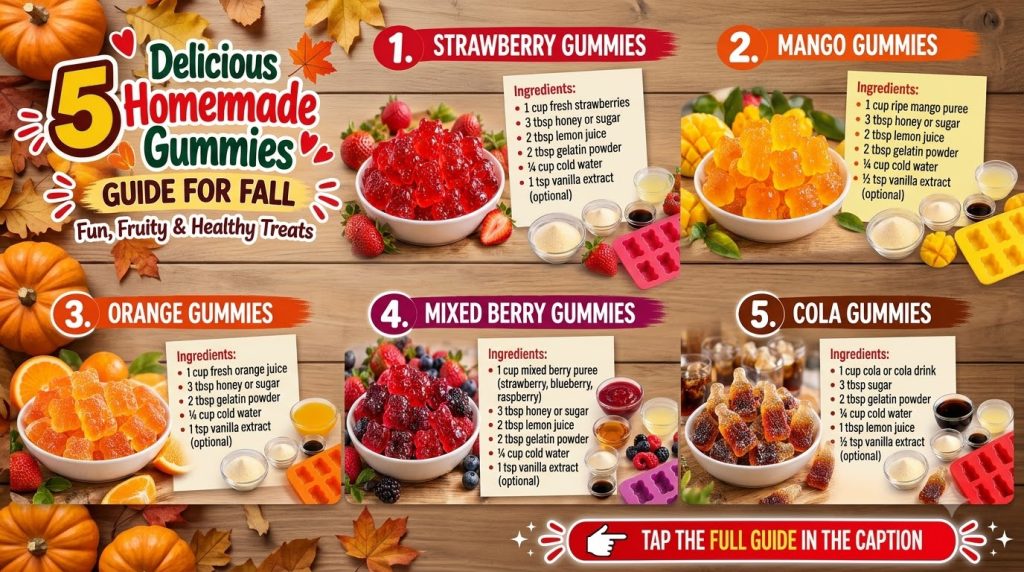
Embrace the cozy vibes of autumn with a delightful and wholesome treat: homemade fruit gummies! Forget store-bought options filled with artificial flavors and colors. These DIY gummies are bursting with real fruit taste, naturally sweetened, and incredibly fun to make. Perfect for a lunchbox surprise, a healthy after-school snack, or a sweet bite after dinner, our collection of five fall-inspired flavors – Strawberry, Mango, Orange, Mixed Berry, and even a unique Cola option – offers something for everyone.
Making your own gummies is surprisingly simple and requires just a few basic ingredients. You’ll love customizing the flavors, shapes, and sweetness to your family’s preference. Get ready to create colorful, chewy, and naturally delicious treats that celebrate the best of the season!
Why You’ll Love These Homemade Fruit Gummies
- Naturally Delicious: Made with real fruit puree or juice, these gummies offer authentic flavors without artificial additives.
- Simple Ingredients: You only need a few pantry staples – gelatin, fruit, sweetener, and liquid.
- Easy to Customize: Adjust the sweetness, experiment with different fruits, or try various molds for endless fun.
- Healthier Snack Option: A great alternative to sugary, processed candies, providing a dose of fruit goodness.
- Fun for All Ages: Kids love helping to make and eat these vibrant treats, and adults appreciate the wholesome quality.
- Allergy-Friendly Potential: Easily adaptable for common allergies by choosing appropriate fruit and sweeteners.
Ingredients for Homemade Fruit Gummies (Base Recipe)
This recipe provides a base for approximately 1 cup (240ml) of liquid/puree, yielding about 30-40 small gummies depending on mold size. You can scale it up for larger batches or multiple flavors.
For the Base Gummy Mixture:
- 1/2 cup (120 ml) cold water or fruit juice (for blooming gelatin, or as part of the fruit base)
- 3 tablespoons (27 g) unflavored gelatin powder (high-quality bovine gelatin recommended for best set)
- 1/4 cup (60 ml) water, fruit juice, or cola soda (for heating the mixture – this will be specific to your flavor)
- 1-2 tablespoons (15-30 ml) natural sweetener (honey, maple syrup, or agave, adjusted to taste and fruit sweetness)
For Specific Flavors:
Strawberry Gummies:
- 1 cup (150 g) fresh or frozen strawberries (hulled), pureed
Mango Gummies:
- 1 cup (165 g) fresh or frozen mango chunks, pureed
Orange Gummies:
- 1 cup (240 ml) freshly squeezed orange juice (pulp strained for smoother gummies)
Mixed Berry Gummies:
- 1 cup (150 g) fresh or frozen mixed berries (e.g., raspberries, blueberries, blackberries), pureed
Cola Gummies:
- 1 cup (240 ml) cola soda (flat or gently carbonated)
Ingredient Notes
- Gelatin Powder: Use unflavored gelatin. The quality of your gelatin can affect the final texture. Beef gelatin tends to set firmer than pork gelatin.
- Sweetener: Honey and maple syrup are excellent natural choices. Adjust the amount based on the natural sweetness of your fruit and your personal preference. For cola gummies, you might reduce or omit additional sweetener.
- Fruit: Fresh or frozen fruits work equally well. If using frozen, thaw them slightly before pureeing. Straining fruit purees through a fine-mesh sieve will give you super smooth gummies, but it’s optional.
- Orange Juice: Freshly squeezed is best for flavor, but good quality store-bought 100% orange juice can be used.
- Cola Soda: For cola gummies, it’s helpful to let the soda sit open for a bit to de-carbonate slightly, which helps prevent excessive foaming when heated.
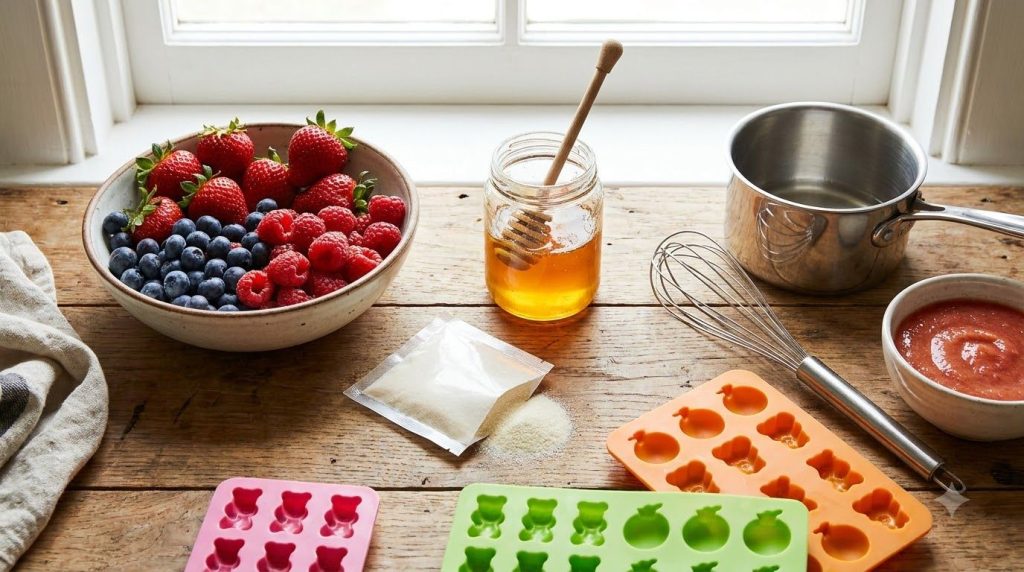
Equipment You’ll Need
- Small saucepan
- Whisk
- Measuring cups and spoons
- Silicone gummy molds (various shapes like bears, stars, or simple squares)
- Dropper or small spoon (for filling molds)
- Blender or food processor (for fruit purees)
- Fine-mesh sieve (optional, for straining purees)
How to Make Delicious Homemade Fruit Gummies
Follow these steps to create your vibrant and tasty fall gummies!
Step 1: Prepare Your Fruit Puree or Juice
- For Strawberry, Mango, or Mixed Berry Gummies: Place your chosen fruit (fresh or thawed frozen) into a blender or food processor. Blend until completely smooth. If you desire a very smooth gummy, pass the puree through a fine-mesh sieve to remove any seeds or pulp. Measure out 1 cup (240 ml) of puree.
- For Orange Gummies: Squeeze fresh oranges to yield 1 cup (240 ml) of juice. Strain if you prefer gummies without pulp.
- For Cola Gummies: Measure out 1 cup (240 ml) of cola soda. If it’s very fizzy, you can gently stir it for a minute to release some carbonation.
Step 2: Bloom the Gelatin
- In your small saucepan, pour the 1/2 cup (120 ml) of cold water or a portion of your fruit juice/cola.
- Evenly sprinkle the 3 tablespoons (27 g) of unflavored gelatin powder over the cold liquid. Do not stir it in. Let it sit undisturbed for 5-10 minutes to “bloom.” The gelatin will absorb the liquid and swell, forming a thick, jelly-like consistency.
Step 3: Gently Heat the Mixture
- Add the remaining 1/4 cup (60 ml) of your fruit puree, juice, or cola (and the sweetener, if using honey or maple syrup) to the saucepan with the bloomed gelatin.
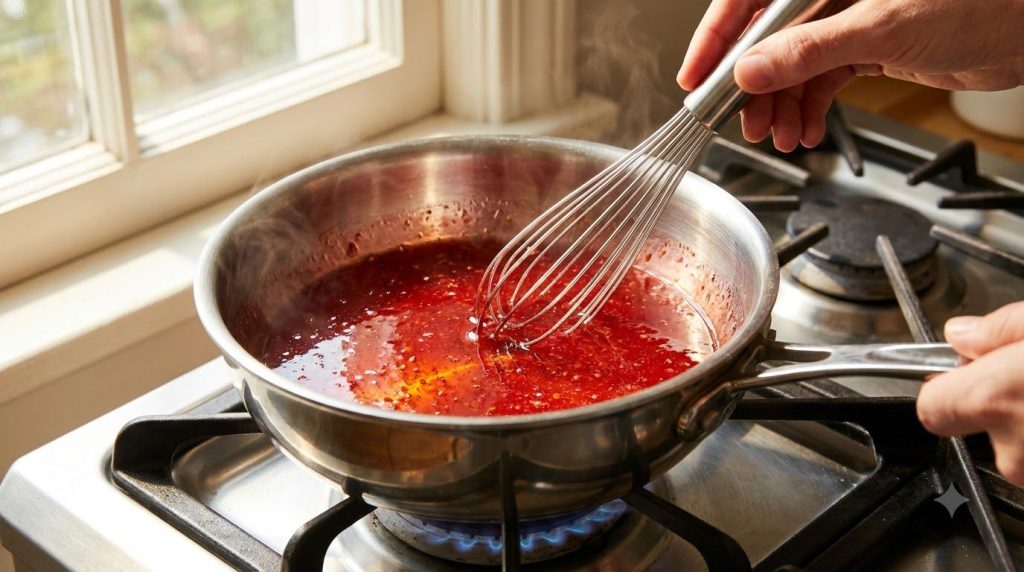
- Place the saucepan over low heat. Gently whisk continuously until the gelatin is completely dissolved and the mixture is smooth. This should take about 3-5 minutes.
- Important: Do not let the mixture come to a boil, as excessive heat can reduce the gelatin’s setting power. The mixture should be warm enough to dissolve the gelatin, but not simmering or boiling.
Step 4: Fill the Molds
- Carefully pour the warm liquid gummy mixture into your silicone molds. A dropper or a small spoon can be helpful for precise filling and to avoid spills.
- Fill the molds almost to the top.
Step 5: Chill and Set
- Transfer the filled silicone molds to the refrigerator.
- Chill for at least 30-60 minutes, or until the gummies are completely firm and easily release from the molds.
Step 6: Unmold and Enjoy
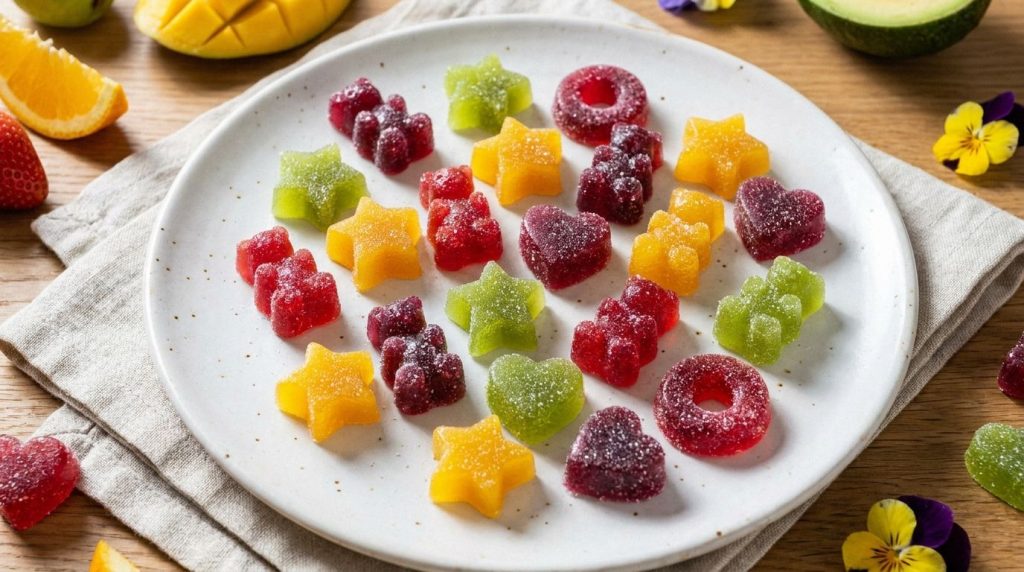
- Once thoroughly chilled, carefully pop the gummies out of their molds.
- Your homemade fruit gummies are ready to enjoy!
Pro Tips for the Best Results
- Use Cold Liquid for Blooming: Always sprinkle gelatin over cold liquid and let it bloom fully before heating. This prevents lumps.
- Don’t Boil: High heat can destroy gelatin’s ability to set properly, resulting in soft or unset gummies. Keep the heat low and gentle.
- Adjust Sweetness: Taste your fruit puree or juice before adding sweetener. Some fruits are naturally sweeter than others.
- Silicone Molds are Key: They make unmolding incredibly easy without needing to grease or flour.
- Strain for Smoothness: For professional-looking, crystal-clear gummies, strain your fruit puree or juice through a fine-mesh sieve.
- Quick Set Trick: If you’re in a hurry, you can place the molds in the freezer for about 15-20 minutes, then transfer to the fridge.
- Clean Molds Promptly: Wash your silicone molds soon after use to prevent residue from sticking.
Common Mistakes to Avoid
- Not Blooming Gelatin Properly: If you don’t bloom the gelatin in cold liquid first, it won’t hydrate evenly and can result in grainy or lumpy gummies.
- Boiling the Gelatin Mixture: As mentioned, boiling weakens gelatin. Always keep the heat low and stir gently until just dissolved.
- Not Enough Gelatin: If your gummies are too soft or don’t hold their shape, you might need slightly more gelatin. Different brands can have varying strengths.
- Not Chilling Long Enough: Rushing the chilling process will lead to gooey, unset gummies. Give them ample time in the refrigerator.
- Overfilling Molds: This can make unmolding difficult and lead to oddly shaped gummies. Use a dropper for precision.
Variations & Substitutions
- Other Fruit Flavors: Experiment with apple puree, pear puree, peach, pineapple (note: fresh pineapple and kiwi contain enzymes that can prevent gelatin from setting, so these fruits should be lightly cooked first).
- Different Sweeteners: While honey and maple syrup are recommended, you can also use stevia, erythritol, or other granulated sweeteners, adjusting to taste.
- Juice Base: Instead of pureeing fruit, you can use 100% fruit juice (like apple, grape, or cranberry) for a quicker method.
- Add a Boost: For older children and adults, you could stir in a tiny pinch of vitamin C powder (ascorbic acid) for an extra nutritional kick – do not exceed recommended daily allowances and consult a professional for dosage.
- Shapes and Sizes: Beyond classic gummy bear molds, try seasonal shapes like leaves, pumpkins, or even simple square ice cube trays.
Serving Suggestions
These homemade fruit gummies are wonderfully versatile:
- Healthy Snack: A perfect pop of fruity goodness for any time of day.
- Lunchbox Treat: A much-loved surprise in school lunchboxes.
- Dessert Topping: Use them to decorate cakes, cupcakes, or yogurt parfaits.
- Party Favors: Bag them up for a unique and wholesome party treat.
- On-the-Go Fuel: A quick energy boost during hikes or busy days.
Storage & Reheating
- Refrigerator Storage: Store homemade fruit gummies in an airtight container in the refrigerator for up to 1-2 weeks. Layer them with parchment paper if necessary to prevent sticking, though well-set gummies usually don’t need it.
- Freezing: Freezing is generally not recommended as it can alter the texture, making them too watery or grainy upon thawing.
- Reheating: Gummies are best served chilled or at room temperature. They are not designed for reheating.
FAQ
Can I make these gummies vegan?
To make these gummies vegan, you would need to substitute animal-based gelatin with a plant-based alternative like agar-agar powder. The ratio and setting time will be different, so follow specific instructions for agar-agar, which typically sets faster and can be boiled without issue.
Why are my gummies too soft or not setting?
The most common reasons for soft or unset gummies are not enough gelatin, boiling the mixture (which degrades gelatin’s setting power), or not chilling them for long enough. Ensure you use the correct amount of high-quality gelatin and maintain low heat during the dissolving process.
Can I use sugar instead of honey or maple syrup?
Yes, you can use granulated sugar. Stir it into the fruit puree/juice along with the gelatin until dissolved. Adjust the amount to your desired sweetness.
How long do homemade gummies last?
When stored properly in an airtight container in the refrigerator, homemade fruit gummies typically last for 1 to 2 weeks. The exact duration can depend on the freshness of the fruit used.
Do I have to strain the fruit puree?
No, straining the fruit puree is optional. It creates a smoother, clearer gummy, which some people prefer, but leaving the pulp in will give a more rustic, fiber-rich gummy. It’s a matter of personal preference.
Can I make a larger batch?
Absolutely! You can easily double or triple the recipe. Just ensure you use a larger saucepan and have enough molds ready. The chilling time might be slightly longer for larger volumes.
Recipe Card
Recipe Name: Homemade Fruit Gummies (5 Fall Flavors)
Short Description: Delicious and healthy DIY fruit gummies bursting with natural flavor, perfect for fall snacking. Choose from Strawberry, Mango, Orange, Mixed Berry, or Cola!
Prep Time: 15 minutes (plus fruit preparation)
Cook Time: 5 minutes
Total Time: 20 minutes (plus 30-60 minutes chilling)
Servings: Approximately 30-40 small gummies per flavor (based on 1 cup liquid)
Course: Snack, Dessert
Cuisine: American
Cooking Method: Stovetop, Chilling
Ingredients:
For the Base Gummy Mixture (per flavor):
- 1/2 cup (120 ml) cold water or fruit juice (for blooming gelatin)
- 3 tablespoons (27 g) unflavored gelatin powder
- 1/4 cup (60 ml) water, fruit juice, or cola soda (for heating)
- 1-2 tablespoons (15-30 ml) natural sweetener (honey, maple syrup, or agave), to taste
For Specific Flavors (yielding 1 cup puree/juice):
- Strawberry: 1 cup (150 g) fresh or frozen strawberries, pureed
- Mango: 1 cup (165 g) fresh or frozen mango chunks, pureed
- Orange: 1 cup (240 ml) freshly squeezed orange juice
- Mixed Berry: 1 cup (150 g) fresh or frozen mixed berries, pureed
- Cola: 1 cup (240 ml) cola soda
Instructions:
- Prepare Fruit/Liquid: Puree chosen fruits (Strawberries, Mango, Mixed Berries) in a blender and measure 1 cup. For Orange, squeeze and strain 1 cup juice. For Cola, measure 1 cup soda.
- Bloom Gelatin: In a small saucepan, pour 1/2 cup (120 ml) cold water or a portion of your fruit juice/cola. Sprinkle gelatin powder evenly over the cold liquid. Let sit undisturbed for 5-10 minutes to bloom.
- Heat Mixture: Add the remaining 1/4 cup (60 ml) of your fruit puree, juice, or cola (and sweetener, if using) to the saucepan. Place over low heat and whisk gently until gelatin is completely dissolved and the mixture is smooth, about 3-5 minutes. Do not boil.
- Fill Molds: Carefully pour the warm mixture into silicone gummy molds using a dropper or small spoon.
- Chill: Transfer molds to the refrigerator and chill for at least 30-60 minutes, or until gummies are completely firm.
- Unmold & Serve: Gently pop the firm gummies out of their molds and enjoy!
Notes:
Ensure gelatin is fully bloomed and dissolved for the best texture. Do not boil the mixture. Adjust sweetness to your preference. Silicone molds are highly recommended for easy release.
Storage:
Store in an airtight container in the refrigerator for up to 1-2 weeks. Not suitable for freezing.
Nutrition:
Nutrition information is an estimate and may vary depending on the ingredients and brands used.