Tired of store-bought mayonnaise that lacks flavor and freshness? Get ready to elevate your culinary game with the ultimate homemade garlic mayonnaise recipe! Inspired by a secret café trick, this incredibly creamy and flavorful dip features the sweet, mellow essence of roasted garlic and the surprising stability of hard-boiled eggs.
Forget the fear of raw eggs or broken emulsions. Our method guarantees a consistently smooth, rich, and utterly irresistible garlic mayo perfect for everything from crispy fries and gourmet sandwiches to grilled vegetables and seafood. Once you taste this homemade version, you’ll never go back to the jarred stuff!
Why You’ll Love This Homemade Garlic Mayonnaise Recipe
-
Unbeatable Flavor: Roasted garlic brings a sweet, caramelized depth that raw garlic simply can’t match.
-
Incredibly Creamy: Hard-boiled eggs are our secret ingredient, ensuring a luxurious, velvety texture without the fuss.
-
No Raw Eggs: Enjoy peace of mind knowing your mayo is made with fully cooked eggs, making it a safer option for everyone.
-
Easy to Make: With a food processor or blender, this gourmet condiment comes together with minimal effort.
-
Versatile: Perfect as a dip, spread, or sauce, it enhances countless dishes.
-
Better Than Store-Bought: Fresh ingredients mean a vibrant, clean taste that commercial brands can’t replicate.
Ingredients for Homemade Garlic Mayonnaise
This recipe uses simple, accessible ingredients to create a truly spectacular result.
For the Roasted Garlic:
- 1 whole head garlic (about 10-12 cloves)
- 1 tbsp (15 ml) olive oil
- Pinch of salt and black pepper
For the Mayonnaise:
- 2 large hard-boiled eggs, peeled and cooled
- 1 cup (240 ml) neutral-flavored oil (such as canola, grapeseed, or light olive oil)
- 1 tbsp (15 ml) fresh lemon juice
- 1 tsp (5 ml) Dijon mustard
- ½ tsp salt, or to taste
- ¼ tsp black pepper, or to taste
Ingredient Notes
- Roasted Garlic: Roasting transforms garlic from pungent to sweet and mellow. Don’t skip this step for the best flavor.
- Hard-Boiled Eggs: This is the game-changer! The yolks and whites provide a stable, creamy emulsion and a richer texture than traditional egg yolk-only mayo, plus it’s safer. Ensure they are fully cooled before using.
- Neutral Oil: A neutral oil allows the garlic flavor to shine. Extra virgin olive oil can be too strong and bitter for mayonnaise.
- Lemon Juice: Adds essential brightness and a slight tang, balancing the richness of the mayo.
- Dijon Mustard: Acts as an emulsifier, helping the oil and eggs combine smoothly, and adds a subtle depth of flavor.
Equipment You’ll Need
- Baking sheet or aluminum foil (for roasting garlic)
- Small saucepan (for boiling eggs)
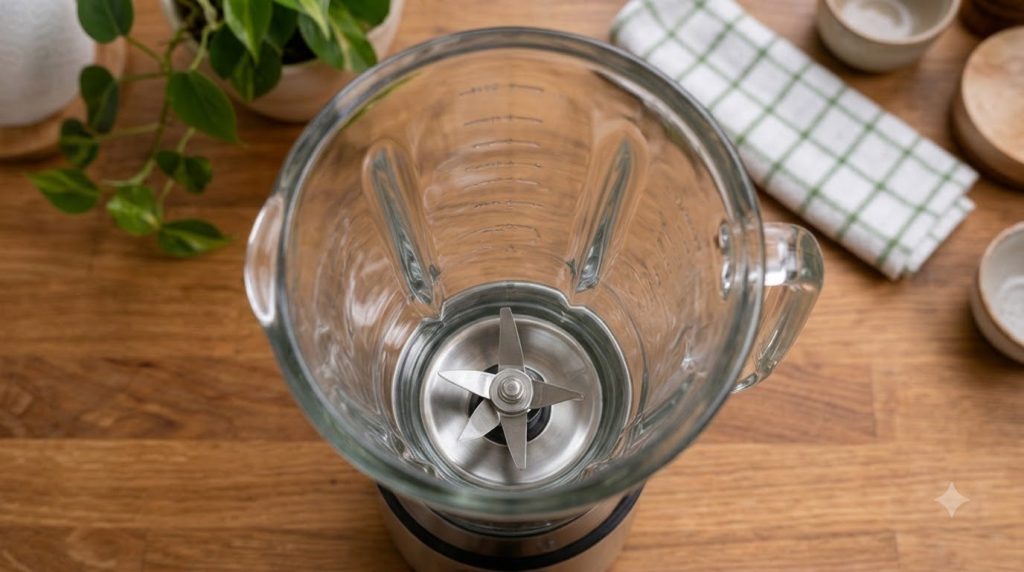
- Food processor or high-speed blender
- Measuring cups and spoons
- Rubber spatula
How to Make The Ultimate Homemade Garlic Mayonnaise
Follow these steps for a perfect, creamy batch every time.
Step 1: Roast the Garlic
- Preheat your oven to 400°F (200°C).
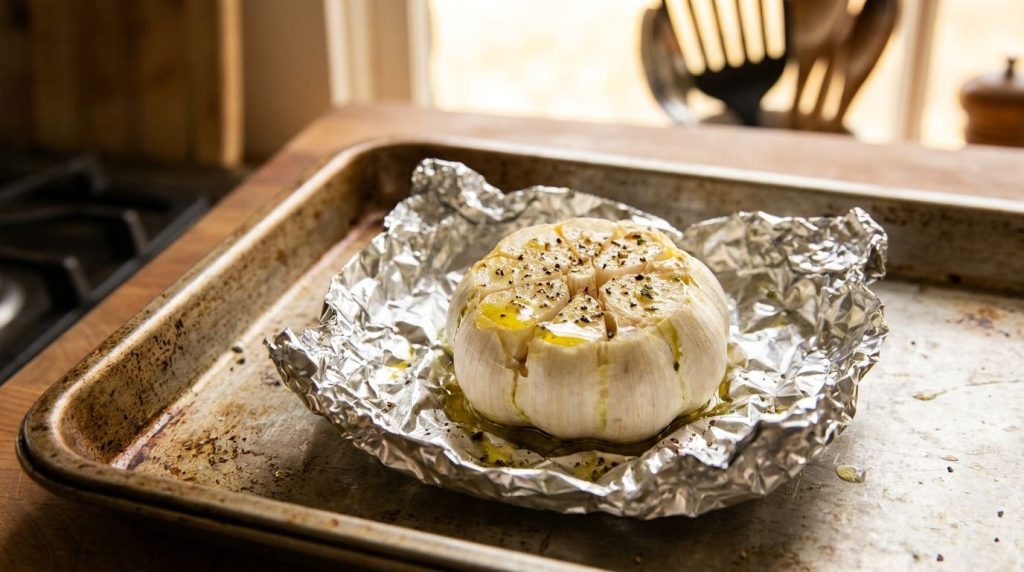
- Cut off the very top ¼ inch (0.5 cm) of the garlic head, exposing the cloves. Place the garlic head cut-side up on a small baking sheet or a piece of aluminum foil.
- Drizzle with 1 tablespoon of olive oil and sprinkle with a pinch of salt and pepper.
- Wrap the garlic in foil (if not on a baking sheet) and roast for 30-40 minutes, or until the cloves are soft and golden brown.
- Remove from oven and let cool completely. Once cool enough to handle, squeeze the softened garlic cloves out of their skins into a small bowl. Mash them lightly with a fork.
Step 2: Prepare the Hard-Boiled Eggs
- Place the two large eggs in a small saucepan and cover with cold water by about an inch (2.5 cm).
- Bring the water to a rolling boil over high heat. Once boiling, immediately turn off the heat, cover the pan, and let the eggs sit in the hot water for 10-12 minutes for perfectly hard-boiled eggs.
- Carefully transfer the eggs to an ice bath or run under cold water to stop the cooking process and cool them quickly.
- Once completely cool, peel the eggs and set aside.
Step 3: Blend the Base
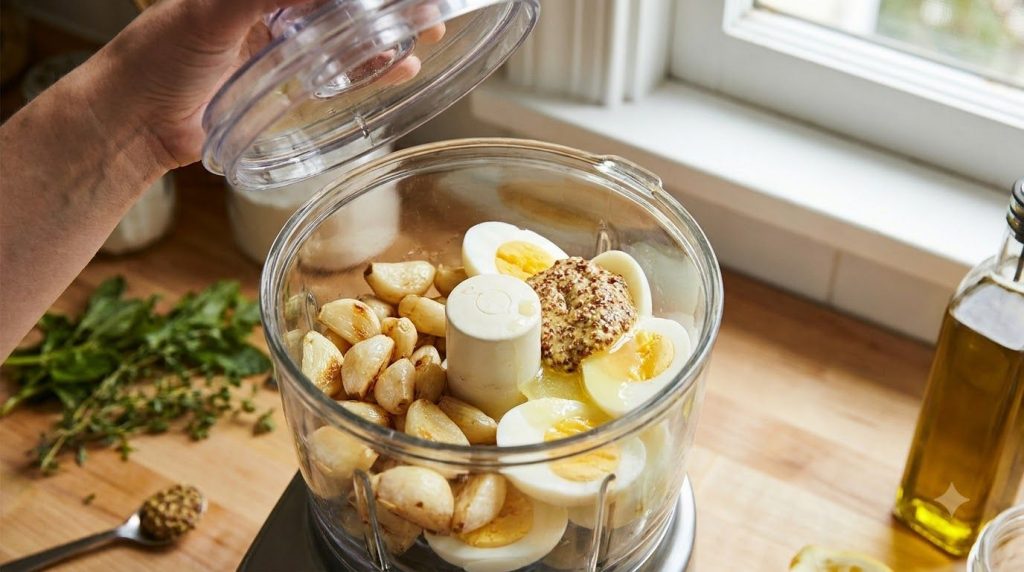
- In the bowl of a food processor or a high-speed blender, combine the cooled roasted garlic, peeled hard-boiled eggs (halved or quartered for easier blending), lemon juice, Dijon mustard, ½ teaspoon of salt, and ¼ teaspoon of black pepper.
- Process until the mixture is completely smooth and creamy, scraping down the sides as needed. There should be no visible chunks of egg or garlic.
Step 4: Emulsify with Oil
- With the food processor running on low speed, slowly and gradually drizzle in the neutral oil through the feed tube in a very thin, steady stream. This slow addition is crucial for creating a stable emulsion.
- Continue to process until all the oil has been incorporated and the mayonnaise is thick, creamy, and pale yellow. This process may take 2-4 minutes.
Step 5: Adjust Seasoning and Chill
- Stop the food processor and taste the mayonnaise. Adjust salt and pepper as needed. You might want to add a tiny bit more lemon juice for extra brightness.
- Transfer the homemade garlic mayonnaise to an airtight container.
- For the best flavor and texture, cover and refrigerate for at least 30 minutes before serving. This allows the flavors to meld and the mayonnaise to thicken further.
Pro Tips for the Best Results
- Cool Everything Down: Ensure your roasted garlic and hard-boiled eggs are completely cool before adding them to the food processor. Warm ingredients can cause the emulsion to break.
- Drizzle Slowly: The key to a stable emulsion is adding the oil very slowly, drop by drop at first, then in a thin stream. Patience here pays off!
- Use Fresh Lemon Juice: Freshly squeezed lemon juice makes a significant difference in the brightness and overall flavor compared to bottled varieties.
- Don’t Over-Process After Oil: Once the mayonnaise is thick and creamy, avoid over-processing, which can sometimes lead to a thinner consistency.
- Season Generously: Mayonnaise needs proper seasoning. Don’t be shy with salt and pepper; taste and adjust until it’s perfect for your palate.
Common Mistakes to Avoid
- Adding Oil Too Quickly: This is the most common reason for a broken or thin mayonnaise. The oil needs to emulsify gradually with the egg and garlic base.
- Using Warm Ingredients: As mentioned, warm ingredients can prevent a proper emulsion. Always ensure everything is chilled.
- Not Mashing Garlic Enough: If your roasted garlic isn’t fully mashed or blended into a paste initially, you might end up with small chunks, affecting the smooth texture.
- Using Extra Virgin Olive Oil: While delicious for other uses, EVOO often has a strong, sometimes bitter flavor that can overpower the delicate balance of homemade mayo. Stick to neutral oils.
Variations & Substitutions
- Herb Infusion: Add a handful of fresh parsley, chives, dill, or cilantro to the food processor with the initial ingredients for a herbaceous twist.
- Spicy Kick: Incorporate a pinch of cayenne pepper, a dash of hot sauce, or a finely minced fresh jalapeño for a spicy garlic mayo.
- Lemon-Herb Mayonnaise: Increase the lemon juice slightly and add a tablespoon of finely chopped fresh herbs like tarragon or chives.
- Smoked Paprika Garlic Mayo: A teaspoon of smoked paprika adds a wonderful smoky depth and color.
- Vegan Version: While this recipe uses eggs, a great vegan alternative often uses aquafaba (chickpea brine) or silken tofu as a base.
- Different Oils: While neutral oil is recommended, you can experiment with avocado oil for a slightly richer, healthier profile.
Serving Suggestions
This ultimate homemade garlic mayonnaise is incredibly versatile and pairs well with almost anything! Here are some ideas:
- Dipping Sauce: Serve it with crispy French fries, sweet potato fries, potato wedges, or raw vegetables.
- Sandwiches & Burgers: Spread it generously on your favorite burgers, sandwiches, or wraps for an instant flavor upgrade.
- Grilled & Roasted Vegetables: A dollop on grilled asparagus, roasted broccoli, or corn on the cob is divine.
- Seafood: It’s a fantastic accompaniment to grilled fish, shrimp, crab cakes, or even a simple tuna sandwich.
- Chicken: Use it as a dip for chicken tenders, grilled chicken, or as a dressing for chicken salad.
- Potato Salad: Elevate your classic potato salad by using this garlic mayo instead of regular mayonnaise.
Storage & Reheating
- Refrigerator Storage: Store your homemade garlic mayonnaise in a clean, airtight container in the refrigerator.
- Duration: Due to the hard-boiled eggs, it will last for about 5-7 days when stored properly.
- Freezing: Mayonnaise does not freeze well, as the emulsion tends to break upon thawing, resulting in a separated, oily texture.
- Reheating: No reheating is necessary. Serve chilled or at room temperature.
FAQ About Homemade Garlic Mayonnaise
Q: Can I use raw garlic instead of roasted garlic?
A: Yes, you can, but the flavor will be much more pungent and intense. If using raw garlic, start with just one small clove and increase to taste. Remember that raw garlic can sometimes be too sharp for some palates.
Q: Why are hard-boiled eggs used in this recipe?
A: Hard-boiled eggs are a secret ingredient that provides incredible stability and creaminess to the mayonnaise. The cooked egg proteins help create a strong emulsion, resulting in a rich, smooth texture and eliminating any concerns about using raw eggs.
Q: How long does homemade garlic mayonnaise last?
A: When stored in an airtight container in the refrigerator, homemade garlic mayonnaise made with hard-boiled eggs is best consumed within 5-7 days.
Q: What if my mayonnaise is too thick or too thin?
A: If it’s too thick, you can thin it out by blending in a very small amount (half a teaspoon at a time) of warm water or additional lemon juice until desired consistency. If it’s too thin, it likely means the emulsion didn’t form properly, often due to adding oil too fast. Unfortunately, it’s difficult to salvage a broken, thin mayonnaise with this method once it has gone wrong. Start over slowly.
Q: Can I make this without a food processor or blender?
A: While technically possible with a whisk and a lot of arm strength, a food processor or blender is highly recommended for achieving the silky-smooth consistency and stable emulsion with this particular recipe, especially given the hard-boiled egg base.
Q: What kind of oil is best for homemade mayonnaise?
A: A neutral-flavored oil like canola, grapeseed, sunflower, or light olive oil is best. These oils won’t overpower the delicate garlic and egg flavors. Avoid strong oils like extra virgin olive oil, which can make the mayo taste bitter.
There you have it – your guide to making the most delicious, creamy, and foolproof homemade garlic mayonnaise. Get ready to impress your taste buds and your guests!
Recipe Card: The Ultimate Homemade Garlic Mayonnaise
Recipe Name: The Ultimate Homemade Garlic Mayonnaise
Short Description: Discover the secret to incredibly creamy, flavorful garlic mayonnaise using roasted garlic and hard-boiled eggs. Perfect for dipping, spreading, and elevating any meal!
Prep Time: 15 minutes
Cook Time: 40 minutes (for garlic & eggs)
Total Time: 1 hour (includes cooling & chilling)
Servings: Approximately 1.5 cups (360 ml)
Course: Condiment, Dip, Sauce
Cuisine: American, European-inspired
Cooking Method: Roasting, Boiling, Blending
Ingredients:
- 1 whole head garlic
- 1 tbsp (15 ml) olive oil
- Pinch of salt and black pepper
- 2 large hard-boiled eggs, peeled and cooled
- 1 cup (240 ml) neutral-flavored oil (canola, grapeseed, or light olive oil)
- 1 tbsp (15 ml) fresh lemon juice
- 1 tsp (5 ml) Dijon mustard
- ½ tsp salt, or to taste
- ¼ tsp black pepper, or to taste
Instructions:
- Roast the Garlic: Preheat oven to 400°F (200°C). Cut off ¼ inch (0.5 cm) from the top of the garlic head, expose cloves. Drizzle with 1 tbsp olive oil, salt, and pepper. Wrap in foil and roast for 30-40 minutes until soft. Cool completely, then squeeze out mashed cloves.
- Boil Eggs: Place eggs in a saucepan, cover with cold water. Bring to a rolling boil, then remove from heat, cover, and let sit 10-12 minutes. Transfer to an ice bath to cool completely. Peel.
- Blend the Base: In a food processor, combine cooled roasted garlic, peeled hard-boiled eggs, lemon juice, Dijon mustard, ½ tsp salt, and ¼ tsp pepper. Process until completely smooth.
- Emulsify with Oil: With the food processor running on low, slowly drizzle in the 1 cup neutral oil in a thin, steady stream. Continue processing until thick, creamy, and pale yellow (2-4 minutes).
- Adjust & Chill: Taste and adjust salt, pepper, or lemon juice as needed. Transfer to an airtight container and refrigerate for at least 30 minutes before serving for best flavor and texture.
Notes:
Ensure all ingredients, especially garlic and eggs, are completely cool before blending. Adding the oil slowly and steadily is crucial for a stable emulsion. For best results, use a neutral-flavored oil.
Storage:
Store in an airtight container in the refrigerator for up to 5-7 days. Not suitable for freezing.
Nutrition:
Nutrition information is an estimate and may vary depending on the ingredients and brands used.