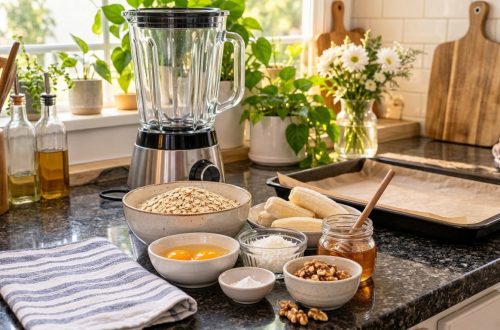
Looking for a dessert that’s effortlessly elegant and undeniably delicious? Look no further than this incredibly Easy Blender Pudding! This recipe is a true game-changer, transforming basic pantry staples into a creamy, golden-crusted sweet treat with minimal effort. Simply toss your ingredients into a blender, give it a whirl, and bake. It’s that simple!
This baked pudding boasts a melt-in-your-mouth texture that’s smooth and rich, complemented by a beautifully golden top. It’s comfort food at its finest, perfect for a cozy weeknight dessert, a family gathering, or when you need a quick sweet fix without the fuss. Get ready to impress with very little stress!
Why You’ll Love This Easy Blender Pudding Recipe
- Effortless Preparation: All the mixing happens in your blender, saving you time and dirty dishes.
- Simple Ingredients: You likely have most of these pantry staples on hand already.
- Delightful Texture: Enjoy a wonderfully creamy interior with a lightly crisp, golden top.
- Family Favorite: A comforting dessert that appeals to all ages.
- Quick to Bake: From prep to oven in minutes, with a relatively short baking time.
- Customizable: Easily adapt the flavors to suit your taste preferences.
Ingredients
- 3 large eggs
- 2 cups (480 ml) whole milk
- ½ cup (100 g) granulated sugar
- ¼ cup (30 g) all-purpose flour
- 1 teaspoon (5 ml) vanilla extract
- Pinch of salt
- 2 tablespoons (30 g) unsalted butter, melted, plus extra for greasing
Ingredient Notes
- Eggs: Provide structure and richness, giving the pudding its characteristic creamy texture. Use large eggs for consistency.
- Whole Milk: Recommended for the richest, creamiest result. You can use 2% milk, but the pudding might be slightly less decadent.
- Granulated Sugar: Sweetens the pudding. Adjust to your preference, but the given amount provides a balanced sweetness.
- All-Purpose Flour: Acts as a thickener, helping the pudding set properly.
- Vanilla Extract: Essential for that classic, comforting pudding flavor. Use a good quality pure vanilla extract for the best taste.
- Butter: Adds a lovely richness and helps create that delicious golden crust.
Equipment You’ll Need
- Blender (a standard kitchen blender works perfectly)
- 8×8 inch (20×20 cm) baking dish or similar-sized oven-safe dish
- Measuring cups and spoons
- Small bowl for melting butter (if not doing it directly in a saucepan)
How to Make Easy Blender Pudding
- Preheat Oven and Prepare Dish: Preheat your oven to 350°F (175°C). Grease an 8×8 inch (20×20 cm) baking dish with a little extra butter. This prevents sticking and helps the pudding slide out easily.
- Combine Wet Ingredients: Crack the eggs into your blender. Add the milk, granulated sugar, vanilla extract, and melted butter. Blend on medium speed until the mixture is smooth and well combined, about 30 seconds.
- Add Dry Ingredients: With the blender still running on low, gradually add the all-purpose flour and pinch of salt through the opening in the lid. Continue blending until all ingredients are fully incorporated and the batter is smooth with no lumps. Scrape down the sides if necessary to ensure everything is mixed.
-
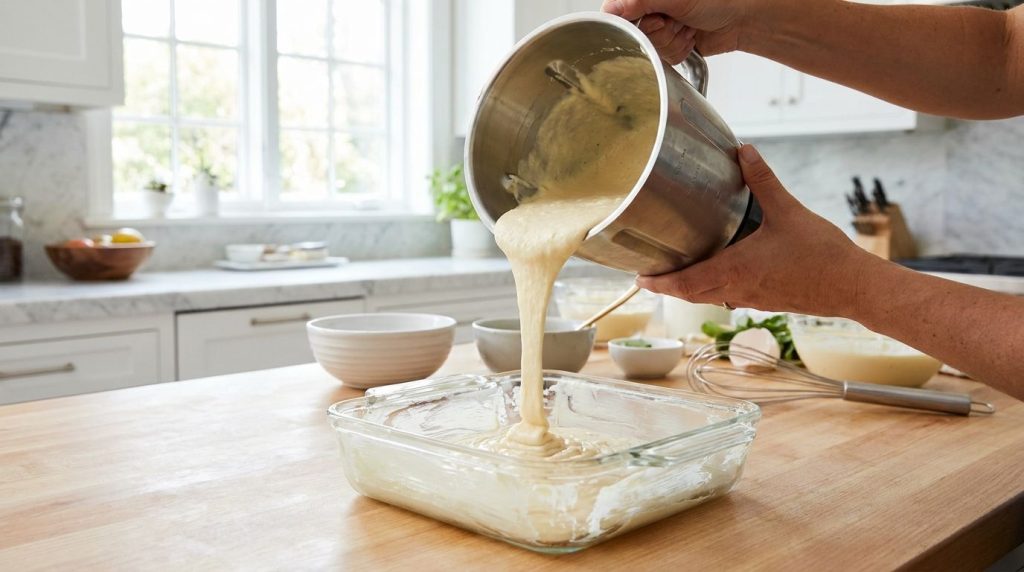
Pour the smooth batter directly into your prepared baking dish. Pour and Bake: Pour the smooth pudding batter into your prepared baking dish. Carefully transfer the dish to the preheated oven.
- Bake Until Golden: Bake for 30-40 minutes, or until the pudding is set around the edges and a beautiful golden brown on top. The center should still have a slight jiggle when gently shaken.
- Cool and Serve: Remove the pudding from the oven and let it cool on a wire rack for at least 30 minutes before serving. This allows it to set completely and achieve the best texture. Enjoy warm or at room temperature.
Pro Tips for the Best Results
- Don’t Overbake: Overbaking can lead to a dry or rubbery pudding. Keep an eye on it, and remove it when the edges are set and the center still has a slight jiggle.
- Ensure a Smooth Batter: Take the time to blend thoroughly. Any lumps of flour can lead to an uneven texture.
- Cool Completely (or Mostly): While tempting to dive in immediately, allowing the pudding to cool helps it set into its perfect creamy consistency.
- Grease Your Dish Well: A generous coating of butter prevents the pudding from sticking and makes for easier serving.
- Quality Vanilla Matters: A good quality pure vanilla extract will significantly enhance the overall flavor of your pudding.
Common Mistakes to Avoid
- Lumpy Batter: Not blending long enough or adding the flour too quickly can result in lumps. Add flour slowly and scrape down the blender sides.
- Dry or Rubbery Pudding: This is a sign of overbaking. Start checking for doneness at the lower end of the baking time range.
- Sticking to the Dish: Forgetting to grease the baking dish properly will make serving challenging and messy.
- Cutting Too Soon: If you cut into the pudding while it’s still very hot, it might seem too soft or fall apart. Patience is key!
Variations & Substitutions
- Chocolate Blender Pudding: Add 2-3 tablespoons of unsweetened cocoa powder along with the flour for a rich chocolate version.
- Lemon Zest: Incorporate 1 teaspoon of fresh lemon zest into the blender for a bright, citrusy twist.
- Spiced Pudding: Add ½ teaspoon of ground cinnamon or a pinch of nutmeg for a warm, comforting flavor.
- Dairy-Free Option: You can experiment with unsweetened almond milk or oat milk, though the texture may be slightly less rich than with whole milk.
- Different Dish Sizes: A slightly larger or smaller dish can be used; just adjust baking time accordingly. A wider dish will bake faster, a narrower one may take longer.
Serving Suggestions
This Easy Blender Pudding is delicious on its own, but you can elevate it with a few simple additions:
- Fresh Berries: A handful of raspberries, blueberries, or sliced strawberries adds a fresh, vibrant contrast.
- Whipped Cream: A dollop of homemade whipped cream is always a classic pairing.
- Powdered Sugar: A light dusting of powdered sugar adds a touch of sweetness and an elegant finish.
- Chocolate Shavings or Sauce: For chocolate lovers, a drizzle of chocolate sauce or a sprinkle of shaved chocolate takes it up a notch.
- Ice Cream: A scoop of vanilla bean ice cream alongside a warm slice of pudding is pure bliss.
Storage & Reheating
- Refrigerator Storage: Store any leftover pudding in an airtight container in the refrigerator for up to 3-4 days.
- Freezer Suitability: Freezing is not recommended for this pudding, as it can alter the creamy texture upon thawing.
- Reheating Method: To reheat, place a slice in the microwave for 30-60 seconds, or until just warmed through. You can also gently warm it in an oven at a low temperature (around 250°F / 120°C) until heated.
- Best Texture: This pudding is delightful served warm, at room temperature, or even chilled directly from the refrigerator.
FAQ
Can I make this easy blender pudding ahead of time?
Yes, absolutely! This pudding is excellent made a day in advance. Simply bake, let it cool completely, cover, and refrigerate. It can be served chilled or gently reheated.
Can I freeze this pudding?
While technically possible, freezing is not recommended as it can negatively impact the creamy texture of the pudding, making it somewhat watery or grainy upon thawing.
Why did my blender pudding turn out dry or rubbery?
A dry or rubbery texture is typically a sign of overbaking. Keep a close eye on the pudding during the last 10-15 minutes of baking and remove it as soon as the edges are set and the center still has a slight jiggle.
What kind of milk is best for this recipe?
Whole milk is recommended for the richest and creamiest results. You can use 2% milk, but for the best texture and flavor, whole milk is ideal.
How do I know when the blender pudding is done baking?
The pudding is done when the edges are set and golden brown, and the center still has a slight, gentle jiggle when the dish is lightly shaken. A toothpick inserted near the edge should come out clean.
Can I add other flavorings to the pudding?
Yes, feel free to experiment! You can add a pinch of nutmeg, a dash of almond extract (reduce vanilla slightly), or even some orange zest for different flavor profiles.
What if I don’t have an 8×8 inch baking dish?
A similar-sized oven-safe dish will work, such as a 9×9 inch square dish or a small (approx. 1.5-2 quart) oval or rectangular casserole dish. Keep in mind that baking times may vary slightly based on the depth and surface area of your dish.
Easy Blender Pudding Recipe Card
Easy Blender Pudding
A delightfully simple, creamy baked pudding with a golden crust, made effortlessly in your blender.
- Prep Time: 10 minutes
- Cook Time: 30-40 minutes
- Total Time: 40-50 minutes (plus cooling)
- Servings: 6-8
- Course: Dessert
- Cuisine: American
- Cooking Method: Baking, Blending
Ingredients:
- 3 large eggs
- 2 cups (480 ml) whole milk
- ½ cup (100 g) granulated sugar
- ¼ cup (30 g) all-purpose flour
- 1 teaspoon (5 ml) vanilla extract
- Pinch of salt
- 2 tablespoons (30 g) unsalted butter, melted, plus extra for greasing
Instructions:
- Preheat Oven and Prepare Dish: Preheat your oven to 350°F (175°C). Grease an 8×8 inch (20×20 cm) baking dish with a little extra butter.
- Combine Wet Ingredients: Crack the eggs into your blender. Add the milk, granulated sugar, vanilla extract, and melted butter. Blend on medium speed until the mixture is smooth and well combined, about 30 seconds.
- Add Dry Ingredients: With the blender still running on low, gradually add the all-purpose flour and pinch of salt through the opening in the lid. Continue blending until all ingredients are fully incorporated and the batter is smooth with no lumps. Scrape down the sides if necessary.
- Pour and Bake: Pour the smooth pudding batter into your prepared baking dish. Carefully transfer the dish to the preheated oven.
- Bake Until Golden: Bake for 30-40 minutes, or until the pudding is set around the edges and a beautiful golden brown on top. The center should still have a slight jiggle when gently shaken.
- Cool and Serve: Remove the pudding from the oven and let it cool on a wire rack for at least 30 minutes before serving. Enjoy warm or at room temperature.
Notes:
For the best texture, ensure your pudding cools sufficiently before serving. A good quality vanilla extract makes a noticeable difference in flavor.
Storage:
Store leftovers in an airtight container in the refrigerator for up to 3-4 days. Freezing is not recommended.
Nutrition:
Nutrition information is an estimate and may vary depending on the ingredients and brands used.