Craving something sweet and satisfying that brings a smile with every bite? Look no further than these delightful twisted donuts! Light, airy, and coated in a delicate layer of sugar, these homemade treats are far more satisfying than store-bought versions. From simple dough to perfectly golden, fried goodness, the process of making twisted donuts is a rewarding culinary journey that fills your home with an irresistible aroma.
This guide will walk you through everything you need to know to create your own batch of happiness. Get ready to transform basic ingredients into a truly special dessert that’s perfect for sharing, or simply enjoying with a warm cup of coffee or tea. Who’s ready to bake (or rather, fry!) some happiness today?
Unraveling the Deliciousness of Twisted Donuts
Twisted donuts, also known as Korean twisted donuts or Kkwabaegi, are a beloved treat cherished for their unique shape and delightfully chewy texture. Unlike traditional ring donuts, their twisted form provides more nooks and crannies for a sugar coating, enhancing the sensory experience. They are often lighter and less dense than their American counterparts, making them incredibly moreish.
The secret lies in a well-prepared dough and the perfect frying technique, which yields a crispy exterior and a soft, fluffy interior. These characteristics make twisted donut delights a popular choice for breakfast, dessert, or a comforting snack any time of day.
Your Guide to Crafting Perfect Twisted Donut Delights
Making twisted donuts at home is an incredibly rewarding experience. Follow this detailed recipe to create a batch that will impress family and friends alike. Remember, practice makes perfect!

Essential Ingredients for Your Twisted Donuts
Gathering all your ingredients before you start will make the process much smoother. For these delightful twisted donuts, you’ll need:
For the Dough:
- 3 ½ cups all-purpose flour, plus extra for dusting
- ½ cup granulated sugar, divided
- 1 packet (2 ¼ teaspoons) active dry yeast
- 1 cup warm milk (around 105-115°F / 40-46°C)
- 2 large eggs, at room temperature
- ¼ cup unsalted butter, melted
- ½ teaspoon salt
For Frying and Coating:
- 6-8 cups vegetable oil, canola oil, or other neutral oil for deep frying
- 1 cup granulated sugar, for coating
Step-by-Step Instructions: From Dough to Delight
Follow these steps carefully to ensure your twisted donuts turn out perfectly golden and delicious.
- Activate the Yeast: In a large mixing bowl, combine the warm milk with 1 tablespoon of the ½ cup granulated sugar and sprinkle the active dry yeast over the top. Let it sit for 5-10 minutes until foamy, indicating the yeast is active.
- Combine Wet Ingredients: Add the eggs, melted butter, and remaining sugar (from the ½ cup) to the yeast mixture. Whisk until well combined.
- Add Dry Ingredients: In a separate bowl, whisk together the all-purpose flour and salt. Gradually add the dry ingredients to the wet ingredients, mixing with a wooden spoon or a stand mixer with a dough hook until a shaggy dough forms.
- Knead the Dough: Turn the dough out onto a lightly floured surface and knead for 8-10 minutes until it is smooth and elastic. Alternatively, use a stand mixer with a dough hook for 6-8 minutes on medium-low speed. The dough should be slightly tacky but not sticky.
- First Rise: Lightly grease a large bowl. Place the dough in the bowl, turning it once to coat. Cover the bowl with plastic wrap or a clean kitchen towel and let it rise in a warm place for 1-2 hours, or until doubled in size.
- Prepare for Shaping: Gently punch down the risen dough to release the air. Turn it out onto a lightly floured surface. Divide the dough into approximately 12-16 equal pieces, depending on your desired donut size.
- Shape the Donuts: Roll each piece of dough into a long rope, about 8-10 inches (20-25 cm) long and ½ inch (1.25 cm) thick. Take one end of the rope and twist it around the other end, forming a spiral or a figure-eight shape. Pinch the ends together gently to seal. Repeat with the remaining dough.
- Second Rise: Arrange the shaped donuts on parchment-lined baking sheets, leaving some space between each. Cover loosely with plastic wrap or a clean towel and let them rise again in a warm place for 30-45 minutes, or until visibly puffed.
- Heat the Oil: While the donuts are on their second rise, pour the vegetable oil into a deep pot or Dutch oven (at least 3 inches of oil) and heat it over medium heat to 350-375°F (175-190°C). Use a candy thermometer to monitor the temperature for best results.
- Fry the Donuts: Carefully place 2-3 donuts at a time into the hot oil, being careful not to overcrowd the pot. Fry for 1-2 minutes per side, or until golden brown.
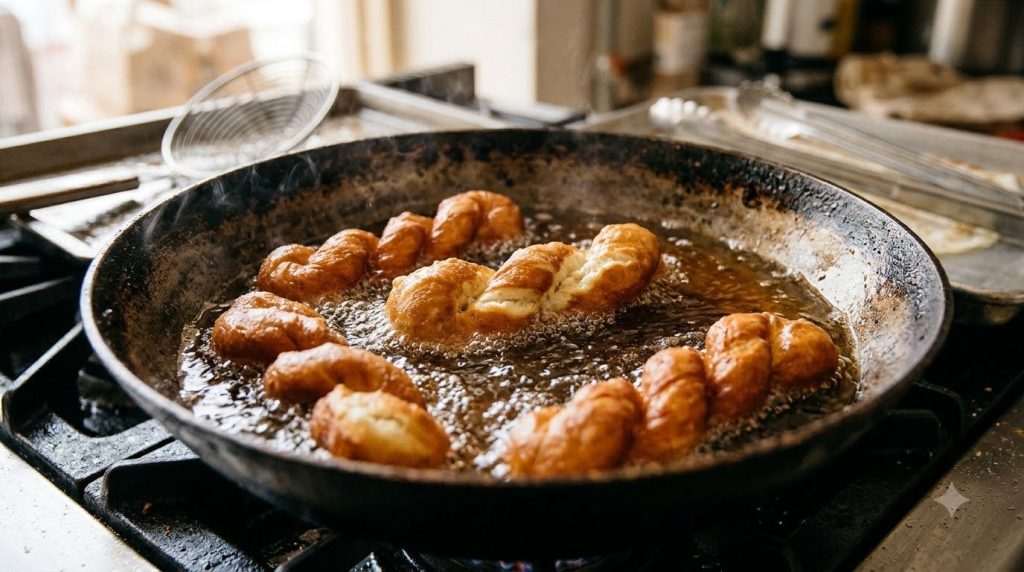
- Drain and Coat: Remove the fried donuts with a slotted spoon or tongs and place them on a plate lined with paper towels to drain excess oil. While still warm, but not piping hot, roll the donuts in the remaining 1 cup of granulated sugar until evenly coated.
- Serve Immediately: Serve your twisted donut delights warm and enjoy their irresistible fresh taste!
Tips for Twisted Donut Success
- Mind the Temperature: The oil temperature is crucial. Too low, and the donuts will absorb too much oil and be greasy. Too high, and they’ll brown too quickly on the outside, remaining raw in the middle.
- Don’t Over-Knead: While kneading is important for elasticity, over-kneading can make the dough tough. Stop when it’s smooth and passes the “windowpane test” (a small piece of dough can be stretched thin enough to see light through it without tearing).
- Warm Place for Rising: A slightly warm, draft-free environment helps the yeast activate optimally. You can create one by preheating your oven to its lowest setting for a few minutes, then turning it off and letting the dough rise inside with the door ajar.
- Fresh Yeast: Always check the expiration date on your yeast. Old yeast won’t activate properly, leading to dense donuts.
Storage and Serving Suggestions
Twisted donuts are best enjoyed fresh, ideally within a few hours of frying. Their light and airy texture is at its peak when warm. If you have leftovers, store them in an airtight container at room temperature for up to 1-2 days. They may lose some of their crispness but will still be delicious.
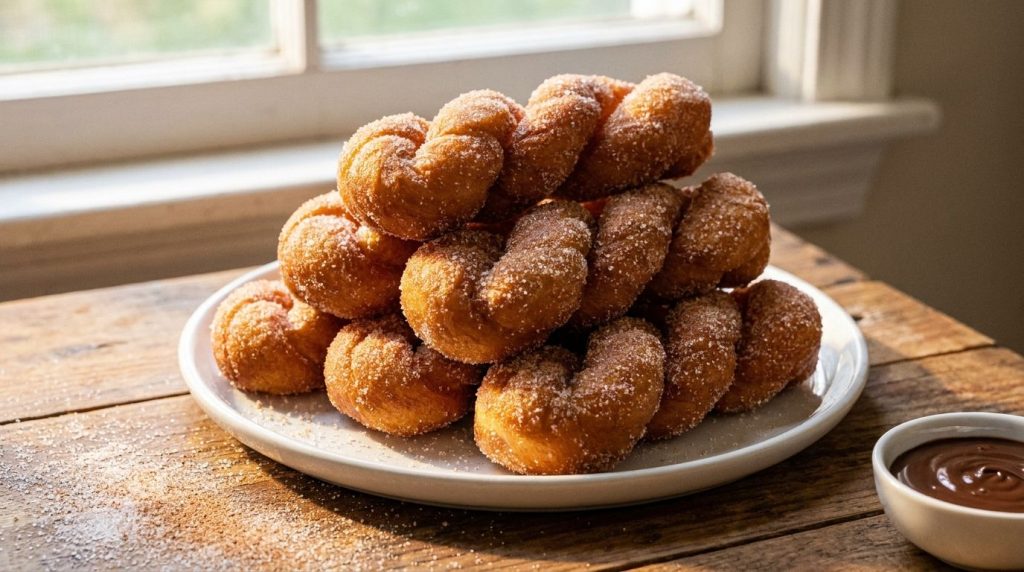
For an extra treat, consider serving them with a side of chocolate dipping sauce, a dusting of cinnamon sugar, or even a light drizzle of honey.
Frequently Asked Questions About Homemade Donuts
Can I bake twisted donuts instead of frying?
While frying gives these twisted donuts their characteristic crispy exterior and light, airy interior, you can technically bake them. However, the texture will be different – more like a soft bread roll than a classic donut. If baking, brush with melted butter before baking at 375°F (190°C) for 10-15 minutes, then coat with sugar.
What’s the best oil for frying donuts?
A neutral-flavored oil with a high smoke point is best for frying donuts. Vegetable oil, canola oil, sunflower oil, and peanut oil are all excellent choices as they won’t impart unwanted flavors to your donuts and can withstand the high heat required for frying.
How long do homemade donuts last?
Homemade twisted donuts are truly at their best on the day they are made. They can be stored in an airtight container at room temperature for up to two days, but they will start to lose their freshness and become a bit chewier over time. Freezing is not recommended for sugar-coated donuts as the sugar can get soggy upon thawing.
Can I make the dough ahead of time?
Yes, you can prepare the dough the night before! After the first rise, punch down the dough, cover it tightly with plastic wrap, and refrigerate it overnight. The next day, let it come to room temperature for about 30-60 minutes before proceeding with shaping and the second rise.
Final Thoughts
Creating your own twisted donut delights is a wonderful way to bring a touch of bakery magic into your home. The process is a labor of love, but the reward – these perfectly golden, sugar-coated treats – is absolutely worth every moment. So, roll up your sleeves, gather your ingredients, and get ready to enjoy the ultimate homemade sweet experience. Happy frying!