Are you looking for a simple, natural way to add a touch of radiance to your skincare routine? The secret might be closer than you think, nestled in your spice cabinet and herb garden. Infusing botanicals into carrier oils is a time-honored practice, and for good reason!
This DIY Clove and Rosemary Infused Oil offers a wonderful opportunity to create a homemade beauty treatment that feels luxurious and can help your skin appear moisturized and glowing. It’s a gentle way to incorporate the aromatic properties of these natural ingredients into your self-care ritual, leaving your skin feeling soft and looking revitalized.
In this article, you’ll learn how to easily prepare your own botanical-infused oil, understand the cosmetic benefits of cloves and rosemary, and discover tips for safe application and storage. Get ready to embrace the glow!
Beauty Recipe Overview
- Recipe Name: DIY Clove & Rosemary Infused Radiant Oil
- Beauty Category: Natural Facial & Body Care
- Suitable Skin Type: Normal, Dry, Combination (patch test for sensitivity)
- Preparation Time: 10 minutes (plus 2–4 weeks infusion time)
- Application Time: 2–5 minutes
- Total Time: 2–5 minutes (after infusion)
- Difficulty Level: Easy
- Yield: Approximately 4 fluid ounces (120 ml)
- Recommended Usage Frequency: 2–3 times per week
- Storage Recommendation: Store in a cool, dark place for up to 6 months
Why You’ll Love This Recipe
Creating your own infused oil is a rewarding experience with many benefits:
- Naturally Aromatic: Enjoy the warm, invigorating scents of cloves and rosemary without artificial fragrances.
- Moisturizing Power: The carrier oil helps to deeply moisturize and soften the skin, improving the appearance of dryness.
- Easy to Prepare: The process is straightforward, requiring minimal hands-on time once ingredients are gathered.
- Budget-Friendly: Make a nourishing beauty product using common, affordable ingredients you might already have.
- Supports a Radiant Look: Regular use can contribute to skin that feels smoother and appears more radiant.
- Customizable: Easily adapt the carrier oil or add other dried botanicals to suit your preferences.
Complete Ingredients List
For your DIY Clove & Rosemary Infused Radiant Oil, you will need:
- 2 tablespoons whole dried cloves: Gently crushed to release their aroma, but not powdered.
- 2 tablespoons dried rosemary leaves: Slightly crushed or chopped.
- 4 fluid ounces (120 ml) cold-pressed carrier oil: Such as sweet almond oil, jojoba oil, or fractionated coconut oil. Choose a lightweight oil suitable for your skin type.
Equipment Needed
Gather these simple tools before you begin:
- Small clean glass jar with a lid (e.g., a Mason jar)
- Measuring spoons
- Fine-mesh strainer or cheesecloth
- Dark glass bottle or container for storage (to protect the oil from light)
- Small funnel (optional, for pouring into the storage bottle)
Step-by-Step Preparation
Follow these steps to create your aromatic infused oil:
- Prepare the Botanicals: Measure out the whole dried cloves and dried rosemary leaves. Gently crush the cloves with the back of a spoon or a mortar and pestle to lightly break them open and release their scent, but avoid making them into a fine powder. Slightly chop or crush the rosemary leaves.
- Combine Ingredients: Place the crushed cloves and rosemary leaves into your clean glass jar.
- Add Carrier Oil: Pour the 4 fluid ounces of your chosen carrier oil over the botanicals in the jar, ensuring they are fully submerged.
- Seal and Infuse: Securely close the lid on the jar. Place the jar in a cool, dark place away from direct sunlight.
- Shake Daily: For the next 2–4 weeks, gently shake the jar once a day to help the infusion process. This ensures the botanicals are constantly exposed to the oil.
- Strain the Oil: After the infusion period (you can go longer for a stronger aroma, up to 6 weeks), place the fine-mesh strainer or a layer of cheesecloth over the opening of your dark glass storage bottle. Carefully pour the infused oil through the strainer to separate the botanicals.
- Store: Discard the spent botanicals. Cap your storage bottle tightly and label it with the date of preparation.
How to Apply the Beauty Treatment
Incorporate this infused oil into your routine with these simple steps:
- Cleanse Skin: Start with clean, slightly damp skin (after showering or washing your face). A damp surface helps the oil spread easily and lock in moisture.
- Dispense Oil: Pour a small amount (about a dime-sized pearl for the face, more for body) of the infused oil into the palm of your hand.
- Warm the Oil: Gently rub your palms together to warm the oil slightly.
- Apply to Skin: Lightly press the oil onto your face, neck, or body, then gently massage in circular motions until absorbed. Avoid the delicate eye area unless you are certain your skin won’t react.
- Enjoy: Allow the oil a few minutes to absorb before dressing or applying other products.
Ingredient Benefits
Each ingredient in this DIY oil brings its own unique cosmetic properties:
- Cloves: Known for their warm, spicy aroma, cloves have been traditionally used in various beauty practices. When infused in oil, they lend their distinctive fragrance and can contribute to a revitalized skin feel, helping to support a natural, healthy-looking glow. Their aromatic compounds are believed to be uplifting.
- Rosemary: The herbaceous scent of rosemary is often associated with invigoration. Infused rosemary can help leave the skin feeling refreshed and conditioned. It’s often chosen in traditional remedies for its properties that promote a vibrant and refreshed appearance to the skin.
- Carrier Oil (Sweet Almond, Jojoba, etc.): These oils are excellent emollients and moisturizers. They help to soften the skin, reduce the appearance of dry patches, and create a protective barrier that locks in moisture. They are gentle, non-comedogenic (less likely to clog pores), and rich in fatty acids that nourish the skin, leaving it feeling supple and smooth.
Recommended Frequency
This Clove & Rosemary Infused Radiant Oil can be used 2–3 times per week, or daily if your skin tolerates it well and feels nourished without any signs of irritation. Start with less frequent use and gradually increase as your skin adapts.
Expert Beauty Tips
- Always Patch Test: Before applying the oil to a larger area, always perform a patch test on a small, inconspicuous part of your skin (like behind the ear or inner forearm) and wait 24 hours to check for any adverse reactions.
- Choose Quality Ingredients: Opt for high-quality, dried organic cloves and rosemary, and a cold-pressed, unrefined carrier oil for the best results.
- Patience is Key: The infusion process takes time, but the wait is worth it for a naturally potent and aromatic oil.
- Gentle Massage: When applying, use light, upward strokes to massage the oil into your skin. This promotes absorption and a relaxing experience.
- Use After Shower: Applying body oil to damp skin right after a shower or bath helps to seal in moisture more effectively.
- Protect from Light: Always store your infused oil in a dark glass bottle to prevent oxidation and extend its shelf life.
Safe Recipe Variations
Once you’re comfortable with the basic infusion, you can explore safe variations:
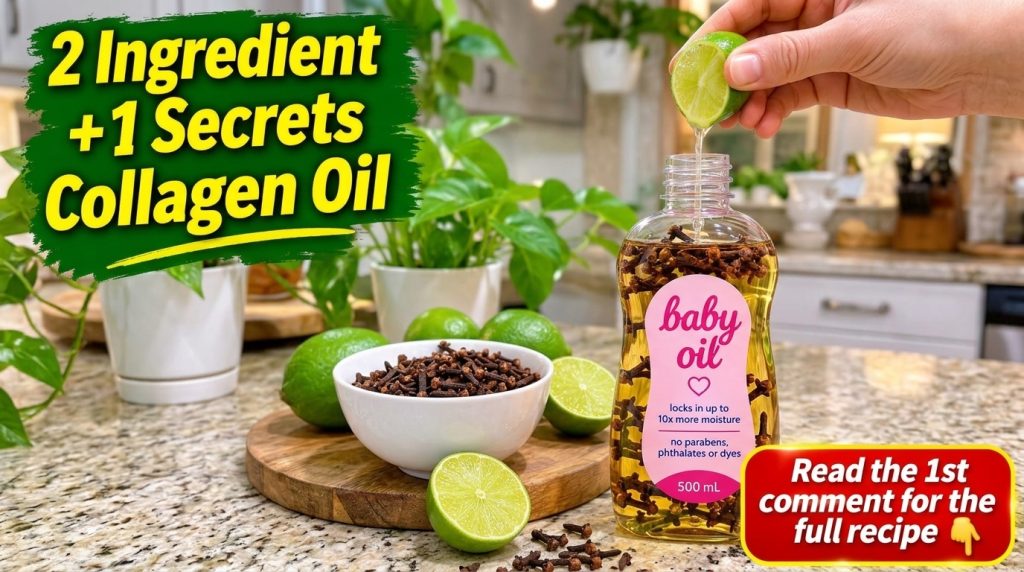
- Different Carrier Oils: Experiment with other natural carrier oils like grapeseed oil for oily skin, apricot kernel oil for mature skin, or avocado oil for very dry skin. If you are interested in an occlusive moisturizer like the ‘baby oil’ seen in some visual inspirations, you may use a mineral oil as your carrier, but be aware it’s not a botanical oil and offers different properties.
- Add Other Dried Botanicals: Consider adding a tablespoon of dried lavender buds for a more calming aroma or dried calendula petals for their soothing properties. Always ensure any added botanicals are safely used for skin.
- Solar Infusion: Instead of a dark, cool place, you can place the sealed jar in a sunny window for 2–4 weeks. The gentle warmth from the sun can sometimes speed up the infusion process, but ensure the oil doesn’t get too hot. This method requires checking for mold growth more frequently, especially if ingredients weren’t completely dry.
Storage and Shelf Life
Because this recipe uses dried botanicals and no water, its shelf life is primarily determined by the carrier oil. Store your Clove & Rosemary Infused Radiant Oil in a tightly sealed, dark glass bottle in a cool, dark place (like a cupboard or pantry) away from direct sunlight and heat.
Typically, a properly stored infused oil can last as long as the shelf life of the carrier oil itself, often 6 to 12 months. If you notice any changes in smell, color, or texture (e.g., a rancid odor), it’s time to discard the oil and prepare a fresh batch. Do not assume refrigeration will significantly extend the life of an oil, as it can sometimes cause cloudiness.
Safety Precautions
Your safety is paramount when creating and using homemade beauty remedies:
- Patch Test is Essential: Always, always perform a patch test before full application. Apply a tiny amount to a small area of skin and wait 24 hours to check for any redness, itching, burning, or irritation.
- Avoid Broken or Irritated Skin: Do not apply this infused oil to cuts, wounds, sunburned, or otherwise irritated skin.
- Eye Contact: Avoid direct contact with your eyes. If oil gets into your eyes, rinse thoroughly with cool water.
- Allergies: Even natural ingredients can cause allergic reactions. Be aware of any known allergies to cloves, rosemary, or your chosen carrier oil.
- No Citrus Juice: While some images might show citrus like lime, it is crucial to avoid applying citrus juices directly to your skin, especially if you will be exposed to sunlight. Citrus can cause severe phototoxic reactions (burns, discoloration, or rashes) when exposed to UV light. This recipe does NOT contain lime.
- Stop if Irritated: If you experience any discomfort, redness, or irritation, discontinue use immediately and gently wash the area with mild soap and water. If irritation persists, consult a healthcare professional.
- For External Use Only: This infused oil is not intended for internal consumption.
Common Mistakes to Avoid
To ensure a pleasant and effective experience, avoid these common DIY mistakes:
- Using Essential Oils Directly: This recipe calls for dried botanicals, not essential oils. Essential oils are highly concentrated and can cause severe irritation or burns if not properly diluted by an expert.
- Not Patch Testing: Skipping the patch test is a common oversight that can lead to widespread skin irritation.
- Expecting Miraculous Results: Homemade remedies are wonderful for skin feel and appearance, but they do not replace medical treatments or offer instant, dramatic transformations. Realistic expectations are key.
- Improper Storage: Leaving your oil in direct sunlight or an unsealed container can cause it to spoil quickly.
- Using Undried Botanicals: Fresh herbs contain water, which can introduce bacteria and mold, causing your oil to spoil rapidly and unsafely. Always use thoroughly dried botanicals for oil infusions.
Frequently Asked Questions
Is this DIY infused oil really a ‘collagen oil’?
No, this DIY infused oil does not contain collagen and cannot directly increase or produce collagen in your skin. The term ‘collagen oil’ can be misleading. This recipe is designed to moisturize, soften, and contribute to the radiant appearance of your skin, which can sometimes be associated with a healthy, plump look.
How often can I use this treatment?
You can use this infused oil 2–3 times a week, or daily if your skin responds well. Always monitor your skin for any signs of sensitivity.
Can I prepare the mixture in advance?
Yes, the preparation involves an infusion period of 2–4 weeks. Once infused and strained, the oil is ready for use and can be stored for several months.
Should I refrigerate leftovers?
Refrigeration is not typically necessary for oil infusions and can sometimes cause natural oils to become cloudy. Storing it in a cool, dark place is usually sufficient to maintain its freshness.
Can I replace one of the ingredients?
You can substitute the carrier oil with another natural oil you prefer (like jojoba or grapeseed). You can also add other dried, skin-safe botanicals. However, always ensure any new ingredients are well-tolerated by your skin and are appropriate for oil infusion.
What should I do if my skin becomes irritated?
If you experience any irritation, stop using the oil immediately, gently wash the affected area with mild soap and water, and apply a soothing, plain moisturizer. If irritation persists, consult a healthcare professional.
Can this recipe replace my regular skincare products?
This infused oil can be a wonderful addition to your regular skincare routine for moisturization and radiance. However, it’s generally best to continue with other essential products like cleansers, toners, and SPF for a complete regimen.
Conclusion
Crafting your own Clove & Rosemary Infused Radiant Oil is a beautiful way to connect with nature’s bounty and elevate your self-care routine. It’s a simple, affordable, and aromatic treatment that provides excellent moisturization and can help your skin look and feel wonderfully soft and radiant.
Remember the importance of patience during the infusion process and always prioritize safety through patch testing. Embrace the journey of natural beauty and enjoy the subtle glow this homemade elixir brings to your skin!