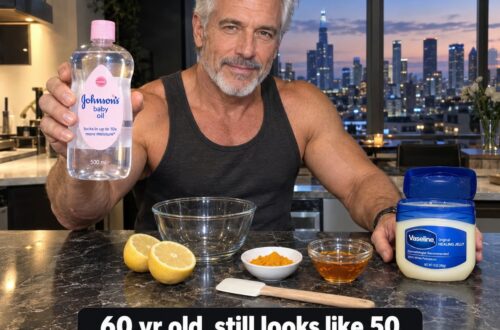
Are you searching for an easy, budget-friendly way to achieve incredibly soft, deeply hydrated skin? Look no further! The world of DIY skincare offers fantastic solutions, and today we’re diving into a beloved combination: a homemade overnight cream featuring baby oil and petroleum jelly. This isn’t about reversing time or erasing wrinkles; it’s about giving your skin the ultimate moisture boost it deserves, helping it feel smoother, look plumper, and maintain its natural barrier.
Life can be hectic, leaving little time for elaborate skincare routines. Many of us struggle with dry skin, confusing product labels, and a desire for natural, effective solutions. This DIY moisturizing cream addresses these pain points by offering a simple, practical, and highly effective way to nourish your skin while you sleep. Imagine waking up to a complexion that feels supple and comfortable, ready to face the day.
This article will guide you through understanding the power of occlusive moisturizers, the benefits of each ingredient in our unique recipe, and a step-by-step process to create your own homemade overnight cream. Get ready to transform your nighttime routine and embrace a healthy, radiant glow the natural way!
What Is Petroleum Jelly?
Petroleum jelly, commonly known by brand names like Vaseline, is a semi-solid mixture of hydrocarbons. It’s a byproduct of the oil refining process, but don’t let that deter you! When properly refined, it becomes a safe, non-comedogenic (meaning it won’t clog pores), and incredibly effective skincare ingredient.
Its primary function in skincare is that of an occlusive agent. This means it creates a protective barrier on the skin’s surface, acting like a seal. This barrier is incredibly effective at preventing transepidermal water loss (TEWL), which is the natural evaporation of water from your skin. By locking in existing moisture, petroleum jelly helps keep your skin hydrated and supports its natural barrier function.
Dermatologists often recommend petroleum jelly for various skin concerns, from healing minor cuts and scrapes to soothing chapped lips and dry patches. Its simplicity and effectiveness make it a staple in many households, and it’s a star ingredient in our DIY moisturizing cream for its unparalleled ability to seal in hydration.
Benefits of Baby Oil
Baby oil is essentially mineral oil, often with added fragrance. While it’s famed for its use on delicate baby skin, its benefits extend far beyond. In our DIY overnight cream, baby oil acts as an excellent emollient, meaning it helps to soften and smooth the skin. It fills in the tiny spaces between skin cells, creating a smoother texture and preventing moisture loss.
Combining baby oil with petroleum jelly creates a dynamic duo. While petroleum jelly provides the strong occlusive barrier, baby oil contributes to the cream’s spreadability and initial softening effect. It helps the skin feel instantly smoother and more pliable. For those concerned about heavily fragranced products, unscented mineral oil can be used as a substitute for baby oil, offering the same emollient benefits without any added scents.
Using baby oil for dry skin is a long-standing practice because of its gentle yet effective moisturizing properties. When incorporated into an overnight cream, it ensures that your skin receives continuous nourishment and lubrication throughout the night, complementing the occlusive action of petroleum jelly skincare.
Why Occlusive Moisturizers Work
Our skin is constantly losing water to the environment, a process known as transepidermal water loss (TEWL). This loss can be exacerbated by dry air, harsh weather, hot showers, and damaged skin barriers, leading to dry, tight, and flaky skin. This is where occlusive moisturizers step in.
Occlusive moisturizers, like our DIY cream with petroleum jelly and baby oil, work by forming a physical barrier on the skin’s surface. This barrier slows down the rate at which water evaporates from your skin, effectively trapping moisture underneath. By reducing TEWL, occlusives help to:
- Enhance Hydration: They keep the water content within your skin at optimal levels, leading to plump, supple skin.
- Support Skin Barrier Function: A well-hydrated skin barrier is a strong skin barrier, better equipped to protect against environmental aggressors and irritants.
- Improve Skin Texture: By keeping skin cells hydrated, the surface appears smoother and softer, reducing the look of fine lines caused by dehydration.
- Soothe Dryness and Irritation: The protective layer can help calm irritated skin by shielding it from external factors and promoting a healing environment.
While emollients (like baby oil) soften and humectants (like hyaluronic acid, not in this recipe but common) draw moisture into the skin, occlusives provide the crucial final step: sealing it all in. This makes an overnight skin care recipe using occlusives particularly effective, as it works continuously during your longest period of rest.
Ingredients for Your DIY Moisturizing Cream
Creating your own natural moisturizing cream is simpler than you think! Our recipe focuses on accessible, effective ingredients known for their hydrating properties. Here’s what you’ll need:
- 2 tablespoons petroleum jelly (Vaseline): The star occlusive, locking in moisture and forming a protective barrier.
- 1 tablespoon baby oil (mineral oil): An emollient that softens the skin and improves the cream’s texture.
-
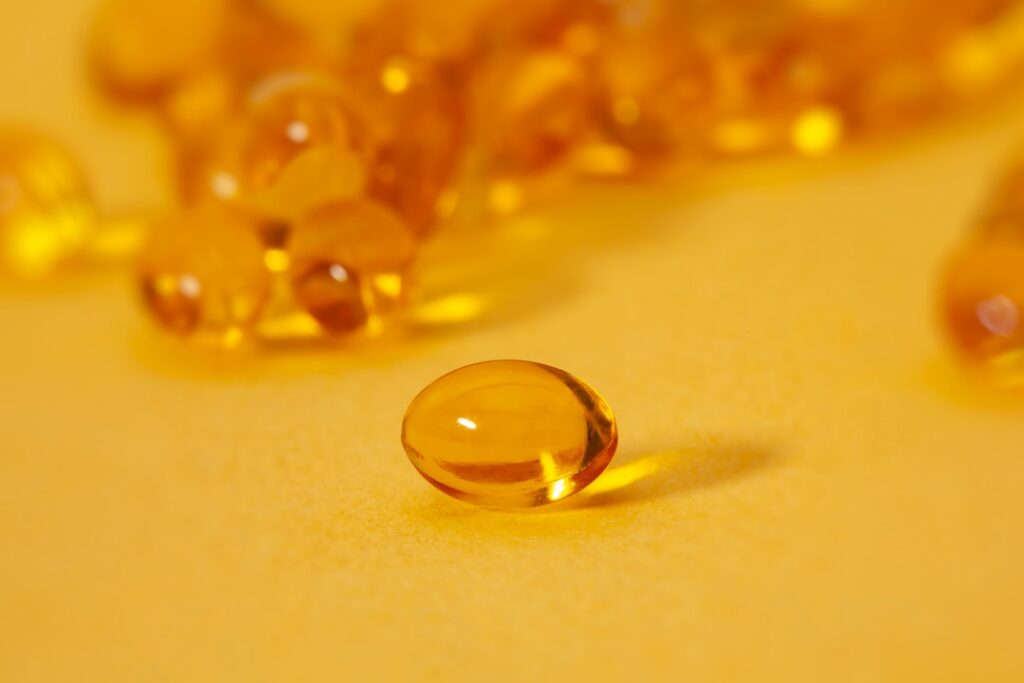
Vitamin E capsules are a popular addition to homemade skincare for their nourishing properties. 1 vitamin E capsule: A potent antioxidant that helps protect skin from environmental damage and offers additional moisturizing benefits. Simply snip the end and squeeze out the oil.
- Optional: 3 drops rosehip oil: Known for its nourishing fatty acids and soothing properties, rosehip oil can add an extra boost of natural goodness. While we’re avoiding claims about collagen regeneration, rosehip oil is cherished for its ability to promote healthy skin appearance.
These ingredients are readily available at most drugstores or supermarkets, making this baby oil vaseline recipe a truly convenient and affordable option for a homemade face moisturizer.
Step-by-Step Recipe: How to Make Your Homemade Overnight Cream
Ready to whip up your own intensely hydrating homemade overnight cream? Follow these simple steps:
- Prepare Your Petroleum Jelly: Scoop 2 tablespoons of petroleum jelly into a clean, heat-safe bowl. To soften it slightly for easier mixing, place the bowl in a larger bowl of warm water (a ‘bain-marie’ style). Do NOT microwave, as this can alter its consistency and potentially create hotspots. Gentle warmth is key.
- Combine with Baby Oil: Once the petroleum jelly has softened to a more pliable consistency, add 1 tablespoon of baby oil to the bowl.
- Add Vitamin E: Take your vitamin E capsule, snip off one end with clean scissors, and squeeze the oil into the mixture.
- (Optional) Incorporate Rosehip Oil: If using, add 3 drops of rosehip oil to the bowl.
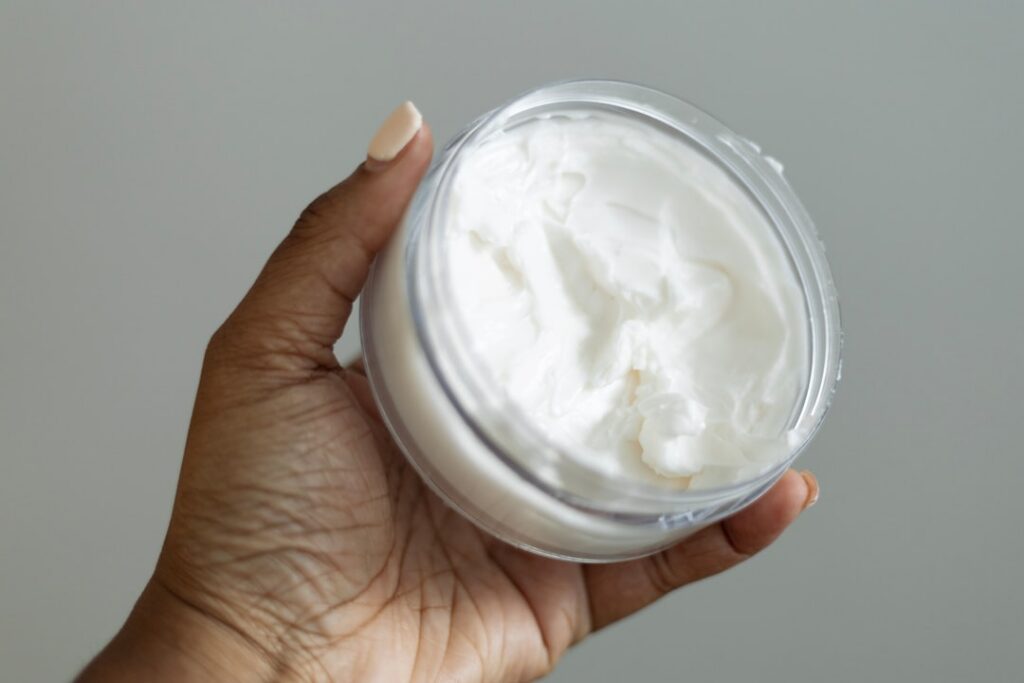
- Blend Until Creamy: Using a clean spoon, small spatula, or a mini whisk, thoroughly mix all the ingredients together. Continue blending until you achieve a smooth, uniform, and creamy texture. It should look consistent, with no distinct oil or jelly separation.
How to Mix Properly for the Best Consistency
Proper mixing is crucial for the effectiveness and luxurious feel of your DIY moisturizing cream. Here are some tips to ensure you get that perfect creamy texture:
- Temperature Matters: As mentioned, softening the petroleum jelly gently is important. If it’s too cold, it will be hard to mix. If it’s too hot, it might become too liquid and separate. Aim for a soft, malleable consistency.
- Gradual Addition: While our recipe calls for a direct mix, sometimes adding the baby oil and other liquid ingredients gradually can help achieve a smoother blend, especially if the petroleum jelly is still a bit stiff.
- Thorough Blending: Don’t rush this step. Continue mixing for several minutes, scraping down the sides of the bowl as needed, until the mixture is completely uniform. You want an emulsified, consistent cream, not a separated oil-and-jelly concoction.
- Use Clean Tools: Always use clean, sterilized utensils and bowls to prevent contamination, especially since you’ll be applying this to your skin.
Storage Instructions
To keep your homemade face moisturizer fresh and effective, proper storage is essential:
- Use a Clean Cosmetic Jar: Transfer your freshly blended cream into a clean, sterilized, airtight cosmetic jar. Glass jars with tight-fitting lids are ideal.
- Store in a Cool, Dry Place: Keep the jar away from direct sunlight and heat, which can cause the ingredients to degrade or separate. A cabinet or drawer in your bathroom or bedroom is perfect.
- Shelf Life: Since this cream contains no water, it’s less prone to bacterial growth than water-based formulations. However, for best results and hygiene, aim to use your cream within 2-3 months. If you notice any changes in smell, color, or consistency, it’s best to discard it and make a fresh batch.
How to Apply Overnight
Applying your DIY moisturizing cream correctly ensures maximum benefits:
- Cleanse Your Skin: Start with a thoroughly cleansed face. Remove all makeup and impurities.
- Apply Other Serums/Treatments (Optional): If you use serums (like hyaluronic acid or niacinamide) or other targeted treatments (like an acne spot treatment), apply them *before* your DIY cream. This allows them to penetrate the skin without the occlusive barrier.
- Take a Tiny Amount: This is crucial! Because this is a heavy, occlusive moisturizer, you only need a very, very thin layer. A pea-sized amount is usually more than enough for your entire face.
- Warm and Spread: Dab small dots of the cream onto your forehead, cheeks, nose, and chin. Gently warm the cream between your fingertips and lightly pat and spread it across your face and neck. Avoid rubbing vigorously. The goal is to create a thin, even seal, not to smother your skin.
- Focus on Dry Areas: Pay extra attention to any particularly dry patches.
- Use 2-4 Nights Weekly: This intense moisturizing treatment is best used a few times a week, rather than every single night, especially if you have combination or oily skin. Listen to your skin and adjust the frequency as needed.
This method allows the cream to work its magic overnight, sealing in moisture and supporting your skin’s recovery while you sleep, leading to softer, more hydrated skin by morning.
Who Should Avoid Heavy Moisturizers?
While an occlusive moisturizer like our homemade overnight cream can be a godsend for many, it’s not suitable for everyone. Here’s who might want to use it with caution or avoid it altogether:
- Acne-Prone Skin: While petroleum jelly itself is non-comedogenic for most, very thick layers of any occlusive can potentially trap other pore-clogging ingredients or exacerbate breakouts for severely acne-prone individuals. If you have active, inflammatory acne, consult a dermatologist before incorporating heavy occlusives.
- Oily Skin: If your skin is naturally very oily, adding a heavy occlusive might feel too greasy and could potentially lead to a shiny complexion or a feeling of heaviness. You might prefer lighter, gel-based moisturizers.
- Rosacea or Fungal Acne: Some skin conditions can be sensitive to occlusives, especially if they create an environment that encourages certain microbial growth. Always consult a healthcare professional if you have a specific skin condition.
If you fall into these categories, consider using this cream only on specific dry patches rather than your entire face, or opt for a lighter natural moisturizing cream instead.
Patch Testing: A Must-Do Step
Before applying any new homemade product to your entire face, a patch test is absolutely essential. This helps you identify any potential sensitivities or allergic reactions to the ingredients.
How to Perform a Patch Test:
- Choose an Inconspicuous Area: Select a small, discreet area of skin, such as behind your ear, on your jawline, or on the inside of your forearm.
- Apply a Small Amount: Dab a tiny amount of your DIY moisturizing cream onto the chosen spot.
- Wait and Observe: Leave the cream on for 24-48 hours. During this time, look for any signs of redness, itching, burning, swelling, or irritation.
- Interpret Results: If you experience any adverse reactions, wash the area immediately and discontinue use of the cream. If no reaction occurs, it’s generally safe to proceed with applying the cream to your face.
Even with natural ingredients, individual sensitivities can exist. Patch testing is a simple step that can save you from a potential skin reaction.
Frequently Asked Questions
Q: Can I use this cream during the day?
A: It’s generally not recommended. This is a very rich, occlusive cream designed for overnight use. Its heavy texture might feel too greasy under makeup or throughout the day. It’s best reserved for your nighttime skin care recipe.
Q: Will this cream clog my pores?
A: Petroleum jelly and mineral oil (baby oil) are generally considered non-comedogenic. However, for those with very acne-prone or extremely oily skin, any heavy occlusive can potentially exacerbate issues. Always patch test and start with a very thin layer.
Q: Can I add essential oils to this recipe?
A: We advise caution with adding essential oils, especially if you have sensitive skin. Many essential oils can be irritating or cause allergic reactions. If you do choose to add them, research skin-safe essential oils and use them in very low concentrations (1-2 drops maximum for the entire batch).
Q: How long does this homemade overnight cream last?
A: Stored in a clean, airtight container in a cool, dry place, it should last for about 2-3 months. Since it contains no water, it’s less prone to bacterial growth, but always monitor for changes in texture, smell, or color.
Q: Is this suitable for all skin types?
A: It’s particularly beneficial for dry, very dry, or mature skin types that need significant moisture retention. Those with oily or acne-prone skin should use with caution or avoid it (see