Build a Stronger Chest at Home: 6 Beginner-Friendly Moves for Upper Body Strength
Ready to sculpt a stronger, more confident you? Your chest muscles are a powerhouse, essential not just for impressive aesthetics but also for daily functional movements, improved posture, and overall upper body strength. Many people think building a powerful chest requires heavy weights and a gym membership, but we’re here to tell you that’s not true! With a few simple, effective exercises, you can achieve remarkable results right from the comfort of your home, or with minimal equipment.
At Remedies Wellness, we believe in making fitness accessible and enjoyable. This comprehensive guide will walk you through 6 incredibly effective, beginner-friendly chest exercises that target your chest, shoulders, and triceps. We’ll cover everything from proper technique and breathing to modifications, weekly routines, and essential nutrition tips to support your muscle-building journey. Get ready to transform your upper body and feel the incredible gains!
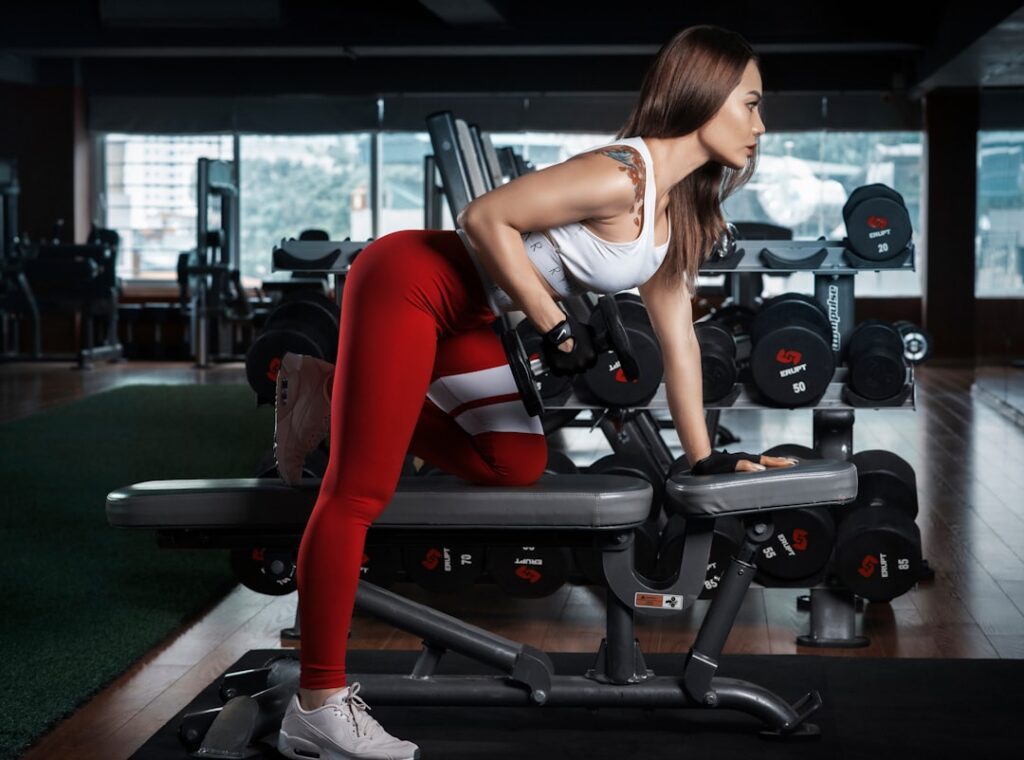
Table of Contents
-
Benefits of Chest Training
-
Exercise #1: Wall Press
-
Exercise #2: Chest Fly
-
Exercise #3: Reverse Fly
-
Exercise #4: Plank
-
Exercise #5: Pullover
-
Exercise #6: Tricep Dips
-
Muscles Worked: A Holistic View
-
Beginner Weekly Routine for a Stronger Chest
-
Common Mistakes to Avoid
-
Warm-up & Cool-down: Your Essential Ritual
-
Progressive Overload Tips: Continuously Challenge Your Body
-
Nutrition for Muscle Growth: Fueling Your Gains
-
Frequently Asked Questions (FAQ)
-
Final Thoughts: Embrace Your Strength Journey
-
Disclaimer
Benefits of Chest Training
Training your chest muscles, also known as your pectorals, offers a wealth of benefits beyond just filling out your shirt. A strong chest contributes significantly to your overall physical health and functional fitness:
-
Improved Posture: Strong chest muscles work in conjunction with your back muscles to stabilize your shoulders and spine, helping to counteract the slouching often associated with desk jobs or smartphone use.
-
Enhanced Upper Body Strength: Your chest muscles are crucial for pushing movements. Whether you’re pushing a grocery cart, opening a heavy door, or pushing yourself up from the floor, a strong chest makes these daily tasks easier.
-
Support for Daily Activities: From carrying children to lifting objects overhead, chest strength plays a vital role in countless everyday actions, making life more manageable and less prone to injury.
-
Aesthetic Appeal: Developing your chest muscles can lead to a more defined and balanced upper body physique, boosting confidence and body image.
-
Better Performance in Sports: Many sports, from swimming and tennis to martial arts and throwing, rely heavily on explosive chest power and endurance.
By incorporating these beginner chest exercises into your routine, you’re not just building muscle; you’re investing in a healthier, stronger, and more functional body.
Exercise #1: Wall Press
The Wall Press is an excellent starting point for anyone new to chest training. It’s a scaled-down version of a push-up, allowing you to control the intensity by adjusting your distance from the wall. It’s perfect for understanding the mechanics of a pushing movement.
Proper Technique
-
Stand facing a wall, about arm’s length away. Place your palms flat on the wall, slightly wider than shoulder-width apart, at chest height.
-
Keep your body straight from head to heels, engaging your core. Your feet should be hip-width apart.
-
Slowly bend your elbows, allowing your chest to move towards the wall. Keep your elbows pointing slightly downwards and back, not flaring out to the sides.
-
Lower yourself until your nose or chest is almost touching the wall, feeling a stretch in your chest.
-
Push back through your palms to the starting position, extending your arms fully but without locking your elbows.
Muscles Targeted
-
Primary: Pectoralis Major (chest)
-
Secondary: Anterior Deltoids (front of shoulders), Triceps (back of upper arms)
Beginner Modifications
-
Easier: Stand closer to the wall. The closer you are, the less body weight you’re pressing, making it easier.
-
Harder: Move your feet further away from the wall. The greater the angle, the more challenging the exercise becomes, simulating a floor push-up.
Recommended Sets and Reps
Perform 3 sets of 10-15 repetitions. Focus on controlled movements rather than speed.
Breathing Technique
Inhale as you lower your chest towards the wall (eccentric phase). Exhale as you push back to the starting position (concentric phase).
How to Avoid Shoulder Discomfort
Ensure your elbows don’t flare out excessively. Keep them tucked in slightly towards your body to protect your shoulder joints. Listen to your body and stop if you feel any sharp pain.
Exercise #2: Chest Fly
The Chest Fly, often performed with dumbbells, is excellent for isolating the chest muscles and focusing on the squeezing motion that defines the pectorals. For a home workout, light dumbbells or even water bottles can be used.
Proper Technique
-
Lie on your back on a flat bench, the floor, or even a yoga mat. If using dumbbells, hold one in each hand with a neutral grip (palms facing each other).
-
Extend your arms straight up above your chest, with a slight bend in your elbows. The dumbbells should be directly above your shoulders, almost touching.
-
Slowly lower the dumbbells out to the sides in a wide arc, keeping that slight bend in your elbows. Feel a stretch in your chest as your arms go down. Stop when your elbows are roughly in line with your shoulders or slightly below (if on a bench).
-
Engage your chest muscles to bring the dumbbells back up to the starting position, squeezing your chest at the top as if hugging a barrel.
Muscles Targeted
-
Primary: Pectoralis Major (especially the sternal head)
-
Secondary: Anterior Deltoids (front of shoulders)
Beginner Modifications
-
Easier: Use lighter weights or no weights at all, focusing solely on the muscle contraction and range of motion. You can also perform this with resistance bands by anchoring them behind you.
-
Harder: Increase the weight of the dumbbells. If on the floor, consider a stability ball under your upper back for greater range of motion.
Recommended Sets and Reps
Perform 3 sets of 12-15 repetitions. Control the movement throughout the entire range.
Breathing Technique
Inhale as you lower the weights out to the sides. Exhale as you bring them back together, squeezing your chest.
How to Avoid Shoulder Discomfort
Maintain a slight, consistent bend in your elbows throughout the movement to avoid putting undue stress on your elbow and shoulder joints. Never go beyond your comfortable range of motion.
Exercise #3: Reverse Fly
While the traditional chest fly works the front of your chest, the Reverse Fly targets the often-neglected muscles of your upper back and rear shoulders. This is crucial for balanced shoulder health, improved posture, and preventing injuries, especially for those who spend a lot of time doing pushing exercises.
Proper Technique
-
Stand with your feet shoulder-width apart, holding a light dumbbell in each hand (or even no weights if you’re just starting).
-
Hinge at your hips, keeping a slight bend in your knees, so your torso is almost parallel to the floor. Let your arms hang straight down, palms facing each other (neutral grip), with a slight bend in your elbows.
-
Keeping your core engaged and back straight, raise your arms out to the sides in an arc, squeezing your shoulder blades together at the top. Imagine you’re trying to pinch a pencil between your shoulder blades.
-
Only raise your arms until they are parallel with your shoulders or slightly higher, forming a ‘T’ shape with your body. Avoid shrugging your shoulders towards your ears.
-
Slowly lower the dumbbells back to the starting position, maintaining control.
Muscles Targeted
-
Primary: Posterior Deltoids (rear shoulders), Rhomboids, Trapezius (upper back)
-
Secondary: Rotator Cuff muscles
Beginner Modifications
-
Easier: Use no weights, focusing purely on the muscle contraction and form. Reduce the angle of your torso if hinging fully is difficult.
-
Harder: Increase the weight of the dumbbells. You can also perform this seated, leaning forward slightly.
Recommended Sets and Reps
Perform 3 sets of 12-15 repetitions. This exercise benefits from controlled, slower movements.
Breathing Technique
Exhale as you raise your arms and squeeze your shoulder blades. Inhale as you slowly lower the weights.
How to Avoid Shoulder Discomfort
Use very light weights, especially when starting, to focus on engaging the correct muscles without straining your shoulders. Avoid shrugging your shoulders up, keeping them depressed and retracted.
Exercise #4: Plank
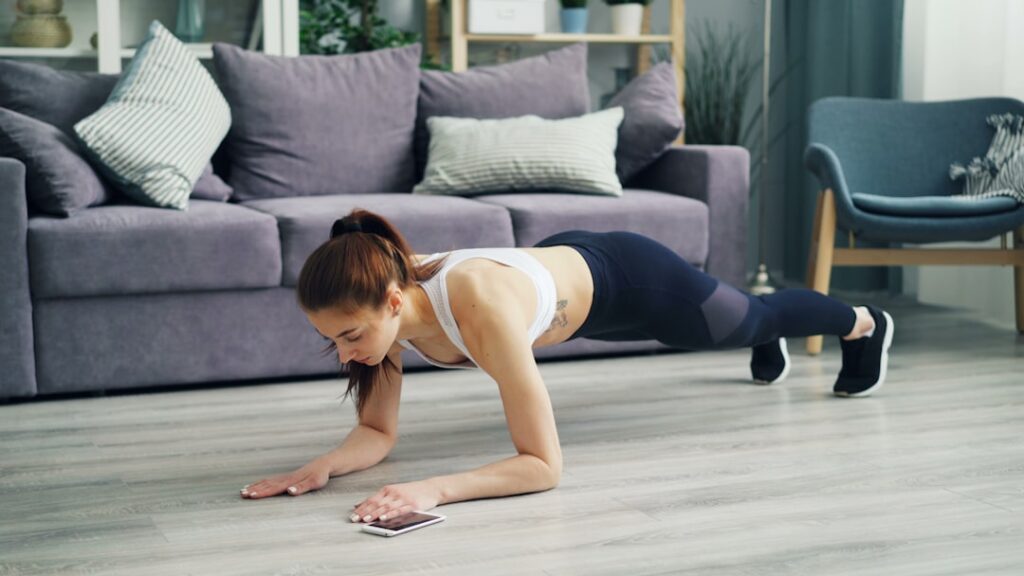
While often considered a core exercise, the Plank also engages your chest, shoulders, and triceps as stabilizers. It builds isometric strength across your entire upper body and core, making it a foundational movement for overall fitness.
Proper Technique
-
Start in a push-up position, but instead of resting on your hands, lower down to your forearms. Your elbows should be directly beneath your shoulders, and your forearms should be parallel, palms flat on the ground or clasped.
-
Form a straight line from your head to your heels. Engage your core, glutes, and quadriceps. Avoid letting your hips sag or pushing them too high.
-
Keep your neck in a neutral position, looking down at the floor.
-
Hold this position for a designated amount of time, maintaining tension throughout your body.
Muscles Targeted
-
Primary: Transverse Abdominis, Rectus Abdominis (core)
-
Secondary: Pectoralis Major (chest), Deltoids (shoulders), Triceps, Glutes, Quadriceps
Beginner Modifications
-
Easier: Drop to your knees, ensuring you still maintain a straight line from head to knees. Alternatively, perform the plank with your forearms on an elevated surface like a bench or sturdy chair.
-
Harder: Extend your hold time. Introduce variations like the high plank (on hands), single-arm plank, or plank with a leg lift.
Recommended Sets and Reps
Hold for 30-60 seconds, performing 3-4 sets. Rest for 30-60 seconds between sets.
Breathing Technique
Maintain steady, controlled breathing throughout the hold. Avoid holding your breath.
How to Avoid Shoulder Discomfort
Ensure your elbows are directly under your shoulders and your shoulder blades are slightly protracted (pushed forward) to create stability. Avoid sinking into your shoulders.
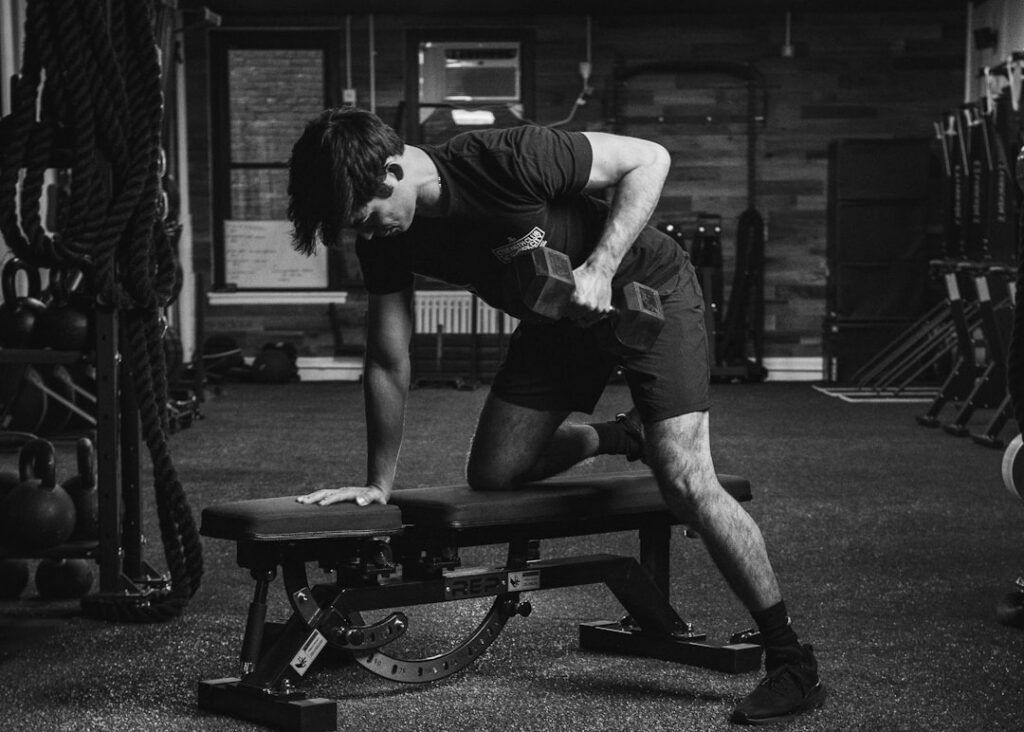
Exercise #5: Pullover
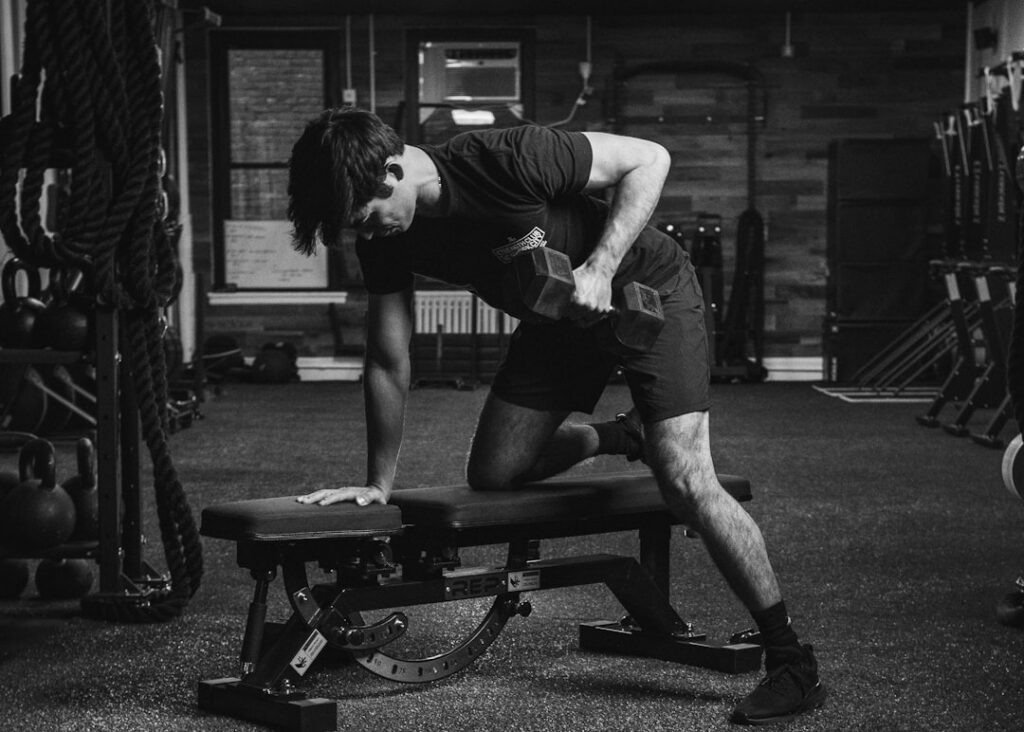
The Pullover is a fantastic exercise for stretching and strengthening the chest and back, particularly the serratus anterior, a muscle crucial for shoulder blade stability and overall upper body health. It can be performed with a single dumbbell at home.
Proper Technique
-
Lie on your back on a bench or the floor. If using a bench, position your upper back and shoulders on the bench, with your feet flat on the floor and hips slightly dropped (to create a slight arch in your lower back).
-
Hold one dumbbell with both hands, gripping one end so your palms are facing the ceiling. Extend the dumbbell straight up over your chest, with a slight bend in your elbows.
-
Slowly lower the dumbbell in an arc over your head towards the floor, keeping the slight bend in your elbows. Feel a stretch in your chest and lats.
-
Go as low as comfortable, without arching your lower back excessively. Your arms should be roughly parallel to the floor.
-
Engage your chest and lats to pull the dumbbell back up in the same arc to the starting position over your chest.
Muscles Targeted
-
Primary: Pectoralis Major (chest), Latissimus Dorsi (lats)
-
Secondary: Triceps, Serratus Anterior
Beginner Modifications
-
Easier: Use a very light dumbbell or even no weight, focusing on the stretch and contraction. Perform on the floor to limit the range of motion if you feel discomfort.
-
Harder: Increase the weight. If you have access to a stability ball, performing it with your upper back on the ball can provide a deeper stretch.
Recommended Sets and Reps
Perform 3 sets of 10-12 repetitions. Emphasize a slow, controlled negative (lowering) phase.
Breathing Technique
Inhale as you lower the dumbbell over your head, allowing your rib cage to expand. Exhale as you pull the dumbbell back to the starting position.
How to Avoid Shoulder Discomfort
Never lock your elbows, maintaining a soft bend. Only lower the dumbbell as far as you can comfortably control without pain or excessive arching in your lower back. Start with a very light weight to master the movement.
Exercise #6: Tricep Dips
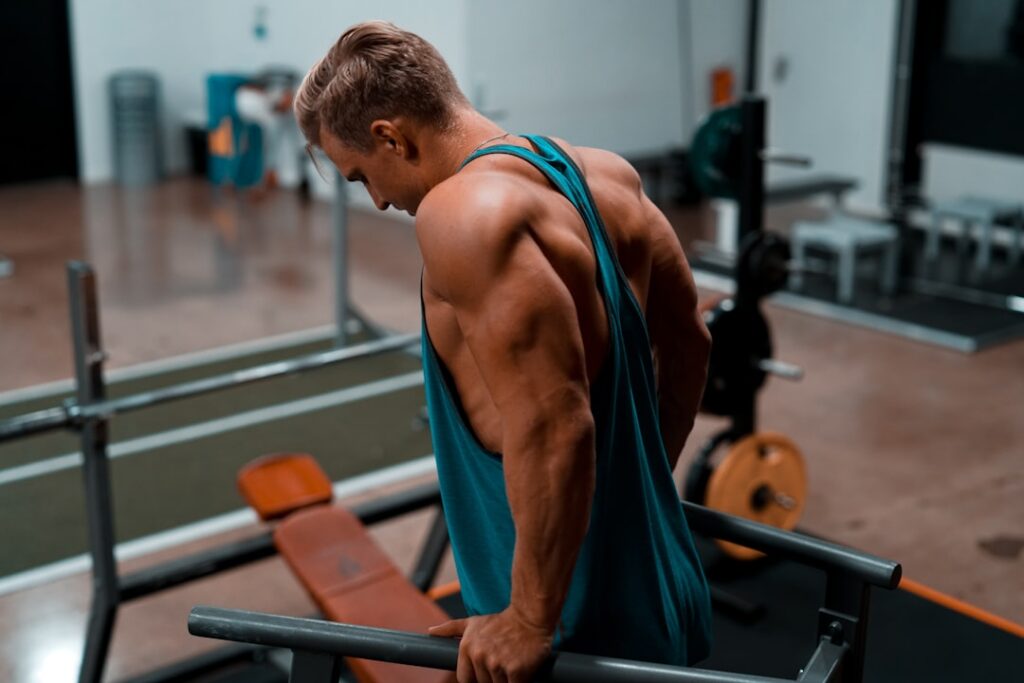
Tricep Dips are a fantastic bodyweight exercise that primarily targets your triceps but also significantly engages your chest (especially the lower chest) and shoulders. All you need is a sturdy chair, bench, or even the edge of a bed.
Proper Technique
-
Sit on the edge of a sturdy chair or bench, placing your hands shoulder-width apart on the edge, fingers pointing forward or slightly out to the sides. Your knuckles should grip the edge.
-
Slide your hips off the chair, extending your legs out in front of you. Keep your heels on the ground with a slight bend in your knees for a beginner modification, or straighten your legs for more challenge.
-
Lower your body by bending your elbows, keeping them pointing straight back rather than flaring out. Keep your back close to the chair.
-
Go down until your upper arms are roughly parallel to the floor, or slightly below your elbows. You should feel a stretch in your chest and triceps.
-
Push back up to the starting position using your triceps, extending your arms fully but without locking your elbows.
Muscles Targeted
-
Primary: Triceps Brachii (back of upper arm)
-
Secondary: Pectoralis Major (lower chest), Anterior Deltoids (front of shoulders)
Beginner Modifications
-
Easier: Keep your knees bent and feet closer to the chair. The more bent your knees and closer your feet, the less body weight you’re lifting.
-
Harder: Extend your legs fully, or place your feet on an elevated surface. You can also add weight to your lap once you’ve mastered the bodyweight version.
Recommended Sets and Reps
Perform 3 sets of 8-12 repetitions. Control the lowering phase and explode upwards.
Breathing Technique
Inhale as you lower your body. Exhale as you push back up to the starting position.
How to Avoid Shoulder Discomfort
Keep your elbows pointing straight back and avoid letting them flare out too much, as this can strain the shoulder joints. Only go as low as your shoulder mobility allows without pain. Ensure the chair or bench is stable.
Muscles Worked: A Holistic View
When you perform chest exercises, you’re not just activating your pectorals. These movements are compound by nature, meaning they engage a network of muscles working together:
-
Pectoralis Major (Chest): The primary muscle responsible for pressing and flying movements. It’s a large, fan-shaped muscle that covers the upper part of your chest.
-
Pectoralis Minor (Under Chest): A smaller, triangular muscle located beneath the Pectoralis Major, it helps stabilize the shoulder blade.
-
Anterior Deltoids (Front of Shoulders): These muscles assist in all pushing motions and contribute to the front-facing shoulder definition.
-
Triceps Brachii (Back of Upper Arm): Crucial for extending the elbow, the triceps are heavily involved in pressing exercises like the wall press and tricep dips.
-
Serratus Anterior: Often called the ‘boxer’s muscle,’ it’s located on the side of your rib cage and helps stabilize your shoulder blade and plays a role in overhead movements and push-ups.
-
Rhomboids & Trapezius (Upper Back): These muscles are key in movements like the reverse fly, pulling your shoulder blades together and helping to counteract the forward pull of strong chest muscles for better posture.
-
Core Muscles: Your abdominal and lower back muscles act as stabilizers in almost every exercise, especially planks, ensuring proper form and preventing injury.
Understanding these muscle groups helps you appreciate how these 6 simple moves contribute to a balanced and strong upper body.
Beginner Weekly Routine for a Stronger Chest
Consistency is key for muscle gain and strength improvement. Here’s a sample beginner weekly routine focusing on your chest, designed to allow for adequate recovery:
-
Day 1: Upper Body Focus (Chest & Triceps)
-
Warm-up (5-10 minutes)
-
Wall Press: 3 sets of 10-15 reps
-
Chest Fly (with light dumbbells/water bottles): 3 sets of 12-15 reps
-
Tricep Dips (on chair): 3 sets of 8-12 reps
-
Plank: 3-4 sets, hold 30-60 seconds
-
Cool-down & Stretch (5-10 minutes)
-
-
Day 2: Lower Body / Core Focus
-
Example: Squats, Lunges, Glute Bridges, Crunches
-
-
Day 3: Rest or Active Recovery
-
Example: Light walk, stretching, yoga
-
-
Day 4: Upper Body Focus (Back & Shoulders)
-
Warm-up (5-10 minutes)
-
Reverse Fly (with light dumbbells/water bottles): 3 sets of 12-15 reps
-
Pullover (with single dumbbell): 3 sets of 10-12 reps
-
Another back or shoulder exercise (e.g., bodyweight rows using a sturdy table, pike push-ups for shoulders)
-
Cool-down & Stretch (5-10 minutes)
-
-
Day 5: Full Body / Cardio
-
Example: Circuit training, brisk walk, cycling
-
-
Day 6 & 7: Rest or Active Recovery
Remember, this is a template. Adjust it based on your schedule, energy levels, and how your body responds. Aim for 2-3 strength training sessions per week, with adequate rest between working the same muscle groups.
Common Mistakes to Avoid
Even simple exercises can be less effective or even lead to injury if not performed correctly. Watch out for these common pitfalls:
-
Rushing Through Reps: Speed isn’t the goal. Slow, controlled movements ensure your muscles are doing the work, not momentum. Focus on the mind-muscle connection.
-
Ego Lifting (Too Much Weight/Too Hard Variation): Especially with dumbbell chest exercises or tricep dips, don’t jump to the hardest variation or heaviest weights too soon. Master the form with easier modifications first.
-
Not Engaging the Core: A weak core leads to a wobbly foundation, compromising form and effectiveness for all upper body workouts, especially planks and presses.
-
Flaring Elbows: This is a common mistake in pressing and dipping movements. Keeping elbows tucked in slightly protects your shoulders and emphasizes the target muscles.
-
Ignoring Recovery: Muscles grow when you rest and recover, not just when you’re working out. Prioritize sleep and active recovery days.
-
Holding Your Breath: Consistent breathing supplies oxygen to your muscles and helps regulate blood pressure during exercise.
-
Skipping Warm-ups and Cool-downs: These are vital for preparing your body for activity and aiding recovery, significantly reducing injury risk and soreness.
Warm-up & Cool-down: Your Essential Ritual
Never skip these crucial phases of your workout. They prepare your body for the stress of exercise and help it recover afterwards.
Warm-up (5-10 minutes)
A good warm-up increases blood flow to your muscles, improves flexibility, and prepares your nervous system. Focus on dynamic movements:
-
Arm Circles: Forward and backward (10-15 each direction)
-
Torso Twists: Gently rotate your upper body side to side (10-15 each side)
-
Cat-Cow Stretch: On hands and knees, arch and round your back (8-10 reps)
-
Light Cardio: Marching in place, jumping jacks, or a brisk walk (2-3 minutes)
-
Wall Slides: Stand against a wall, press your arms up and down, keeping contact (8-10 reps)
Cool-down (5-10 minutes)
A cool-down helps bring your heart rate down and stretches muscles, improving flexibility and reducing post-workout soreness. Focus on static stretches, holding each for 20-30 seconds:
-
Chest Stretch: Stand in a doorway, place your forearm on the frame, and gently lean forward.
-
Triceps Stretch: Reach one arm over your head, bend the elbow, and use your other hand to gently push the elbow down.
-
Shoulder Stretch: Cross one arm across your body and use the other arm to pull it closer.
-
Child’s Pose: Relaxing stretch for the back and shoulders.
-
Overhead Reach: Clasp hands together, reach overhead, gently lean to each side.
Progressive Overload Tips: Continuously Challenge Your Body
For your muscles to grow stronger and larger, you need to continually challenge them. This principle is called progressive overload. For home-based, beginner chest workouts, you can gradually increase difficulty safely through several methods:
-
Increase Repetitions: Once you can comfortably perform 15 reps with perfect form for an exercise, try to increase to 16, then 17, and so on, before considering other methods.
-
Increase Sets: If you’re doing 3 sets, try adding a 4th set to increase your total workout volume.
-
Shorten Rest Times: Reducing the rest period between sets (e.g., from 90 seconds to 60 seconds) can increase the intensity and metabolic demand.
-
Improve Form/Range of Motion: Focus on making each rep perfect and exploring a slightly deeper range of motion where safe and comfortable (e.g., for dips or flies).
-
Slow Down Tempo: Perform reps more slowly, especially the eccentric (lowering) phase. A 3-second lowering phase can significantly increase time under tension.
-
Move to Harder Variations: As you master the easier modifications, progress to harder ones. For example, moving from wall presses closer to the wall to further away, then incline push-ups, then knee push-ups, and eventually full push-ups. For dips, extend your legs further or elevate your feet.
-
Add Resistance: Once bodyweight becomes too easy, consider investing in light dumbbells, resistance bands, or even household items like water bottles or heavy books for exercises like chest flies and pullovers. A backpack filled with books can also add resistance to bodyweight exercises like dips.
Listen to your body, track your progress, and challenge yourself consistently but wisely.
Nutrition for Muscle Growth: Fueling Your Gains
Exercise is only half the equation for building muscle and getting stronger. Your diet plays a critical role. Focus on these key nutritional principles:
-
Adequate Protein Intake: Protein is the building block of muscle. Aim for 0.7-1 gram of protein per pound of body weight daily. Excellent sources include lean meats, poultry, fish, eggs, dairy, legumes, tofu, and protein powder.
-
Complex Carbohydrates: These provide the energy for your workouts and help replenish glycogen stores for recovery. Include foods like whole grains, oats, brown rice, sweet potatoes, and fruits.
-
Healthy Fats: Essential for hormone production and overall health. Incorporate avocados, nuts, seeds, olive oil, and fatty fish into your diet.
-
Hydration: Drink plenty of water throughout the day. Dehydration can impair performance and recovery.
-
Consistent Meals: Distribute your protein and carbs throughout the day across multiple meals to support continuous muscle protein synthesis.
-
Calorie Intake: To build muscle, you generally need to be in a slight calorie surplus, meaning you consume slightly more calories than you burn. However, for beginners, muscle can often be built even at maintenance or a slight deficit, especially if you’re new to training and have body fat to lose.
Remember, it’s about making sustainable, healthy eating choices that support your fitness goals. Consult a nutritionist or healthcare professional for personalized dietary advice.
Frequently Asked Questions (FAQ)
Q1: How often should I train my chest as a beginner?
A: As a beginner, training your chest 1-2 times per week with adequate rest in between is usually sufficient. Your muscles need time to recover and grow. The sample weekly routine provided suggests an upper body focus day, which can be tailored to include these chest exercises.
Q2: Can I really build a strong chest without a gym or heavy weights?
A: Absolutely! Bodyweight exercises like wall presses, push-ups (progressing from walls to incline to floor), and tricep dips are highly effective. Incorporating light dumbbells or resistance bands for exercises like chest flies and pullovers can further enhance your results. Consistency and proper progressive overload are key.
Q3: How long until I see results?
A: Results vary based on individual factors like genetics, diet, consistency, and starting fitness level. However, many beginners notice increased strength and muscle definition within 4-8 weeks of consistent training and proper nutrition. Stay patient and celebrate small victories!
Q4: What if I feel shoulder discomfort during chest exercises?
A: Stop the exercise immediately. Review your form carefully, ensuring your elbows aren’t flaring out excessively and you’re not using too much weight. Focus on controlled movements and maintaining a slight bend in your elbows. If discomfort persists, consult a healthcare professional or physical therapist.
Q5: Is it okay to feel sore after a workout?
A: Yes, a certain level of muscle soreness (Delayed Onset Muscle Soreness or DOMS) is normal, especially when starting a new routine or increasing intensity. It typically peaks 24-48 hours after your workout. Light activity, stretching, good nutrition, and adequate rest can help alleviate it. Sharp pain is not normal and should be addressed.
Q6: How important is breathing during these exercises?
A: Breathing is very important! Proper breathing helps to stabilize your core, maintain blood pressure, and supply oxygen to your working muscles. Generally, exhale during the exertion phase (when you’re pushing/contracting the muscle) and inhale during the release/stretch phase.
Q7: What can I use if I don’t have dumbbells for chest flies or pullovers?
A: You can use household items like water bottles, cans of food, or small bags of rice/beans for light resistance. Resistance bands are also an excellent, versatile, and inexpensive option for home workouts.
Q8: Should I do these exercises every day?
A: No, daily training of the same muscle group is generally not recommended, especially for beginners. Your muscles need 24-48 hours, or even more, to recover and rebuild stronger. Overtraining can lead to fatigue, injury, and hinder progress. Stick to a routine that allows for adequate rest.
Q9: How can I make these exercises more challenging as I get stronger?
A: Implement progressive overload! This means gradually increasing the challenge. You can do this by increasing reps, adding more sets, shortening rest times, performing harder exercise variations (e.g., from wall press to incline push-up), slowing down the movement tempo, or adding light resistance.
Q10: What’s the best recovery method after a chest workout?
A: The most crucial recovery methods are adequate sleep (7-9 hours), proper nutrition (especially protein), and hydration. Light stretching during your cool-down and active recovery (like a gentle walk) on rest days can also aid in recovery and reduce soreness.
Q11: Will these exercises help with overall upper body strength?
A: Absolutely! While focusing on the chest, these exercises also engage your shoulders and triceps. The plank significantly strengthens your core and stabilizers, contributing to overall upper body stability. Incorporating back and shoulder exercises on other days will create a truly balanced upper body.
Q12: Can women benefit from chest training?
A: Yes, women benefit immensely from chest training! It helps improve upper body strength for daily tasks, contributes to better posture, and can enhance overall physique and athletic performance. It does not make breasts larger, but strengthens the muscles underneath.
Final Thoughts: Embrace Your Strength Journey
Building a strong, sculpted chest and powerful upper body is an incredibly rewarding journey, and it doesn’t have to be complicated or require endless gym hours. By consistently applying these 6 beginner-friendly exercises and embracing the principles of proper form, progressive overload, and supportive nutrition, you’re well on your way to achieving your fitness goals.
Remember, every expert was once a beginner. Start where you are, use what you have, and do what you can. Remedies Wellness is here to empower you with practical, effective strategies for a healthier, more vibrant life. Keep moving, keep challenging yourself, and enjoy the amazing transformation!
“The journey of a thousand miles begins with a single step. Start your chest transformation today!”
Disclaimer
The information provided in this article is for general informational and educational purposes only, and is not a substitute for professional medical advice, diagnosis, or treatment. Always consult with a qualified healthcare professional or your physician before beginning any new exercise program, especially if you have pre-existing health conditions or concerns. Proper form is crucial to prevent injury. If you experience any pain or discomfort, stop the exercise immediately and seek professional advice. Remedies Wellness assumes no responsibility for injuries suffered while practicing these exercises.