Say Goodbye to Dull Skin: Your DIY Anti-Aging Secret Revealed!
Who doesn’t dream of smooth, youthful skin that glows with health? While the beauty market is flooded with countless products, sometimes the best solutions are found right in nature, right in your own home! Today, your Beauty Bestie is here to share a wonderful secret: a homemade Aloe Vera Anti-Aging Gel that’s easy to make, gentle on your skin, and kind to your wallet. Get ready to turn back the clock naturally!
Why Aloe Vera is Your Skin’s Best Friend for Anti-Aging
Aloe vera isn’t just for sunburns anymore! This humble plant is a powerhouse of vitamins, minerals, enzymes, and amino acids that work wonders for your skin. When it comes to anti-aging, aloe vera shines because of its:
- Hydrating Power: Keeps skin plump and reduces the appearance of fine lines and wrinkles.
- Antioxidants: Fights off free radicals that cause premature aging.
- Collagen Boost: Helps stimulate collagen production, improving skin elasticity.
- Anti-inflammatory Properties: Soothes irritation and promotes healing, leading to healthier, more resilient skin.
But we’re not stopping there! We’re adding a couple of other skin-loving ingredients to supercharge our anti-aging gel.
Gather Your Youth-Boosting Ingredients
Ready to whip up your magic gel? Here’s what you’ll need:
- Fresh Aloe Vera Gel (from the plant or pure bottled): The star of our show! Aim for about 1/2 cup.
- Vitamin E Oil: A powerful antioxidant that helps repair skin cells and keep skin moisturized. You’ll need about 1 teaspoon.
- Almond Oil (or Jojoba Oil): A carrier oil that adds extra hydration and nourishment without clogging pores. About 1 tablespoon.
- Optional: Lavender Essential Oil: For a calming scent and additional skin benefits (like soothing). Just a few drops. Make sure it’s high-quality and skin-safe!
Your Step-by-Step Guide to DIY Anti-Aging Gel
Making your own anti-aging gel is simpler than you think! Follow these easy steps:
- Prepare Your Aloe: If using a fresh aloe leaf, cut a portion, let the yellow sap drain (it can be irritating), then scoop out the clear gel. If using bottled, ensure it’s 100% pure aloe vera.
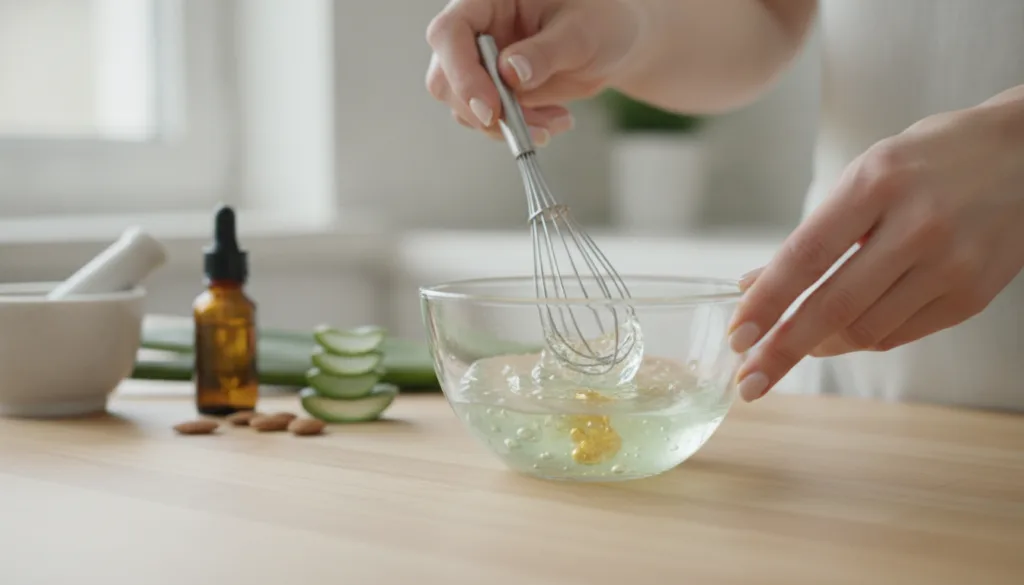
- Blend the Goodness: In a clean blender or food processor, combine your 1/2 cup of aloe vera gel, 1 teaspoon of Vitamin E oil, and 1 tablespoon of almond (or jojoba) oil.
- Mix Until Smooth: Blend on low speed until the mixture is completely smooth and forms a consistent gel-like texture. This might take a minute or two.
- Add Essential Oil (Optional): If using lavender essential oil, add 3-5 drops and pulse briefly to combine.
- Transfer and Store: Carefully pour your freshly made anti-aging gel into a clean, airtight glass jar or pump bottle.
How to Incorporate Your DIY Gel into Your Routine
Consistency is key! Here’s how to get the most out of your homemade anti-aging gel:
- Cleanse First: Always apply to clean, dry skin after cleansing and toning.
- Apply Gently: Take a small amount of gel and gently massage it onto your face, neck, and décolletage using upward strokes.
- Daily Use: Use it twice a day, morning and night, for best results. It works wonderfully as a light moisturizer before your regular cream or SPF.
- Patch Test: As with any new product, always do a patch test on a small area of your skin first to ensure no irritation.
Keeping Your Gel Fresh: Storage Tips
Since your gel is natural and homemade, it won’t have the same shelf life as store-bought products with preservatives. To keep it fresh:
- Refrigerate It: Store your gel in the refrigerator. The cool temperature will extend its life and feel wonderfully refreshing on your skin!
- Use Clean Hands/Spatula: Always use clean hands or a clean spatula to scoop out the gel to prevent bacterial contamination.
- Shelf Life: Your homemade gel should last for about 1-2 weeks in the refrigerator. If you notice any changes in color, smell, or texture, it’s time to make a fresh batch.
Embrace Your Natural Glow
There you have it, gorgeous! A simple, effective, and natural way to support youthful, radiant skin. Making your own anti-aging gel is not just a beauty hack; it’s a little act of self-care that connects you with nature’s goodness. Give it a try and watch your skin thank you!
Have you tried making your own beauty remedies? Share your experiences and favorite natural tips in the comments below – your beauty bestie loves to hear from you!