Want to unlock the secret to naturally radiant and supple skin without breaking the bank? You’re in the right place! We’re diving into the wonderful world of DIY collagen oils – your nature-inspired secret weapon for achieving that coveted youthful glow. Forget expensive serums and complicated routines; we’re talking about simple, effective, and natural remedies you can whip up right in your kitchen.
As we age, our skin naturally produces less collagen, leading to fine lines, wrinkles, and a loss of firmness. But what if you could give your skin a little boost using everyday ingredients? That’s exactly what DIY collagen oils aim to do. By infusing natural ingredients known for their skin-loving properties into nourishing carrier oils, you create a powerful elixir that supports skin elasticity and promotes a healthy, vibrant complexion.
What Are DIY Collagen Oils?
While these homemade concoctions don’t contain actual collagen molecules (which are too large to be absorbed topically), they are packed with nutrients that help support your skin’s natural collagen production. Think of them as a gentle nudge to your skin to keep it looking its best. They work by delivering vitamins, antioxidants, and fatty acids directly to your skin, which are essential for repair, protection, and maintaining elasticity.

Key Natural Ingredients for a Collagen Boost
The beauty of DIY is choosing exactly what goes into your skincare. Here are some superstar ingredients that are easy to find and fantastic for your skin:
- Citrus Peels (Lemon, Orange, Lime): Rich in Vitamin C, a crucial antioxidant for collagen synthesis and brightening skin tone.
- Rice Grains: Contains compounds that promote cell regeneration and have brightening effects, often associated with a ‘glass skin’ look.
- Cloves: Loaded with antioxidants, they help protect the skin from free radical damage, which can break down collagen. They also have anti-inflammatory properties.
- Green Tea Leaves: A powerhouse of antioxidants (EGCG) that combat aging signs and soothe the skin.
- Rose Petals: Hydrating and toning, they also offer antioxidant benefits and a beautiful natural fragrance.
Choosing Your Base Oil
The carrier oil is the foundation of your DIY collagen oil. It’s what delivers all those wonderful nutrients to your skin. While Johnson’s baby oil (mineral oil) is shown in the inspiring image and can be a cost-effective, non-comedogenic base, many natural alternatives offer added benefits:
- Sweet Almond Oil: Light, nourishing, and rich in Vitamin E. Great for all skin types.
- Jojoba Oil: Closely mimics the skin’s natural sebum, making it excellent for balancing oily skin while moisturizing dry skin.
- Grapeseed Oil: Very light, non-comedogenic, and rich in antioxidants. Ideal for acne-prone or sensitive skin.
- Apricot Kernel Oil: Softening and hydrating, good for mature or dry skin.
- Olive Oil: Rich in antioxidants and deeply moisturizing, but can be heavy for some skin types.
Simple DIY Collagen Oil Recipes
Ready to get started? Here are a couple of easy recipes to boost your skin’s radiance!
1. Brightening Citrus-Infused Collagen Oil
This oil harnesses the power of Vitamin C for a radiant complexion.
Ingredients:
- Peel of 1 organic lemon or lime (avoid the white pith)
- 1 cup of your chosen carrier oil (e.g., sweet almond or jojoba oil)
- Optional: a few drops of Vitamin E oil (natural preservative and skin booster)
Instructions:
- Wash and thoroughly dry the citrus peel. Make sure there’s no moisture.
- Place the dry citrus peel in a clean, sterilized glass jar.
- Pour the carrier oil over the peel, ensuring it’s completely submerged. Add Vitamin E oil if using.
- Seal the jar tightly and store it in a cool, dark place for 2-4 weeks. Gently shake the jar every few days.
- After infusion, strain the oil through a fine-mesh sieve or cheesecloth into a clean dropper bottle. Discard the peels.

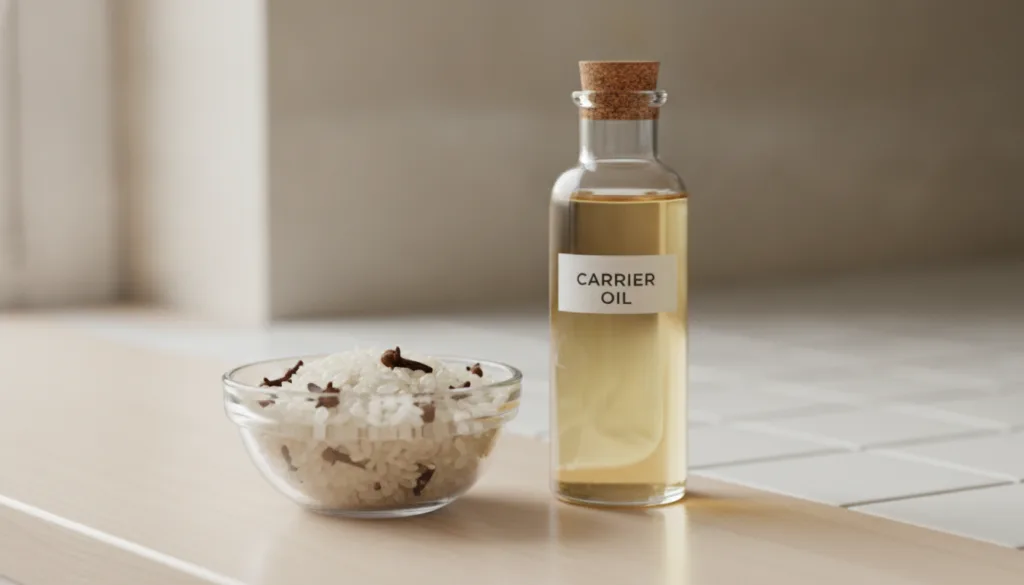
2. Antioxidant Rice & Clove Collagen Oil
This blend offers antioxidant protection and skin-smoothing benefits.
Ingredients:
- 2 tablespoons uncooked white rice (rinsed and thoroughly dried)
- 1 teaspoon whole cloves
- 1 cup of your chosen carrier oil (e.g., grapeseed or apricot kernel oil)
Instructions:
- Rinse the rice and ensure it is completely dry before use to prevent mold.
- Combine the dried rice and whole cloves in a clean, sterilized glass jar.
- Pour the carrier oil over the ingredients, making sure they are fully covered.
- Seal the jar and let it infuse in a cool, dark place for 2-4 weeks, shaking occasionally.
- Strain the oil carefully through a fine-mesh sieve or cheesecloth into a clean dropper bottle.
How to Use Your DIY Collagen Oil
Once your beautiful homemade oil is ready, incorporating it into your routine is simple:
- Cleanse: Start with a clean face.
- Tone (Optional): Apply your favorite toner.
- Apply Oil: Dispense 2-4 drops of your DIY collagen oil into your palm. Gently warm it between your hands.
- Massage: Lightly pat and massage the oil onto your face and neck using upward motions. Focus on areas prone to fine lines.
- Frequency: Use daily, preferably at night, as the last step in your skincare routine to lock in moisture and nutrients.
Tips for Best Results and Safety
- Patch Test: Always perform a patch test on a small area of your skin (like behind your ear or inner arm) before applying new products all over your face.
- Sterilization: Ensure all your jars, bottles, and tools are thoroughly cleaned and sterilized to prevent bacterial growth.
- Storage: Store your DIY oils in dark glass bottles in a cool, dark place to extend their shelf life.
- Shelf Life: Homemade oils typically last 3-6 months. If you notice any change in smell, color, or texture, it’s best to discard them.
- Consistency is Key: Like with any natural remedy, consistent use over time will yield the best results.
- Listen to Your Skin: If irritation occurs, discontinue use.
Embracing DIY collagen oils is a beautiful way to connect with nature’s bounty and nurture your skin with love. You’ll not only save money but also gain the satisfaction of knowing exactly what goes into your skincare. Get ready to unveil that radiant, supple skin you’ve been dreaming of!
Share your favorite DIY beauty secrets in the comments below!