Imagine having an endless supply of fresh, delicious sweet potato plants, all starting from one humble spud! It’s not a dream; it’s a simple, rewarding process called propagation, and it’s something you can easily do right at home. Not only does it save you money on buying seedlings, but it also connects you more deeply with the food you grow.
Sweet potatoes are versatile, nutritious, and relatively easy to grow, making them a fantastic addition to any home garden. Whether you have a sprawling backyard or just a few containers on a patio, you can successfully propagate sweet potato plants and enjoy a bountiful harvest. Let’s dig in and learn how to turn one sweet potato into many vibrant plants!
Why Grow Your Own Sweet Potatoes?
Beyond the joy of DIY gardening, propagating sweet potatoes offers several fantastic benefits:
- Cost-Effective: Why buy plants when you can grow them for free from a single sweet potato?
- Organic Control: You control the entire growing process, ensuring your plants are free from unwanted chemicals.
- Freshness: Nothing beats the taste of freshly harvested vegetables from your own garden.
- Educational Fun: It’s a wonderful project for gardeners of all ages, teaching patience and the magic of plant growth.
- Unlimited Supply: Once you get the hang of it, you can keep propagating for an endless supply of plants.
What You’ll Need
Gathering your supplies is the first step to success. Luckily, you won’t need much:
- A healthy, organic sweet potato (choose one that hasn’t been treated with sprout inhibitors).
- A container (a shallow tray, a pot, or even a glass jar).
- Potting soil or water.
- A warm spot with good light (a sunny window or a grow light).
- Sharp knife or shears (for harvesting slips).
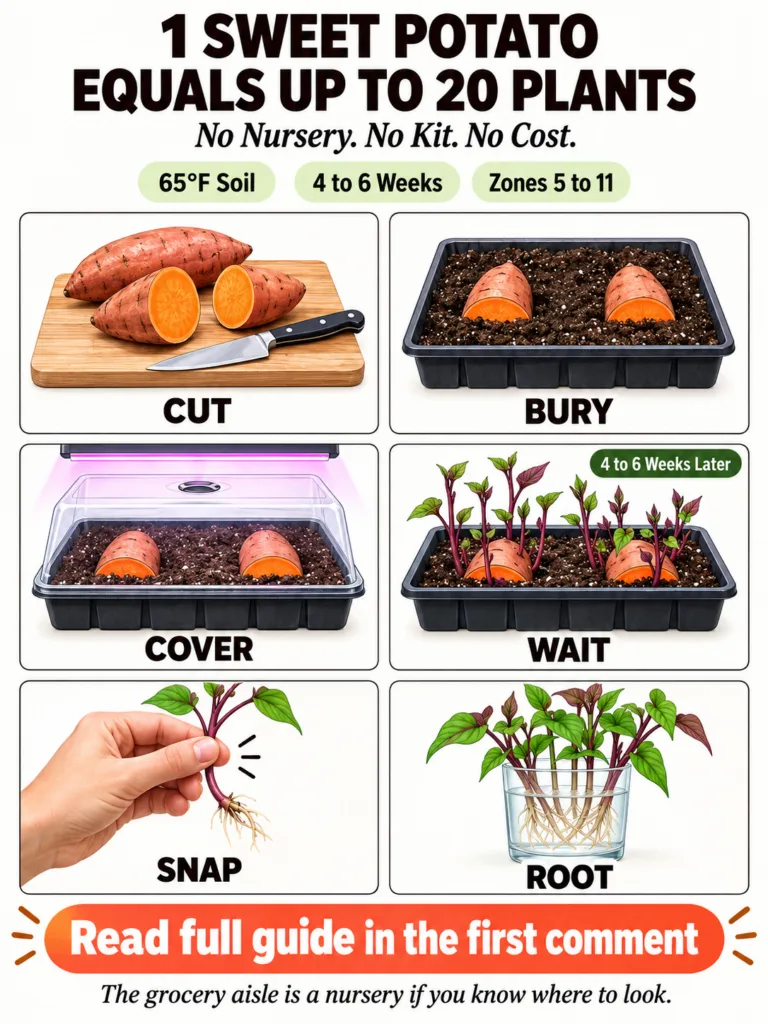
Your Six-Step Guide to Sweet Potato Propagation
Here’s how to turn that humble spud into a thriving garden of sweet potato plants:
Step 1: Prepare Your Sweet Potato
Start by cleaning your sweet potato. You can either place the whole potato in a container of moist potting soil, burying about half of it, or cut it into a few large pieces. If you cut it, make sure each piece has at least one ‘eye’ or bud. Allow cut pieces to ‘cure’ for a day or two in a dry, warm place to form a protective layer, which prevents rotting when planted.
Step 2: Provide the Right Environment
Place your sweet potato in a warm environment. Sweet potatoes love warmth, so a spot where the temperature is consistently around 70-80°F (21-27°C) is ideal. If you’re using soil, keep it consistently moist, but not waterlogged. If you’re using water (often done by suspending half the potato in water with toothpicks), change the water every few days to prevent mold.
Step 3: Wait for Sprouts
Patience is key! Within a few weeks, you’ll start to see ‘slips’ – small shoots and leaves – emerging from the sweet potato. These are your future plants! Ensure they receive plenty of bright, indirect light. If you notice them getting leggy or stretched, they might need more light. A small grow light can work wonders if natural light is insufficient.
Step 4: Harvest the Slips
Once your slips are about 4-6 inches long and have several leaves, they’re ready to be harvested. Gently twist or snap them off the sweet potato. If they have already formed roots while attached to the parent potato, that’s a bonus! If not, don’t worry, the next step will take care of it.
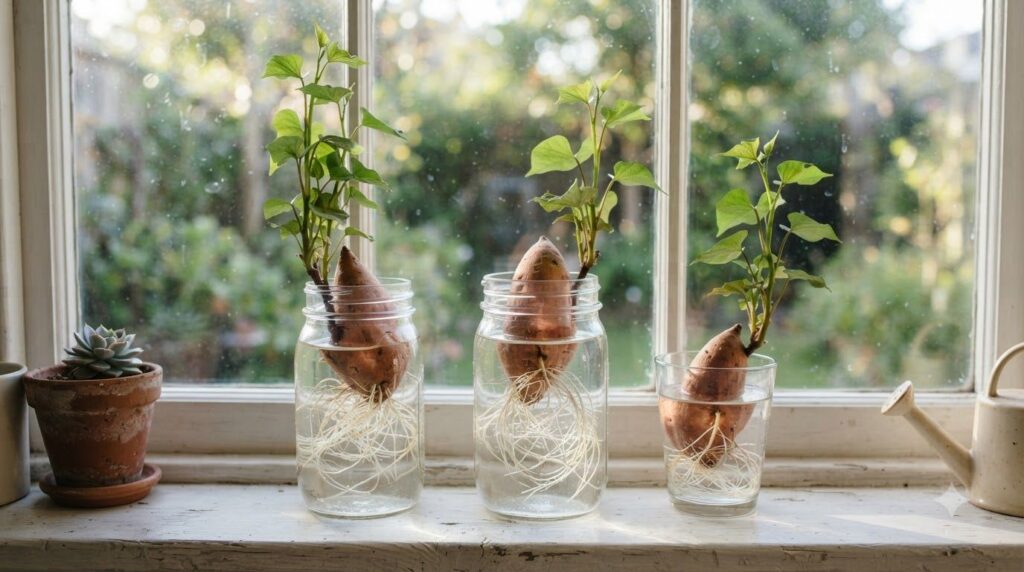
Step 5: Root Slips in Water
Place the harvested slips into a jar or glass of water. Make sure the bottom nodes (where leaves were attached) are submerged in the water, as this is where new roots will form. Keep the jar in a bright location, out of direct harsh sunlight. Change the water every other day to keep it fresh and oxygenated. Within a week or two, you’ll see a healthy network of roots develop.
Step 6: Plant in Your Garden
Once the roots on your slips are about an inch long, they’re ready for planting! Sweet potatoes thrive in full sun (at least 6-8 hours daily) and well-draining soil. Plant your rooted slips about 12-18 inches apart in rows that are 3-4 feet apart. Water them well after planting. Sweet potatoes prefer a slightly acidic to neutral soil pH (6.0-7.0).
Sweet Potato Growing Tips
- Sunlight: Sweet potatoes are sun-loving plants. Ensure they get at least 6-8 hours of direct sunlight daily.
- Soil: They prefer loose, sandy loam soil that drains well. Avoid heavy clay soils.
- Watering: Keep the soil consistently moist, especially during dry periods, but avoid overwatering.
- Fertilization: A balanced fertilizer can be applied after planting, but avoid too much nitrogen, which can lead to lush foliage but small tubers.
- Pest Control: Keep an eye out for common pests like sweet potato weevils or flea beetles. Organic pest control methods are always recommended.
Growing your own sweet potato plants from scratch is an incredibly satisfying experience. It’s a simple, eco-friendly way to enjoy fresh, organic produce and connect with the earth. So grab a sweet potato, get started, and enjoy the bounty of your home harvest!
Do you have any tips for growing sweet potatoes? Share your experiences in the comments below!