Unlock Effortless Gardening with DIY Self-Watering Planters
Are you dreaming of a thriving garden but find yourself short on time or struggling to keep your plants consistently watered? We’ve got a fantastic solution for you that’s both eco-friendly and incredibly effective: DIY self-watering planters! Perfect for busy gardeners, small spaces, or anyone looking to reduce their water usage, these ingenious planters made from recycled plastic bottles are a game-changer for growing herbs, vegetables, and more.
Why DIY Self-Watering Planters Are a Must-Have
Before we dive into the ‘how-to,’ let’s talk about the incredible benefits of these simple planters:
- Consistent Moisture: Your plants will get a steady supply of water, preventing the stress of over or under-watering. This is crucial for healthy growth!
- Water Conservation: The closed system reduces evaporation, meaning less water wasted and more efficient hydration for your plants.
- Repurpose & Recycle: Give new life to plastic bottles, contributing to a more sustainable lifestyle and reducing waste.
- Perfect for Small Spaces: These compact planters are ideal for balconies, windowsills, or any corner of your home.
- Low Maintenance: Once set up, they require less frequent watering, freeing up your time.
Gather Your Materials: What You’ll Need
The best part about this project is how few specialized tools you’ll need. Most items are likely already in your home!
- Clean plastic bottles (1.5L or 2L work best)
- Sharp knife or scissors
- Drill or pushpin (to make a small hole)
- Cotton string, old shoelace, or fabric strip (for the wick)
- Potting mix (good quality, well-draining)
- Seeds or small plant starts
- Water
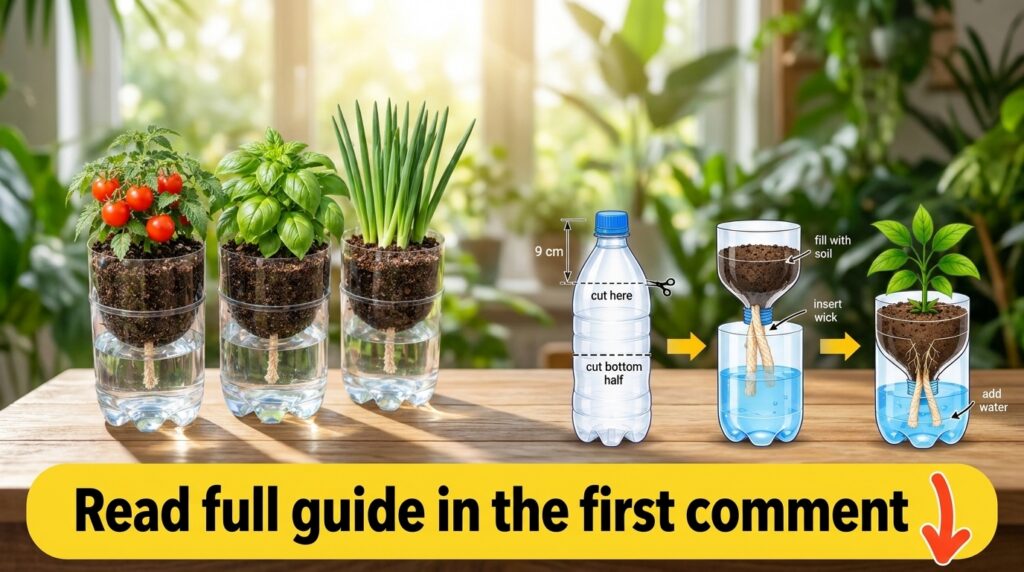
Step-by-Step Guide: Making Your Self-Watering Planter
Let’s get creative! Follow these simple steps to build your very own self-watering system.
Step 1: Prepare Your Bottle
- Take a clean plastic bottle and remove the label.
- Carefully cut the bottle about one-third of the way down from the top. The top section will hold your plant, and the bottom will be the water reservoir.
Step 2: Create the Wick Hole
- Flip the top section of the bottle upside down.
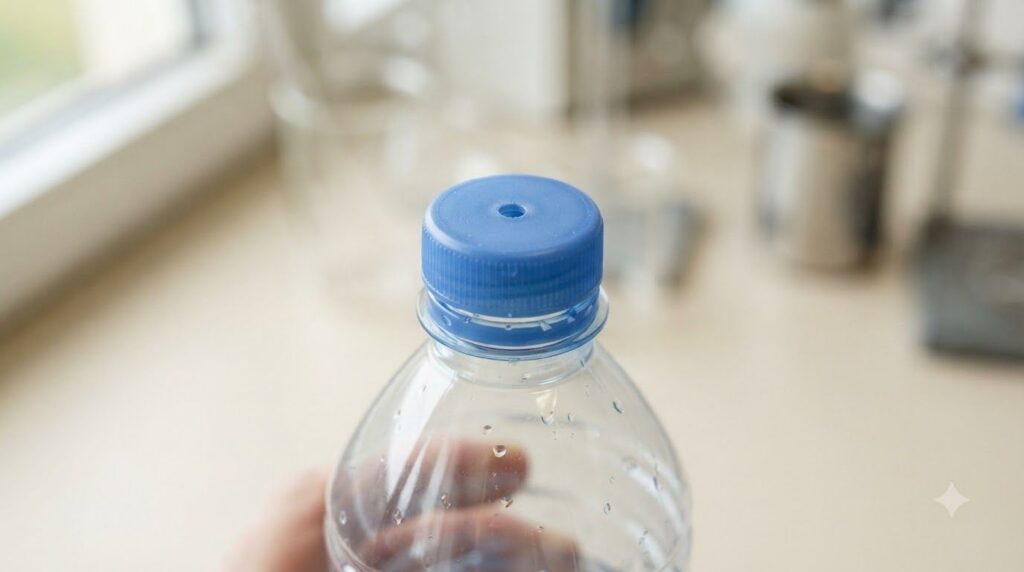
- Using a drill or a heated pushpin, make a small hole in the bottle cap. This hole needs to be just large enough for your wick material to pass through.
Step 3: Insert the Wick
- Cut a piece of cotton string or fabric about 10-12 inches long.
- Thread one end of the wick through the hole in the bottle cap from the inside, pulling it through so that about 3-4 inches extend from the outside of the cap.
- Screw the cap back onto the top section of the bottle.
Step 4: Assemble Your Planter
- Invert the top section of the bottle (with the cap and wick attached) and place it into the bottom section. The wick should hang down into what will be the water reservoir.
- Ensure there’s a small gap between the two sections for aeration and easy refilling.
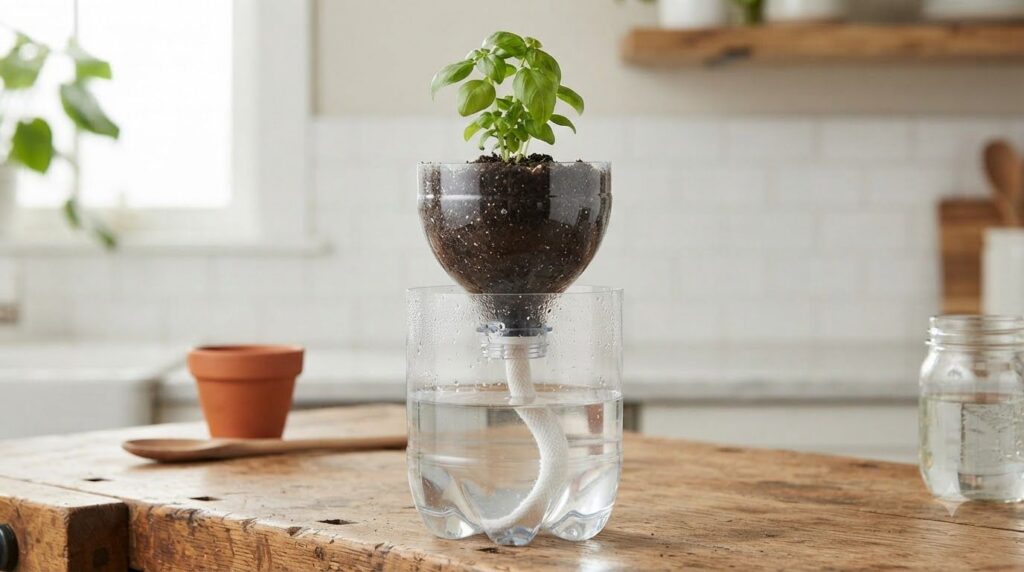
Step 5: Add Soil and Plant
- Fill the top section with your potting mix. Make sure the wick is well-embedded in the soil.
- Plant your chosen seeds or small plant starts.
Step 6: Fill the Reservoir
- Pour water into the bottom section (the reservoir) until it almost touches the bottom of the top section.
- The wick will absorb the water and draw it up into the soil, keeping your plant hydrated.
Choosing the Right Plants for Your Planter
Not all plants are created equal for self-watering systems. Here are some excellent choices:
- Herbs: Basil, mint, parsley, cilantro are fantastic in these planters.
- Leafy Greens: Lettuce, spinach, and kale thrive with consistent moisture.
- Small Vegetables: Cherry tomatoes, peppers, and green onions can do very well.
- Flowering Plants: Small annuals that enjoy consistent moisture.
Tips for Self-Watering Planter Success
- Check Water Levels Regularly: While they are self-watering, the reservoir will eventually run dry. Check it every few days and refill as needed.
- Nutrient Boost: Plants in these systems might need liquid fertilizer more often as nutrients can leach out. Add a diluted liquid feed to your reservoir every few weeks.
- Sunlight is Key: Place your planters in a spot where your chosen plants will get adequate sunlight.
- Clean Your Wicks: Over time, wicks can get clogged. Occasionally pull them out and rinse them, or replace them if they become too dirty.
Embrace the simplicity and efficiency of DIY self-watering planters. They’re a fantastic way to enjoy fresh produce and beautiful plants with less hassle, all while making a positive impact on the environment. Happy gardening!
Have you tried making your own self-watering planters? Share your tips and triumphs in the comments below!