There’s nothing quite like the satisfaction of harvesting fresh produce from your own garden, and ginger is no exception! This versatile spice, known for its distinct flavor and numerous health benefits, is surprisingly easy to grow at home. Imagine having a fresh supply right in your backyard or even in a pot on your patio! At Garden – L. Quyên, we’re here to guide you through the simple steps to cultivate your very own ginger, transforming your garden into a hub of aromatic delight.
Why Grow Your Own Ginger?
Beyond the sheer joy of gardening, growing your own ginger offers a wealth of benefits:
- Unmatched Freshness: Store-bought ginger often travels long distances, losing some of its potency and flavor. Homegrown ginger is picked at its peak, bursting with vibrant taste and aroma.
- Organic Goodness: You control the growing conditions, ensuring your ginger is free from pesticides and unwanted chemicals, making it truly organic.
- Cost-Effective: A single piece of ginger rhizome can yield multiple harvests, saving you money in the long run.
- Health Benefits: Fresh ginger is a powerhouse of antioxidants and anti-inflammatory compounds, perfect for adding to teas, meals, and remedies.
- A Rewarding Experience: Watching your ginger plant flourish from a humble rhizome into a lush green plant is incredibly satisfying.
Getting Started: Choosing Your Ginger Rhizome
The journey begins with selecting the right ginger. You’re not looking for a seed, but a ‘rhizome’ – an underground stem that looks like a knobby root. Here’s what to look for:
- Freshness is Key: Head to your local grocery store or a garden center. Choose a plump, firm piece of ginger that looks fresh, not shriveled or moldy.
- Look for ‘Eyes’: Just like potatoes, ginger rhizomes have small bumps or ‘eyes’. These are the growth points where shoots will emerge. The more eyes, the better your chances of successful sprouting.
- Organic is Best: Organic ginger is often preferred as it’s less likely to have been treated with growth inhibitors, which can hinder sprouting.
Step-by-Step Guide to Planting Ginger
Ready to get your hands dirty? Here’s how to plant your ginger for success:
1. Prepare Your Ginger Rhizome
If your ginger piece is large, you can cut it into smaller sections, each with at least one or two ‘eyes’. Let the cut pieces dry for a day or two to form a callus over the cut surface. This helps prevent rot once planted.
2. Choose the Right Spot or Container
Ginger thrives in warm, humid conditions and prefers partial shade. Direct, harsh sunlight can scorch its leaves.
- In the Ground: If you live in a warm climate (USDA Zones 7-10 or higher), you can plant ginger directly in your garden bed. Ensure the soil is well-draining.
- Containers: For cooler climates or if you have limited garden space, containers are an excellent choice. Opt for wide, shallow pots (at least 12-14 inches in diameter) rather than deep ones, as ginger grows horizontally.
3. Soil Matters
Ginger loves rich, loose, well-draining soil. A good potting mix amended with compost or well-rotted manure will provide the nutrients and drainage it needs.
4. Time to Plant!
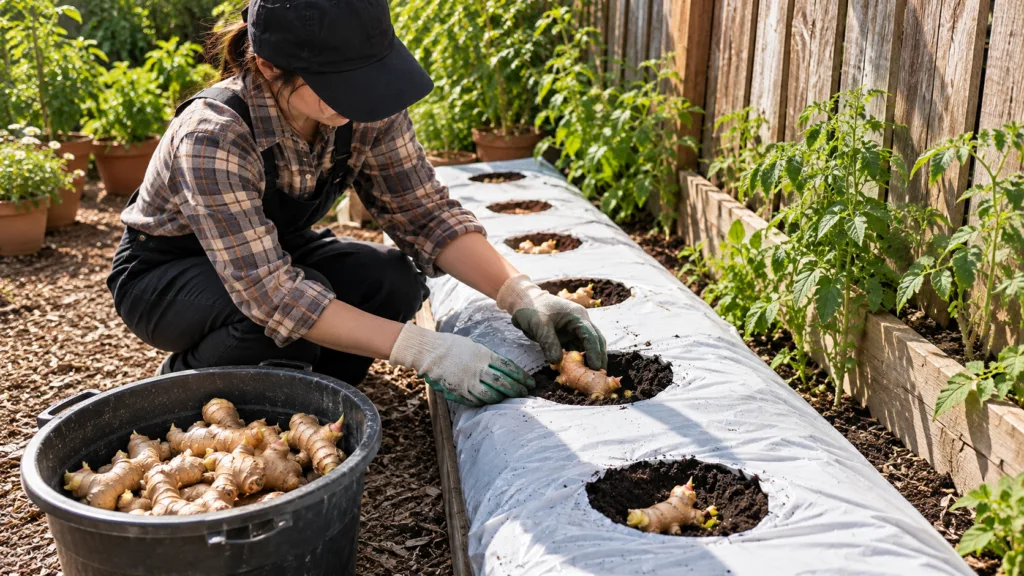
Plant your ginger rhizomes with the ‘eyes’ facing upwards, about 1-2 inches deep. If planting multiple pieces, space them 6-8 inches apart to allow for growth. Gently cover with soil and water thoroughly.
5. Watering and Sunlight
- Watering: Keep the soil consistently moist but not waterlogged. Overwatering can lead to rot. Reduce watering during dormant periods in cooler months.
- Sunlight: As mentioned, partial shade is ideal. If growing indoors, place it near a window that receives bright, indirect light.
Care and Maintenance for Thriving Ginger
- Fertilizing: Ginger is a heavy feeder. Fertilize every few weeks during the growing season with a balanced liquid fertilizer or compost tea.
- Humidity: Ginger loves humidity. Misting the leaves regularly or placing the pot on a pebble tray filled with water can help, especially indoors.
- Pest Control: Ginger is relatively pest-resistant, but keep an eye out for common garden pests. A strong spray of water or neem oil can help if an issue arises.
Harvesting Your Homegrown Spice
Ginger takes time to mature, typically 8-10 months. You’ll know it’s ready when the leaves start to yellow and die back. At this point, you can:
- Partial Harvest: Gently dig around the edges of the plant and snip off a piece of the rhizome, leaving the rest to continue growing.
- Full Harvest: Dig up the entire plant. Wash the rhizomes, let them air dry for a day or two, and store them in a cool, dry place. You can also replant some pieces for your next crop!
Embrace the Ginger Journey!
Growing your own ginger is a wonderful journey that connects you more deeply with nature’s bounty. It’s a testament to the simple joys of gardening and the incredible flavors that can come directly from your home. So, gather your supplies, follow these easy steps, and get ready to enjoy the pungent, spicy goodness of fresh, homegrown ginger. Happy gardening from Garden – L. Quyên!