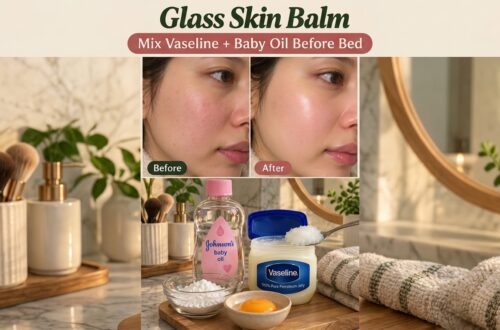
Unlock Radiant Skin with Nature’s Best Toner!
Are you craving that radiant, flawless skin glow that feels as good as it looks? While the beauty market is flooded with options, sometimes the best solutions are found right in your kitchen! Discover the incredible power of natural DIY toners. These easy-to-make recipes use simple, everyday ingredients to help tighten pores, brighten your complexion, and give you that youthful, healthy glow you’ve been dreaming of.
Why a Natural Toner is Your Skin’s Best Friend
Often overlooked, toner is a crucial step in any effective skincare routine. It helps to balance your skin’s pH after cleansing, remove any lingering impurities, and prep your skin to better absorb serums and moisturizers. While commercial toners can sometimes contain harsh chemicals that strip your skin, natural DIY toners harness the gentle yet powerful benefits of nature. They are formulated with ingredients that soothe, hydrate, and nourish your skin, providing a healthier alternative without the hefty price tag.
The Power of DIY: Simple Ingredients, Amazing Results
The beauty of making your own toner lies in its simplicity and customization. You know exactly what’s going into your product, avoiding artificial fragrances, dyes, and preservatives. This approach is not only budget-friendly but also empowers you to tailor solutions precisely to your skin’s needs, whether you’re targeting large pores, dullness, or uneven skin tone.

Your Go-To DIY Natural Toner Recipes
Ready to create your own radiant skin elixir? Here are a few simple, effective recipes to get you started:
1. Rose Water & Glycerin Toner (for Hydration and Soothing)
This gentle toner is perfect for all skin types, especially dry or sensitive skin. Rose water is renowned for its hydrating and anti-inflammatory properties, while glycerin acts as a humectant, drawing moisture into your skin.
- Ingredients:
- 1/2 cup pure rose water
- 1 teaspoon vegetable glycerin (food-grade)
- Optional: 2-3 drops of lavender essential oil for extra soothing
- Combine the rose water, glycerin, and optional essential oil in a clean spray bottle.
- Shake well to mix.
- Spray onto your face after cleansing, or apply with a cotton pad.
- Store in the refrigerator for a refreshing boost and to extend shelf life.
2. Green Tea & Witch Hazel Toner (for Anti-Aging and Pore Tightening)
Green tea is packed with antioxidants that fight free radicals and reduce signs of aging, while witch hazel is a natural astringent that helps tighten pores and control oil.
- Ingredients:
- 1/2 cup brewed green tea (cooled)
- 1/4 cup alcohol-free witch hazel
- Optional: 2-3 drops of tea tree oil (for acne-prone skin)
- Brew a strong cup of green tea and let it cool completely.
- Mix the cooled green tea with alcohol-free witch hazel and optional tea tree oil in a clean spray bottle.
- Shake gently before each use.
- Apply with a cotton pad after cleansing.
- Store in the refrigerator for up to two weeks.
3. Apple Cider Vinegar (ACV) Toner (for Balancing and Brightening)
ACV is a miracle worker for balancing skin pH, fighting bacteria, and gently exfoliating, leading to a brighter, clearer complexion. Always dilute it to avoid irritation.
- Ingredients:
- 1 tablespoon organic apple cider vinegar (with the mother)
- 1/2 cup distilled water
- Optional: A few drops of your favorite essential oil (like frankincense or geranium) for scent and added benefits
- In a clean spray bottle, mix the apple cider vinegar and distilled water.
- Add optional essential oils and shake well.
- After cleansing, apply with a cotton pad, avoiding the eye area.
- Start by using it every other day, gradually increasing frequency as your skin adjusts.
- Store at room temperature.
4. Clove Infusion Toner (for Clarifying and Anti-Blemish)
Inspired by the power of cloves, this toner can help clarify your skin thanks to cloves’ antiseptic and anti-inflammatory properties, potentially reducing blemishes and promoting a clearer complexion.
- Ingredients:
- 1/4 cup whole cloves
- 1 cup distilled water
- Bring the distilled water to a boil.
- Add the whole cloves, remove from heat, and let it steep until the water cools completely (at least 30 minutes, or even overnight for a stronger infusion).
- Strain the liquid to remove the cloves and pour the infused water into a clean spray bottle.
- Use after cleansing by spraying directly onto the face or applying with a cotton pad.
- Store in the refrigerator for up to one week.
Tips for Using Your Homemade Toner
- Patch Test First: Always apply a small amount of any new product to a discreet area of your skin (like behind your ear or on your inner arm) and wait 24 hours to check for any adverse reactions.
- Apply to Clean Skin: Toners work best on freshly cleansed skin, before applying serums or moisturizers.
- Gentle Application: You can either spray the toner directly onto your face and gently pat it in, or apply it with a cotton pad, sweeping gently across your face and neck.
- Storage Matters: Natural toners often lack preservatives, so store them in clean, airtight containers, preferably in the refrigerator, to prolong their freshness and efficacy. Discard if you notice any changes in smell or appearance.
Embrace Your Natural Glow!
Incorporating natural DIY toners into your daily routine is a simple yet impactful step towards achieving healthy, glowing skin. Not only will you save money, but you’ll also be nourishing your skin with pure, beneficial ingredients. Say goodbye to harsh chemicals and hello to a radiant complexion that truly reflects your natural beauty. Give these recipes a try and watch your skin transform!