One Mix, Many Solutions: Your Handy DIY Cleaning Paste
Tired of a cabinet full of different cleaning products, each designed for a specific mess? Imagine simplifying your cleaning routine with just one powerful, yet gentle, homemade solution. We’ve got a fantastic home hack for you: a multi-purpose creamy cleaning paste designed to tackle some of the most common light household messes, from stubborn wall marks to greasy stovetop buildup, cloudy glass, and even certain washable fabric stains. This budget-friendly DIY cleaning solution is about to become your new best friend!
Why This DIY Cleaning Paste Works Wonders
The magic behind this versatile cleaning paste lies in the synergistic blend of common household ingredients. Each component plays a crucial role:
- Baking Soda: A mild abrasive that gently scrubs away grime without scratching, it’s also a natural deodorizer.
- Liquid Dish Soap: An excellent degreaser that cuts through oil and food residue, helping to lift dirt from surfaces.
- White Vinegar: An acid that helps dissolve mineral deposits, soap scum, and some stains, while also disinfecting. When combined with baking soda, it creates a fizzing action that helps lift dirt.
- Toothpaste: Often contains mild abrasives and detergents that are surprisingly effective at polishing surfaces and removing scuffs.
- Fine Salt: Adds extra abrasive power for scrubbing tougher spots, making it easier to lift stuck-on dirt.
Gather Your Ingredients & Tools
This recipe makes enough for several small cleaning jobs, ensuring you’re ready for any unexpected mess.
Ingredients:
- 4 tablespoons baking soda
- 2 tablespoons liquid dish soap
- 2 tablespoons white vinegar
- 2 tablespoons warm water
- 1 teaspoon plain white toothpaste (gel toothpaste does not work as well)
- 1 teaspoon fine salt
Tools:
- 1 small mixing bowl
- 1 spoon or spatula for mixing
- 1 teal or blue microfiber cloth (for application)
- Clean water for rinsing
- A second clean, dry microfiber cloth (for polishing)
Making Your Multi-Purpose Cleaning Paste
Follow these simple steps to whip up your homemade cleaning marvel:
- Start with Baking Soda: Add the 4 tablespoons of baking soda to your small mixing bowl.
- Mix in Dish Soap: Pour in the 2 tablespoons of liquid dish soap and stir well until you achieve a thick, uniform paste.
- Add Toothpaste: Incorporate the 1 teaspoon of plain white toothpaste and stir again until it’s fully combined.
- Gradually Add Vinegar: Slowly pour in the 2 tablespoons of white vinegar. Add it gradually because the mixture may fizz slightly as the vinegar reacts with the baking soda. Stir continuously.
- Introduce Warm Water: Next, add the 2 tablespoons of warm water and stir until the texture becomes creamy and easy to spread.
- Finish with Salt: Finally, add the 1 teaspoon of fine salt and stir until it’s evenly combined throughout the paste.
Desired Consistency:
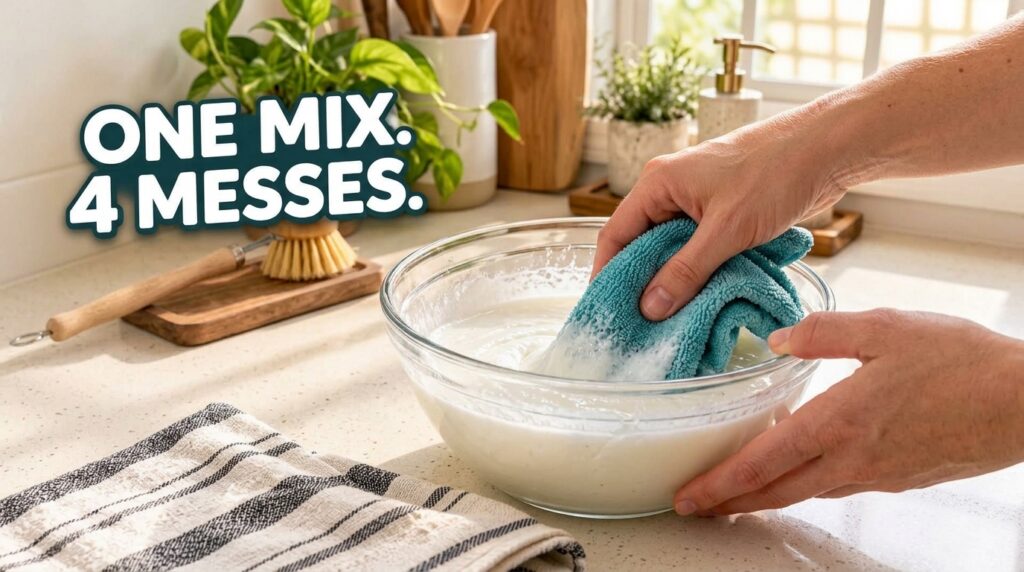
The finished mixture should be:
- Thick enough to cling to a cloth without dripping excessively.
- Creamy rather than watery.
- Easy to spread onto surfaces.
- Not overly foamy (a slight fizz during mixing is normal, but the final paste should be creamy).
If it feels too thick, add a few drops of warm water at a time until the desired consistency is reached. If it feels too thin, add a tiny bit more baking soda.
How to Use Your Multi-Purpose Paste Effectively
This creamy DIY cleaning paste is designed for light household cleaning jobs. Remember, the key is to use it gently and always test it on an inconspicuous area first, as different surfaces react differently.
- Test First: Before applying to a visible area, dab a small amount of paste on a hidden spot and gently rub. Check for any discoloration or damage after a few minutes.
- Application: Scoop a small amount of the paste onto your teal or blue microfiber cloth.
- Target Specific Messes:
- Wall Marks & Scuffs: Gently rub the paste onto the mark in a circular motion. Be careful not to scrub too hard, especially on painted walls.
- Greasy Stovetop Buildup: Apply to cooled stovetop surfaces. Let it sit for 5-10 minutes for tougher grease, then gently scrub.
- Cloudy Glass (e.g., shower doors, windows): Apply a thin layer and gently rub. This can help with hard water spots.
- Washable Fabric Stains (spot treatment): Apply a tiny amount directly to the stain (after testing!), gently work it in, and let it sit for a few minutes before rinsing.
- Rinse Thoroughly: After scrubbing, use a clean cloth dampened with plain water to wipe away all paste residue. Ensure no traces of the paste remain, especially on surfaces that come into contact with food.
- Dry & Polish: Use a second clean, dry microfiber cloth to dry the surface and buff it to a shine.
Important Safety & Usage Notes
- Always Test: This is crucial. Even natural ingredients can react differently with various materials.
- Avoid Delicate Surfaces: Do not use this paste on delicate wood, unsealed natural stone (like marble or granite), or electronics. The acidic vinegar and abrasive components can cause damage.
- Ventilation: While natural, ensure good ventilation when cleaning, especially in confined spaces.
- Storage: Store any leftover paste in an airtight container at room temperature for up to a week. If it dries out, add a few drops of warm water to revive it.
Conquer Your Cleaning Chores
Embrace the power of this simple yet effective DIY cleaning paste and transform your cleaning routine. You’ll save money, reduce chemical exposure, and enjoy a sparkling home with minimal effort. This home hack truly simplifies those everyday chores, making them effortlessly manageable.
What’s the one mess you’d love to conquer with a single solution? Let us know in the comments below! Happy cleaning!