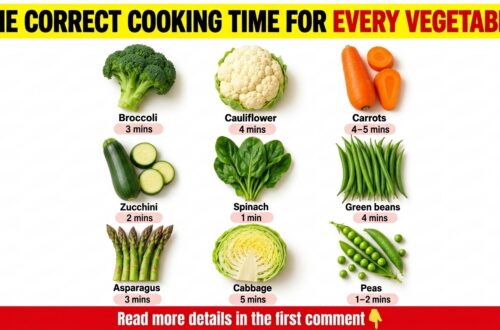
Do you ever wish your fresh vegetables could stay vibrant and tasty for longer, especially when you’re prepping meals in advance or saving garden harvests? Good news! There&rsquos a simple kitchen technique called blanching that can help you achieve just that. Blanching is a quick, easy way to preserve the color, texture, and nutritional value of your favorite produce.
In this guide, we’ll dive into the world of blanching, explaining why it’s such a valuable tool for any home cook. You’ll learn the proper steps to blanch various vegetables and get a handy chart with specific blanching times. Whether you’re looking to brighten your daily meals, extend the life of your produce, or get ready for freezing, this article will equip you with all the knowledge you need. Get ready to elevate your healthy cooking and meal prep!
Why Blanch Vegetables? More Than Just Cooking!
Blanching might seem like an extra step, but it offers several fantastic benefits that make it well worth the effort, especially if you’re planning to freeze vegetables or simply want to improve their culinary qualities.
- Preserves Color and Flavor: Blanching stops enzyme actions that cause vegetables to lose flavor, color, and nutrients over time. This means your green beans stay bright green, and your carrots retain their sweet crunch.
- Enhances Texture: It helps vegetables maintain a firm, crisp texture rather than becoming mushy or tough, especially after freezing and thawing.
- Cleanses and Reduces Microorganisms: A quick dip in boiling water helps clean the surface of vegetables and reduces surface bacteria, making them safer for storage.
- Slows Nutrient Loss: While some water-soluble vitamins can be lost, blanching inactivates enzymes that would otherwise break down nutrients during storage, ultimately helping to retain more vitamins and minerals.
- Prepares for Freezing: This is perhaps the most common reason to blanch. By stopping enzymatic activity, blanched vegetables can be frozen for months without significant loss of quality.
How to Blanch Vegetables: A Simple Step-by-Step Guide
Blanching is a straightforward process that anyone can master. Here’s how to do it effectively:
- Prepare Your Veggies: Wash your chosen vegetables thoroughly. Peel and chop them into uniform sizes. Smaller pieces will blanch more evenly.
- Boil Water: Fill a large pot with water and bring it to a rolling boil. For every pound of vegetables, use about one gallon of water. Add a pinch of salt to the water to enhance flavor and further brighten colors.
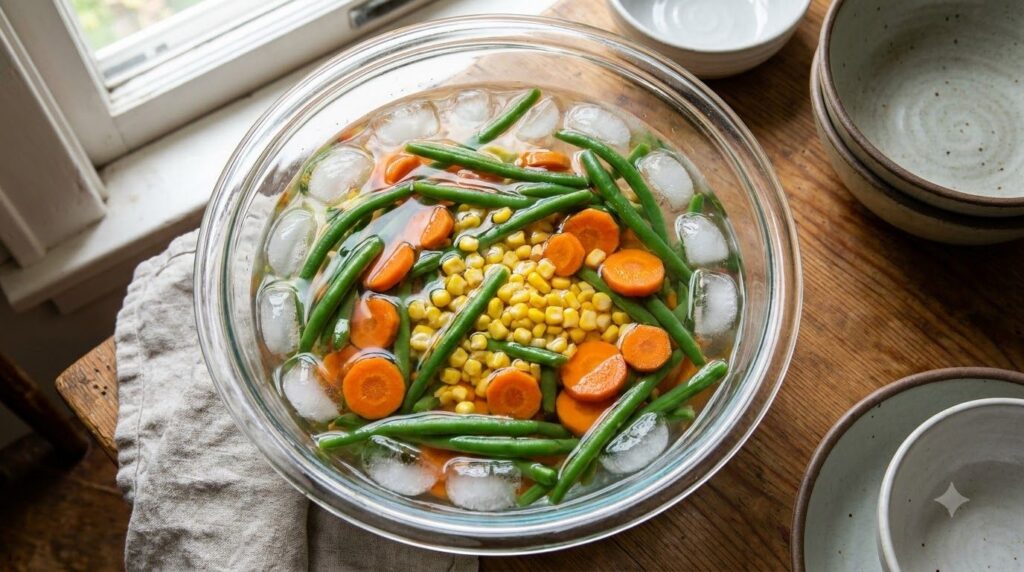
- Prepare an Ice Bath: While the water heats, prepare a large bowl of ice water — a generous amount of ice is key! This is crucial for stopping the cooking process quickly.
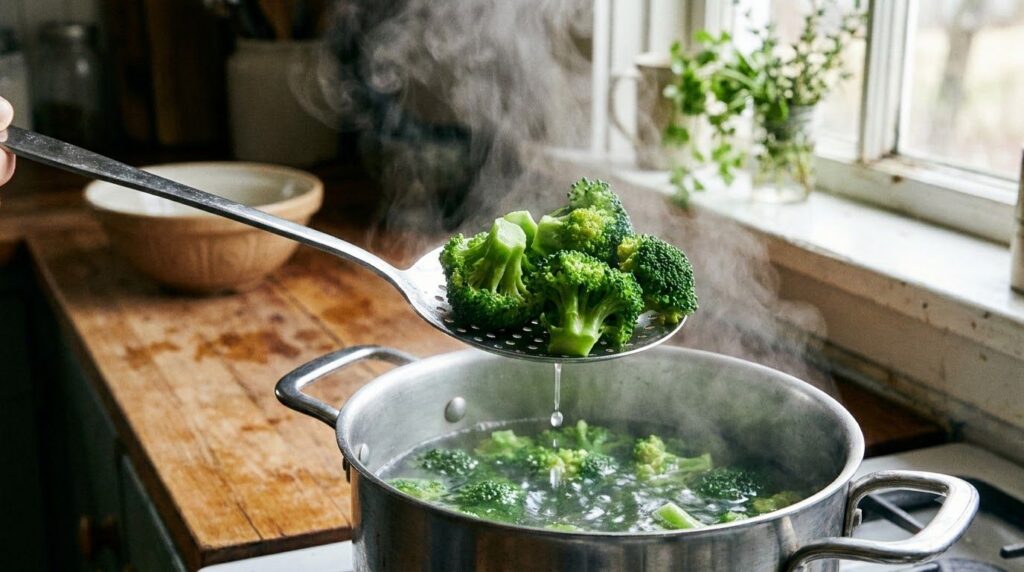
- Blanch the Vegetables: Add a small batch of vegetables to the boiling water. Do not overcrowd the pot, as this will lower the water temperature and lead to uneven blanching. The water should return to a boil within one minute.
- Time it Precisely: Cook the vegetables for the recommended time (see our chart below!). Use a timer, as even a minute too long can overcook them.
- Shock in Ice Water: Immediately remove the blanched vegetables with a slotted spoon or colander and plunge them into the ice bath. This “shocks” them, instantly stopping the cooking process and locking in that vibrant color and crisp texture.
- Drain and Dry: Once cooled completely (usually as long as they were blanched), remove the vegetables from the ice bath. Drain them thoroughly and pat them dry with a clean kitchen towel or use a salad spinner. Excess moisture can lead to freezer burn.
- Store or Freeze: Use immediately, store in the refrigerator for a few days, or pack into freezer-safe bags or containers for longer storage.
Blanching Times Chart: Your Go-To Guide
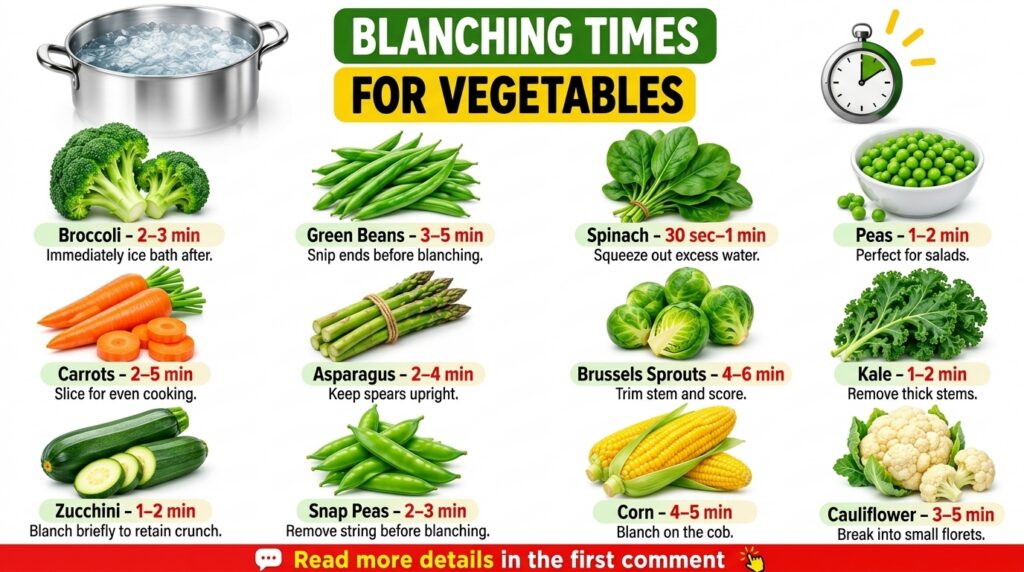
Different vegetables require different blanching times to achieve optimal results. Here’s a helpful chart with approximate values to guide you:
| Vegetable | Blanching Time (min) | Calories (per 100g) | Protein (g) | Carbs (g) | Fat (g) | Fiber (g) | Main Nutrients | Best Benefit |
|---|---|---|---|---|---|---|---|---|
| Asparagus (spears) | 2-4 | 20 | 2.2 | 3.9 | 0.1 | 2.1 | Vitamin K, Folate | Digestive Health |
| Broccoli (florets) | 3-4 | 34 | 2.8 | 6.6 | 0.4 | 2.6 | Vitamin C, Vitamin K | Immune Support |
| Brussels Sprouts | 3-5 | 43 | 3.4 | 8.9 | 0.3 | 3.8 | Vitamin C, Vitamin K | Anti-Inflammatory |
| Carrots (sliced) | 2-3 | 41 | 0.9 | 9.6 | 0.2 | 2.8 | Vitamin A (Beta-carotene) | Eye Health |
| Cauliflower (florets) | 3-4 | 25 | 1.9 | 5.0 | 0.3 | 2.0 | Vitamin C, Vitamin K | Antioxidant Rich |
| Corn (kernels/cob) | 5-8 | 86 | 3.3 | 19.0 | 1.2 | 2.7 | Fiber, Vitamin C | Energy Boost |
| Green Beans | 2-3 | 31 | 1.8 | 7.0 | 0.1 | 2.7 | Vitamin K, Vitamin C | Bone Health |
| Kale (chopped) | 2-3 | 35 | 3.3 | 4.4 | 0.5 | 4.1 | Vitamin K, Vitamin A, Vitamin C | Superfood Powerhouse |
| Peas (green) | 1.5-2 | 81 | 5.4 | 14.5 | 0.4 | 5.1 | Fiber, Vitamin K | Heart Health |
| Spinach (leaves) | 1-1.5 | 23 | 2.9 | 3.6 | 0.4 | 2.2 | Iron, Vitamin K | Energy & Blood Health |
Note: These times are approximate and can vary slightly based on the size and maturity of the vegetables. Always aim for “al dente” – tender-crisp.
Practical Tips for Perfect Blanching Every Time
To get the best results from your blanching efforts, keep these handy tips in mind:
- Don’t Overcrowd the Pot: Blanch vegetables in small batches to ensure the water temperature remains high and they cook evenly.
- Use Plenty of Ice: Your ice bath should be at least half ice. If it melts too quickly, add more.
- Dry Thoroughly: Patting vegetables completely dry before freezing prevents ice crystals and freezer burn.
- Label and Date: When freezing, always label your containers or bags with the vegetable name and date. Most blanched vegetables can be stored for 8-12 months in the freezer.
- Consider Steam Blanching: For delicate vegetables like spinach or greens, or if you want to minimize nutrient loss, steam blanching is an alternative. Place veggies in a steamer basket over boiling water, cover, and steam for slightly longer times than water blanching.
- Re-use Water: You can reuse the blanching water for several batches of the same vegetable, or even for making soup stock, but change it if it becomes cloudy or starchy.
Common Mistakes to Avoid
Even though blanching is simple, a few common errors can compromise your results:
- Under-Blanching: If vegetables aren’t blanched long enough, the enzymes aren’t fully inactivated, and they may still degrade during freezing.
- Over-Blanching: Too long in hot water can lead to mushy textures, faded colors, and significant nutrient loss. Stick to the recommended times!
- Skipping the Ice Bath: Failing to immediately plunge vegetables into an ice bath means they will continue to cook from residual heat, leading to soft, dull produce.
- Not Drying Vegetables: Freezing wet vegetables can lead to freezer burn and a less desirable texture once thawed.
FAQs About Blanching Vegetables
Q: Why is blanching important before freezing?
A: Blanching stops enzyme actions that cause loss of flavor, color, and texture during frozen storage. It also cleanses the surface of dirt and microorganisms, brightens color, and helps slow the loss of vitamins.
Q: Can I blanch all vegetables?
A: Most vegetables benefit from blanching before freezing. Exceptions might include certain delicate herbs or vegetables with a high water content that are typically enjoyed raw, like lettuce or cucumbers, which don’t freeze well regardless.
Q: What if I don’t have ice for an ice bath?
A: An ice bath is highly recommended for best results. If you absolutely don’t have ice, you can use very cold tap water, but you’ll need to change the water frequently to keep it cold and ensure it effectively stops the cooking process.
Q: How long can blanched vegetables stay in the refrigerator?
A: Blanched vegetables can typically be stored in an airtight container in the refrigerator for 2-3 days before they should be consumed or frozen.
Q: Does blanching remove nutrients from vegetables?
A: Some water-soluble vitamins (like Vitamin C and some B vitamins) can leach into the blanching water. However, blanching also prevents enzymatic degradation of nutrients during storage, so overall, it helps preserve nutrient quality, especially for long-term freezing.
Q: Can I blanch different vegetables together?
A: It’s best to blanch different vegetables separately, especially if they have different cooking times. Mixing them can lead to some vegetables being overcooked and others undercooked.
Conclusion
Blanching is a simple yet powerful technique that can transform how you enjoy and preserve your vegetables. By taking a few extra minutes, you can lock in vibrant colors, satisfying textures, and essential nutrients, making your healthy meals even more appealing. Whether you’re stocking your freezer or simply preparing fresh produce for a special dish, mastering blanching will undoubtedly enhance your culinary skills.
Ready to put these tips into practice? Start with your favorite vegetable and see the difference blanching makes! Explore more healthy food content on our website for additional tips and delicious recipes.
This content is for educational purposes only and should not be considered medical advice. Consult a qualified healthcare professional for personalized dietary recommendations.