Welcome back, garden friends! As the days grow longer and the promise of spring fills the air, it’s time to start thinking about our bountiful harvests. For many gardeners, few things are as rewarding as digging up a fresh batch of homegrown potatoes. But before you can enjoy those delicious spuds, there’s a simple yet crucial step that can significantly boost your success: chitting seed potatoes.
Chitting, sometimes called ‘sprouting,’ is a process that encourages your seed potatoes to develop strong, healthy sprouts before planting. This gives them a head start, leading to earlier harvests and potentially higher yields. If you’ve ever struggled with getting your potato plants off to a robust start, this method is a game-changer!
What Exactly is Chitting Seed Potatoes?
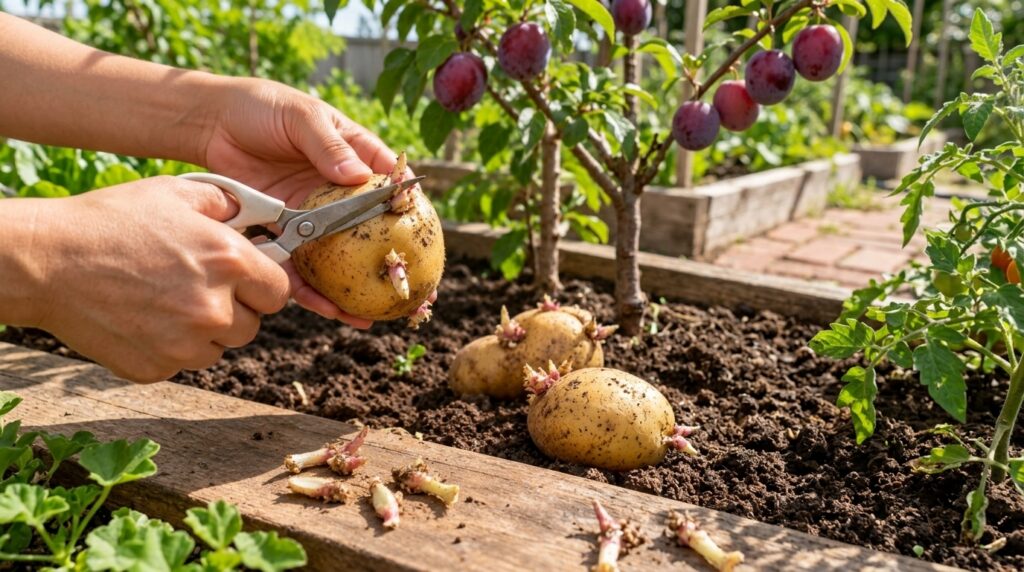
Chitting is essentially pre-sprouting your seed potatoes indoors before planting them in your garden. Instead of planting a dormant potato, you plant one that has already begun to grow. This process helps the potato establish itself more quickly once it’s in the ground, as it doesn’t have to expend energy initiating growth.
Why Bother with Chitting? The Benefits
- Earlier Harvests: Chitted potatoes get a head start, meaning you can enjoy your harvest weeks earlier than unchitted ones.
- Increased Yields: Stronger, earlier growth often translates to more potatoes per plant.
- Stronger Plants: The sprouts developed during chitting are generally more robust than those that might emerge directly in cold soil.
- Better Resistance: A strong start can help plants better withstand common pests and diseases once they’re planted outside.
Choosing the Right Seed Potatoes
Before you begin the chitting process, selecting high-quality seed potatoes is vital. Always purchase certified disease-free seed potatoes from a reputable supplier. Avoid using grocery store potatoes, as they may be treated with sprout inhibitors or carry diseases that could harm your garden.
Factors to Consider:
- Variety: Choose a potato variety that is well-suited to your local climate and growing conditions.
- Size: Medium-sized seed potatoes (about the size of a hen’s egg) are ideal. Larger ones can be cut into pieces, ensuring each piece has at least two ‘eyes’ or sprouts.
- Health: Look for firm, healthy potatoes free from soft spots, mold, or excessive blemishes.
Simple Method for Chitting Seed Potatoes Effectively
Ready to give your potatoes the best possible start? Here’s how to chit them successfully:
Step 1: Prepare Your Space
Find a cool, bright, frost-free location indoors. A shed, garage, spare room, or even a windowsill can work. The ideal temperature is between 45-55°F (7-13°C). Avoid direct sunlight, which can cause sprouts to become leggy and weak.
Step 2: Arrange Your Seed Potatoes
Place your seed potatoes in a single layer, ‘eye-side up.’ The ‘eyes’ are the small indentations from which sprouts will emerge. You can use old egg cartons, shallow trays, or even spread them out on newspaper.
Step 3: Provide Indirect Light
Expose the potatoes to indirect light. This encourages the development of short, sturdy, green or purple sprouts (known as ‘chits’) rather than long, pale, brittle ones you’d see if they sprouted in darkness.
Step 4: Monitor and Wait
Over the next few weeks, you’ll notice small sprouts forming. Aim for sprouts that are about 1/2 to 1 inch long (1-2.5 cm) and look robust. This process usually takes 2-4 weeks, depending on the potato variety and conditions.
Step 5: Prepare for Planting
Once your seed potatoes have developed good sprouts, they are ready for planting! If you need to cut larger potatoes, do so a day or two before planting to allow the cut surfaces to ‘heal’ or form a protective skin. This reduces the risk of rot in the soil.
Planting Chitted Potatoes for Success
When the soil is workable and the danger of hard frost has passed (typically late spring), it’s time to transfer your chitted potatoes to the garden bed. Plant them about 4-6 inches deep, with the sprouts pointing upwards, and space them according to the variety’s recommendations.
By taking this simple extra step, you’re setting yourself up for a truly rewarding potato harvest. Happy gardening!