Sparkling Showers Made Easy: The Power of Vinegar and Salt for a Spotless Clean
Tired of scrubbing endless soap scum and hard water stains from your shower? You’re not alone! The battle against bathroom grime can feel like a never-ending chore, but what if we told you that two common household ingredients could be your secret weapon for a sparkling, spotless shower? Forget harsh chemicals and expensive cleaners; it’s time to embrace the simple yet powerful duo of white vinegar and salt.
Why This Dynamic Duo Works Wonders
The magic behind this DIY shower cleaner lies in the combined forces of white vinegar and common table salt. Each ingredient brings unique properties that make them incredibly effective against typical bathroom buildup.
White Vinegar: The Acidic Powerhouse
- Acidity: White vinegar is an acetic acid solution, making it incredibly effective at dissolving mineral deposits like hard water stains, calcium buildup, and rust. It also breaks down the fatty acids in soap scum.
- Disinfectant: While not a registered disinfectant, vinegar’s acidic nature can inhibit the growth of certain molds, mildews, and bacteria, contributing to a cleaner, healthier bathroom environment.
- Odor Neutralizer: It naturally eliminates unpleasant odors, leaving your bathroom smelling fresh without chemical fragrances.
Salt: The Gentle Abrasive
- Scouring Power: Fine-grain salt acts as a mild abrasive, providing the necessary friction to scrub away tough grime, dried soap scum, and other residues without scratching most shower surfaces.
- Thickener: When mixed with vinegar, salt can help create a thicker paste, allowing the cleaner to cling better to vertical surfaces, extending its contact time and cleaning power.
Your Simple 2-Ingredient Shower Cleaner Recipe
This recipe is incredibly straightforward and uses ingredients you likely already have at home.
What You’ll Need:
- 1 cup white vinegar
- 1/2 cup table salt (fine-grain works best)
- Empty spray bottle (optional, for solution application)
- Mixing bowl
- Sponge or scrub brush
- Gloves (recommended for sensitive skin)
Step-by-Step Instructions:
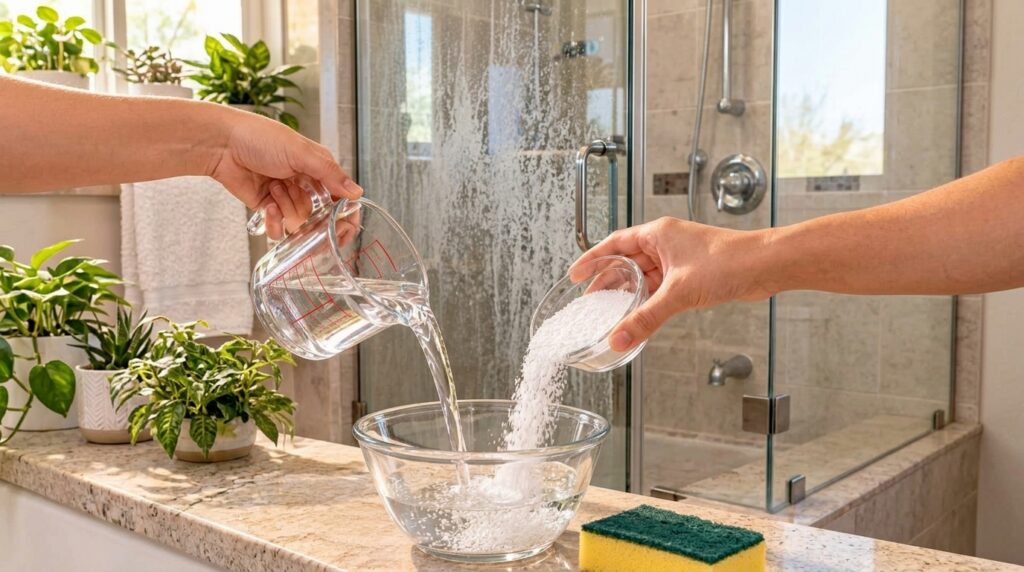
- Combine Ingredients: In your mixing bowl, pour in 1 cup of white vinegar. Gradually add 1/2 cup of table salt, stirring constantly. You can adjust the ratio slightly to achieve a consistency that works for you – a thinner solution for spraying or a thicker paste for scrubbing.
- Prepare the Shower: For best results, it’s helpful to lightly wet down your shower surfaces with warm water first. This helps loosen some of the surface grime and prepares it for the cleaner.
- Apply the Cleaner:
- For a solution: If your mixture is liquid enough, pour it into an empty spray bottle. Spray generously over all affected areas of your shower, including tiles, grout, glass doors, and fixtures.
- For a paste: If you’ve created a thicker paste, apply it directly to a damp sponge or scrub brush and spread it evenly over the surfaces.
- Let it Dwell: Allow the vinegar and salt mixture to sit on the surfaces for at least 15-30 minutes. For very stubborn stains, you can let it sit for up to an hour. The longer it dwells, the more time the vinegar has to break down the grime.
- Scrub Away: Don your gloves and use a sponge or scrub brush to vigorously scrub the treated surfaces. You’ll notice the salt providing gentle abrasion, helping to lift away the loosened dirt and scum.
- Rinse Thoroughly: Once scrubbing is complete, rinse all surfaces thoroughly with warm water. Ensure no residue is left behind. You’ll be amazed at the shine!
- Wipe Dry (Optional): For an extra streak-free finish, particularly on glass doors, you can quickly wipe the surfaces dry with a clean microfiber cloth or squeegee.
Tips for Best Results & Safety Notes
- Ventilation is Key: Always ensure your bathroom is well-ventilated when cleaning, especially when using vinegar, as its scent can be strong. Open a window or turn on the exhaust fan.
- Patch Test: While vinegar and salt are generally safe for most bathroom surfaces, it’s always wise to do a patch test in an inconspicuous area first, especially on natural stone or antique fixtures, to ensure no discoloration or damage occurs.
- Regular Maintenance: For easier cleaning in the future, consider using a squeegee on your shower door after every use and a quick spray-and-rinse with a diluted vinegar solution a few times a week.
- Avoid Mixing: Never mix vinegar with bleach or products containing bleach, as this can create dangerous chlorine gas. Stick to this simple recipe!
Say Goodbye to Grime, Hello to Shine!
This simple, homemade cleaning solution proves that you don’t need harsh chemicals to achieve a sparkling clean shower. With just white vinegar and salt, you can effectively tackle soap scum, hard water stains, and grime, saving money and opting for a more eco-friendly approach. Give this hack a try and reclaim the shine in your bathroom!
What’s your go-to DIY cleaning hack? Share your wisdom and tips in the comments below – we’d love to hear them!