Hey, beauty besties! Are you tired of complicated skincare routines and expensive products that promise the world but deliver little? What if we told you that sometimes, the simplest solutions are the most effective? Today, we’re diving into a little secret that can bring a moment of clarity to your skin: a DIY Hydrating Water Toner!
It’s all about getting back to basics and giving your skin what it truly craves: pure, refreshing hydration. Imagine a product that’s gentle, effective, incredibly affordable, and easy to make right in your kitchen. Sounds like a dream, right? Well, it’s not! Let’s get started on your journey to refreshed, radiant skin.
Why Your Skin Craves a Hydrating Water Toner
Toners are often overlooked, but they play a crucial role in your skincare routine. They help to balance your skin’s pH, remove any lingering impurities after cleansing, and prepare your skin to better absorb subsequent serums and moisturizers. A hydrating water toner takes this a step further by infusing your skin with essential moisture, making it feel supple and look plump.
The Gentle Power of Hydration
Dehydrated skin can look dull, feel tight, and even emphasize fine lines. A hydrating toner delivers a quick boost of moisture, instantly refreshing your complexion. It’s like a tall drink of water for your skin, waking it up and leaving it feeling soft and smooth.
Balancing Act for Happy Skin
After cleansing, your skin’s natural pH can get a little thrown off. A toner helps to restore this balance, which is essential for maintaining a healthy skin barrier. A balanced skin barrier is your first line of defense against environmental stressors and can help prevent issues like dryness, oiliness, and breakouts.
Your Easy-Peasy DIY Hydrating Water Toner Recipe
Ready to whip up your own skin-loving elixir? This recipe is super simple and uses ingredients you might already have!
What You’ll Need: Simple Ingredients
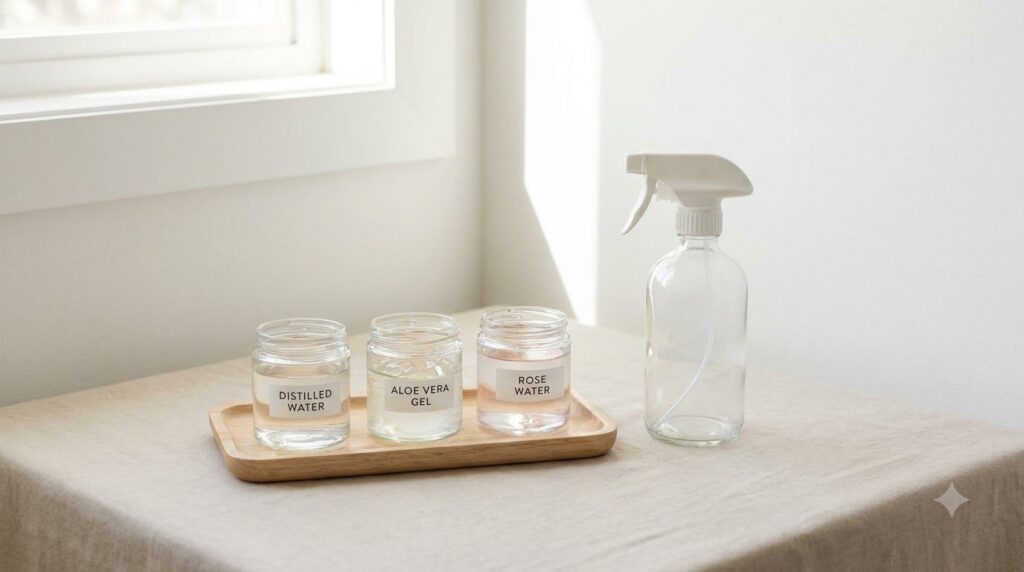
- 1/2 cup distilled water (or filtered water that has been boiled and cooled)
- 1 tablespoon pure aloe vera gel (ensure it’s 100% pure, no added fragrances or alcohol)
- 5-10 drops of rose water (optional, for added soothing and a lovely scent)
- A clean spray bottle or airtight container
Step-by-Step Guide: Crafting Your Toner
- Prepare Your Water: If using tap water, boil it for 5 minutes and let it cool completely. Distilled water is preferred for longevity and purity.
- Combine Ingredients: In your clean spray bottle or container, pour in the distilled (or cooled boiled) water.
- Add Aloe Vera: Add the tablespoon of pure aloe vera gel. Aloe vera is a superstar for soothing and hydrating skin!
- Introduce Rose Water (Optional): If you’re using rose water, add 5-10 drops. It adds a beautiful natural fragrance and extra calming benefits.
- Shake It Up: Secure the lid and shake well to ensure all ingredients are thoroughly mixed.
How to Incorporate Your Water Toner into Your Routine
Using your new DIY toner is as easy as making it! Here’s how to get the most out of it:
- After Cleansing: After washing your face, gently pat it dry.
- Spray or Apply: If using a spray bottle, mist your face 2-3 times, holding it about 6-8 inches away. If using a regular container, pour a small amount onto a cotton pad and gently swipe it across your face and neck.
- Pat In: Lightly pat your skin with your fingertips to help the toner absorb.
- Follow Up: While your skin is still slightly damp from the toner, apply your favorite serum, moisturizer, and any other skincare treatments. This helps lock in the hydration and allows your products to penetrate better.
- Throughout the Day: You can also use this toner as a refreshing mist whenever your skin feels a bit dull or tired throughout the day! It’s perfect for a mid-afternoon pick-me-up.
Pro Tips for Maximum Glow
- Storage: Store your DIY toner in the refrigerator. This keeps it fresh for longer (up to 1-2 weeks) and provides an extra cooling sensation when applied, which feels amazing!
- Patch Test: Always do a patch test on a small area of your skin (like behind your ear or on your inner arm) before applying any new DIY product to your entire face, especially if you have sensitive skin.
- Consistency is Key: For the best results, incorporate this hydrating toner into your daily morning and night routine.
- Adjust to Your Skin: If you find pure aloe vera gel too sticky, you can slightly reduce the amount. Listen to what your skin tells you!
Embrace the Clarity, Embrace Your Radiance
There you have it, beauty bestie! A simple, natural, and incredibly effective way to bring a moment of clarity and hydration to your skin. This DIY Hydrating Water Toner is proof that you don’t need fancy ingredients or complicated steps to achieve a healthy, glowing complexion. It’s all about gentle care and consistent hydration.
Give it a try and let your natural radiance shine through! What are your favorite DIY skincare hacks? Share your tips with us in the comments below!