Hey, beauty besties! Are you tired of wrinkles, large pores, and dark spots making you feel less than radiant? What if we told you the secret to glowing, youthful skin might be hiding in your kitchen, not your expensive beauty cabinet? That’s right, we’re talking about okra!
Okra, also known as ‘bhindi,’ isn’t just a delicious vegetable for your meals; its silky mucilage is a skincare superstar! It’s packed with hydrating sugars and powerful antioxidants that work wonders to calm, plump, and smooth your skin. Imagine a natural way to repair your skin barrier, boost that youthful bounce, and brighten dull, uneven tones. Sounds amazing, right?
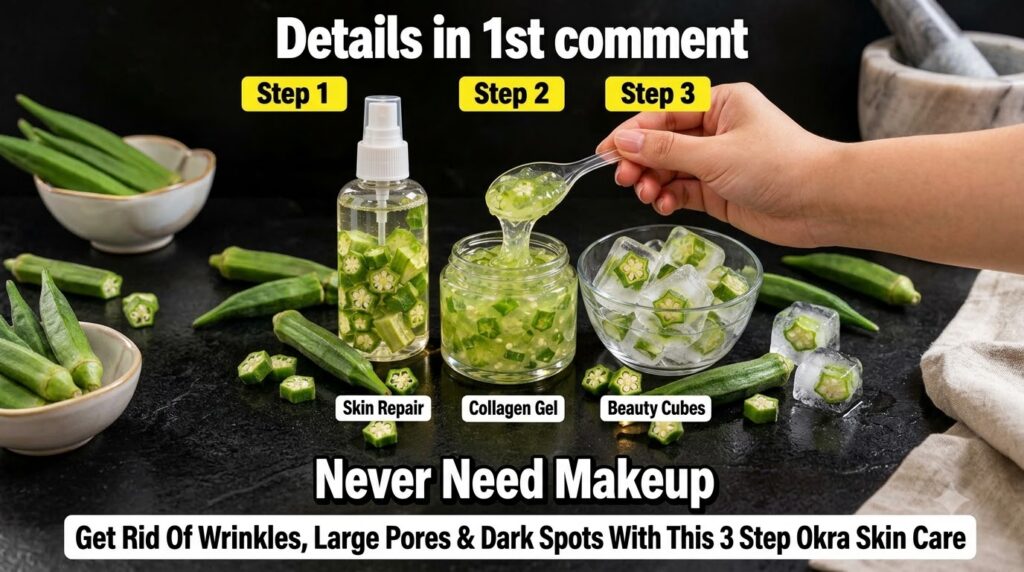
Today, we’re diving into a simple yet incredibly effective 3-step okra skincare routine that you can easily make at home. Each step uses readily available ingredients and layers beautifully for daily use, helping you achieve that ‘never need makeup’ glow!
Why Okra is Your Skin’s New Best Friend
Okra’s incredible benefits come from its unique composition. The mucilage (that slimy texture you get when you cut it) is rich in polysaccharides, which are excellent humectants, meaning they draw moisture to your skin, keeping it hydrated and plump. Beyond hydration, okra offers:
- Anti-Aging Power: Its antioxidants fight free radicals, which contribute to wrinkles and fine lines. Regular use can help diminish the appearance of aging.
- Pore Minimizing: Okra helps to tighten and firm the skin, making pores appear smaller and less noticeable.
- Brightening & Even Tone: Its soothing properties and vitamins can help reduce inflammation and hyperpigmentation, leading to a more even and radiant complexion.
- Skin Barrier Repair: The gentle nutrients in okra support a healthy skin barrier, protecting against environmental damage.
Your 3-Step Okra Skincare Routine
Let’s get started on your journey to beautiful, natural skin!
Step 1: Okra & Green Tea Skin Repair Toner
This toner is your first line of defense, soothing and preparing your skin for the next steps. It’s packed with ingredients known for their healing and toning properties.
Ingredients:
- 4–5 fresh okra pods, sliced
- ½ cup strong green tea, cooled
- ½ cup rice water (plain or lightly fermented 12–24 hours)
- 2 tbsp aloe vera juice (or 1 tbsp gel whisked into water)
- 2 tbsp alcohol-free witch hazel
- 1 tsp vegetable glycerin
- 2 tbsp rose water (optional, for extra soothing)
Procedure:
- Extract Okra Liquid: Add the sliced okra to 1 cup of hot (not boiling) water. Cover and steep for 20–30 minutes until the liquid becomes slightly viscous. Strain the liquid, pressing the okra gently to extract all the beneficial mucilage. Let this okra liquid cool completely. You should have about ½ cup of okra liquid.
- Blend: In a clean glass jar or spray bottle, combine the ½ cup cooled okra liquid with the cooled green tea, rice water, aloe vera juice, witch hazel, vegetable glycerin, and rose water (if you’re using it).
- Shake Well: Secure the lid and shake vigorously to ensure all ingredients are well combined.
- Bottle & Chill: Transfer the toner to a clean, sterilized spray or flip-cap bottle. Store it in the refrigerator. Use this toner within 7-10 days for optimal freshness and benefits.
How to Use:
After cleansing your face, spritz or gently pat the toner onto your skin. Use it both morning and night to refresh and prepare your skin.
Step 2: Okra Collagen Boosting Gel
This gel is your secret weapon for plumping up your skin, reducing the appearance of wrinkles, and giving you that bouncy, youthful look. It’s like a natural collagen boost!
Ingredients:
- ½ cup okra mucilage (extracted from about 8-10 okra pods)
- 2 tbsp pure aloe vera gel
- 1 tsp vitamin E oil (optional, for extra nourishment)
- 5 drops of lavender or frankincense essential oil (optional, known for skin benefits, but always do a patch test first!)
Procedure:
- Extract Okra Mucilage: Slice 8-10 okra pods and simmer them in 1 cup of water for 10-15 minutes until they are very soft and the liquid is highly viscous. Strain the liquid, pressing the okra firmly to extract as much gel as possible. Let the okra mucilage cool completely.
- Combine: In a clean bowl, gently mix the cooled okra mucilage with the pure aloe vera gel until smooth.
- Add Extras: If desired, stir in the vitamin E oil and your chosen essential oils.
- Store: Transfer the gel to a clean, airtight glass jar. Keep it refrigerated. This gel is best used within 5-7 days.
How to Use:
Apply a pea-sized amount of the gel onto your face and neck after toning. Gently massage it into your skin until absorbed. Use morning and night for best results.
Step 3: Okra Beauty Cubes
These icy cubes are fantastic for de-puffing, tightening pores, and giving your skin an invigorating glow. It’s a refreshing way to complete your routine!
Ingredients:
- 1 cup okra water (extracted from about 6-8 okra pods)
- ¼ cup rose water
- 2 tbsp cucumber juice (optional, for extra soothing and refreshment)
Procedure:
- Prepare Okra Water: Slice 6-8 okra pods and simmer them in 1.5 cups of water until they are soft and the water becomes slightly viscous. Strain the liquid, ensuring it’s completely cooled.
- Combine: Mix the cooled okra water with the rose water and cucumber juice (if using).
- Freeze: Pour the mixture into clean ice cube trays.
- Store: Freeze until the cubes are solid. Once frozen, you can transfer them to a freezer-safe bag or container for easy storage.
How to Use:
After applying your okra gel, gently rub an okra beauty cube over your face for 30-60 seconds. Wrap it in a thin cloth if the direct cold is too intense. Pat your face dry. Use this step once a day, preferably in the morning to awaken your skin.
Tips for Best Results
- Consistency is Key: Like any skincare routine, regular use is crucial to see noticeable improvements.
- Patch Test: Always do a patch test on a small area of your skin before applying any new DIY product to your entire face, especially if you have sensitive skin or are using essential oils.
- Hygiene Matters: Always use clean, sterilized containers and utensils when making your DIY products to prevent contamination.
- Listen to Your Skin: If you experience any irritation, discontinue use immediately.
- Stay Hydrated: Complement your external routine with plenty of water intake and a healthy diet for truly glowing skin from within.
There you have it, a complete 3-step okra skincare routine that’s natural, affordable, and incredibly effective for targeting wrinkles, large pores, and dark spots! Give it a try and get ready to fall in love with your radiant, youthful complexion. Share your experiences in the comments below, we’d love to hear how it works for you!