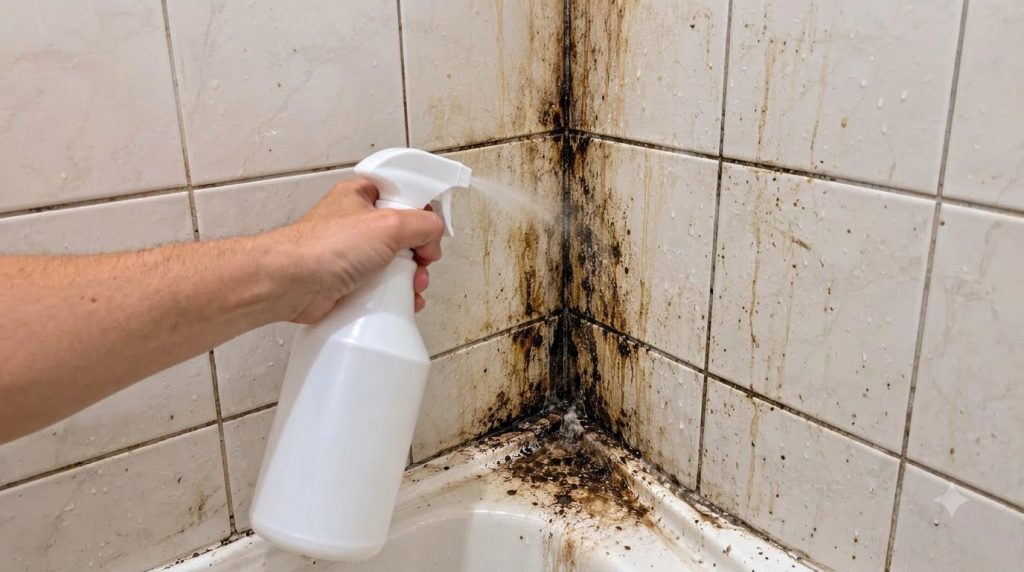
Tired of scrubbing endlessly, only to see stubborn bathroom grime laugh in your face? We’ve all been there. That unsightly build-up of soap scum, mildew, and general bathroom gunk can make even the cleanest home feel a little less fresh. It’s a common problem that many homeowners face, and often, the go-to solutions involve harsh chemicals that can be tough on your lungs and the environment.
But what if there was a simpler, more natural way to tackle that persistent grime? A method that uses ingredients you probably already have in your pantry, making your bathroom sparkle without the overwhelming fumes or the hefty price tag of specialized cleaners? This guide is for anyone who wants to reclaim their bathroom’s shine, from busy parents looking for quick, effective solutions to eco-conscious individuals seeking greener alternatives.
In this comprehensive guide, we’re going to share an easy-to-follow DIY cleaning solution designed to conquer even the toughest bathroom grime. You’ll learn how to mix powerful, natural ingredients to create a potent cleaner, apply it effectively, and maintain a sparkling bathroom with minimal effort. Say goodbye to endless scrubbing and hello to a cleaner, fresher bathroom you’ll love.
Get ready to transform your cleaning routine and discover a secret weapon against bathroom grunge that’s both effective and gentle on your home and the planet. Let’s dive in and make that bathroom sparkle!
Why You’ll Love This Guide
- Easy to Prepare: Simple steps with common household ingredients.
- Uses Common Ingredients: No need for special trips to specialty stores.
- Budget-Friendly: Save money on expensive commercial cleaners.
- Beginner-Friendly: Clear, detailed instructions for everyone.
- Eco-Friendly: Reduce your chemical footprint with natural alternatives.
- Effective on Tough Grime: Designed to cut through soap scum, mildew, and hard water stains.
- Safer for Your Home: Avoid harsh fumes and chemicals.
- Versatile: Can be used on various bathroom surfaces.
Ingredients & Materials
Gathering the right ingredients is the first step to creating your grime-fighting solution. These are all common items, making this recipe incredibly accessible.
- 1/2 cup Baking Soda: A natural abrasive and deodorizer, fantastic for scrubbing away grime.
- 1/4 cup White Vinegar: An acidic powerhouse that dissolves soap scum, hard water stains, and mildew.
- 1 tablespoon Liquid Dish Soap: Helps cut through grease and oil, making the solution adhere better to vertical surfaces.
- 10-15 drops Essential Oil (optional): For a pleasant scent. Tea tree oil or lemon oil are great choices for their natural antimicrobial properties.
- Warm Water: To dilute and activate the ingredients.
Equipment Needed
Having the right tools will make your cleaning task much easier and more efficient.
- Empty Spray Bottle (16-24 oz): For easy application of your cleaning solution.
- Small Mixing Bowl: To combine the dry ingredients.
- Measuring Cups and Spoons: For accurate quantities.
- Scrub Brush or Old Toothbrush: For tackling tough grout lines and corners.
- Microfiber Cloths or Sponges: For wiping surfaces clean.
- Rubber Gloves: To protect your hands during cleaning.
Step-by-Step Instructions: Conquering Bathroom Grime
Follow these steps to create and apply your powerful DIY bathroom cleaner. Remember, consistency and patience are key!
Step 1: Prepare Your Work Area (Estimated Time: 2 minutes)
Before you begin, ensure your bathroom is well-ventilated. Open windows or turn on the exhaust fan. Clear any items from the surfaces you plan to clean, such as shampoo bottles, soap dishes, and decorative items. This step matters because it gives you unobstructed access to the grime and helps dissipate any lingering odors from the cleaning process. You’ll have a clear canvas to work on.
Step 2: Mix the Dry Ingredients (Estimated Time: 1 minute)
In a small mixing bowl, combine 1/2 cup of baking soda. Baking soda acts as a gentle abrasive that helps lift stubborn stains and provides scrubbing power without scratching surfaces. The expected result is a loose, powdery substance.
Step 3: Create the Cleaning Paste (Estimated Time: 2 minutes)
Slowly add 1/4 cup of white vinegar to the baking soda in the bowl. Be prepared for a fizzing reaction – this is natural and means the ingredients are activating! The vinegar’s acidity reacts with the baking soda’s alkalinity, creating carbon dioxide bubbles that help lift dirt and grime. Stir the mixture until it forms a thick paste. If it’s too thick, add a tiny bit more vinegar; if too runny, add a little more baking soda. This paste is your concentrated grime fighter.
Step 4: Add Dish Soap and Essential Oils (Estimated Time: 1 minute)
Now, stir in 1 tablespoon of liquid dish soap. Dish soap is a surfactant, meaning it helps to break down grease and allows the solution to spread more easily and cling to vertical surfaces. If desired, add 10-15 drops of your chosen essential oil for a fresh scent. Mix thoroughly until all ingredients are well combined. The expected result is a slightly thicker, fragrant paste.
Step 5: Apply the Paste to Grimy Areas (Estimated Time: 5-10 minutes)
Using a spoon or your gloved hand, apply a generous layer of the cleaning paste directly onto the heavily soiled areas of your bathroom. Focus on grout lines, corners, soap scum buildup on shower walls, and around the base of toilets. The ‘why it matters’ here is crucial: applying the paste directly allows the active ingredients to penetrate and break down the grime effectively. Ensure good coverage. The expected result is that the grime is fully covered by the paste.
Step 6: Let It Sit and Work Its Magic (Estimated Time: 30-60 minutes)
This is where patience pays off! Allow the paste to sit on the grime for at least 30 minutes, or up to an hour for very stubborn stains. During this time, the vinegar and baking soda will work together to loosen and lift the dirt, while the dish soap breaks down oils and residue. Helpful tip: For extremely tough stains, you can leave it overnight. The expected result is that the paste will begin to dry slightly, and the grime underneath will start to soften.
Step 7: Scrub Away the Grime (Estimated Time: 5-15 minutes)
Once the sitting time is up, grab your scrub brush or old toothbrush. Vigorously scrub the treated areas in small circular motions. Pay extra attention to grout lines and corners. The abrasive nature of the baking soda, combined with the dissolving power of the vinegar and dish soap, will make scrubbing much easier. You should see the grime lifting away with relatively little effort. The expected result is that the surfaces will visibly lighten and feel smoother as the grime is removed.
Step 8: Rinse Thoroughly (Estimated Time: 3-5 minutes)
After scrubbing, rinse the cleaned surfaces thoroughly with warm water. You can use a spray bottle filled with plain water, a wet microfiber cloth, or a showerhead for larger areas. Ensure all cleaning residue is washed away. This step is important to prevent any white streaks from the baking soda. The expected result is a clean, residue-free surface.
Step 9: Wipe Dry and Buff (Estimated Time: 2-3 minutes)
Finally, use a clean, dry microfiber cloth to wipe down the surfaces and buff them to a shine. This prevents water spots and leaves your bathroom sparkling. Admire your handiwork – your bathroom should now be significantly cleaner and fresher!
Expert Tips for a Sparkling Bathroom
- Pre-Treat Tough Spots: For extremely tough mold or mildew, a preliminary spray of straight white vinegar and a 15-minute wait before applying the paste can enhance its effectiveness.
- Consistency is Key: For ongoing maintenance, use this cleaner weekly or bi-weekly. Regular cleaning prevents grime from building up excessively.
- Don’t Forget the Grout: A narrow brush or old toothbrush is your best friend for getting into those pesky grout lines.
- Ventilation Matters: Always ensure good ventilation by opening windows or using an exhaust fan, even with natural cleaners.
- Test on an Inconspicuous Area: Before applying to a large surface, especially on natural stone or delicate finishes, test a small, hidden area to ensure no discoloration or damage occurs.
- Avoid Mixing with Bleach: NEVER mix vinegar with bleach. This creates toxic chlorine gas. Even though this recipe doesn’t use bleach, it’s a critical safety reminder for any DIY cleaning.
- Warm Water Boost: Using warm water for rinsing can help dissolve soap scum and residue more effectively than cold water.
- Storage Advice: Store any leftover paste in an airtight container in a cool, dark place, though it’s best used fresh.
- Wear Gloves: While natural, prolonged contact with vinegar can be drying to the skin, so rubber gloves are recommended.
Variations for Different Needs
This basic recipe is incredibly versatile. Here are a few ways you can adapt it to specific cleaning challenges:
- Stronger Cleaning Version (for extreme grime): Increase the amount of baking soda slightly to create a thicker, more abrasive paste. You can also add a teaspoon of borax to the dry mix for an extra cleaning boost, though be mindful of its use around pets and children.
- Fragrance-Free Version: Simply omit the essential oils. The clean scent of vinegar dissipates quickly, leaving no lingering odor.
- Sensitive-Surface Version (use with caution): For delicate surfaces like natural stone, skip the vinegar entirely and create a paste with baking soda and just enough dish soap and warm water to form a thick consistency. Vinegar is acidic and can etch certain stone types. Always test first!
- Liquid Spray for Light Grime: For everyday cleaning or lighter grime, you can dilute the paste. Mix 1/4 cup of the prepared paste with 1 cup of warm water in a spray bottle. Shake well before each use. This won’t be as potent for heavy grime but is excellent for quick touch-ups.
- Lemon Power Boost: For extra stain-fighting and a fresh scent, you can substitute half of the white vinegar with lemon juice. Lemon is a natural bleaching agent and cuts through grease effectively.
Storage Instructions
While this cleaning paste is most effective when used fresh, you can store any leftover mixture for future use. For best results, it’s recommended to make a fresh batch for each deep cleaning session.
- Shelf Life: The paste can be stored for up to 1-2 weeks. Over time, the chemical reaction between baking soda and vinegar will diminish, reducing its fizzing power, but it will still retain significant cleaning capabilities.
- Best Containers: Store the paste in an airtight glass jar or plastic container with a tight-fitting lid. This prevents it from drying out and maintains its potency.
- Refrigeration: Refrigeration is not strictly necessary but can help prolong the shelf life slightly, especially if essential oils are added. Store in a cool, dark place away from direct sunlight.
- Safe Storage Recommendations: Always label your container clearly to avoid confusion with food items. Keep it out of reach of children and pets.
Safety Notes
Even with natural ingredients, safety should always be a priority when cleaning. Please review these important safety guidelines:
- Ventilation: Always ensure adequate ventilation when cleaning, especially in enclosed spaces like bathrooms. Open windows or use an exhaust fan to circulate fresh air.
- Surface Compatibility: While generally safe, vinegar is acidic and can etch or damage certain surfaces, such as natural stone (marble, granite, travertine) and some waxed or unsealed floors. Always test the solution on an inconspicuous area first.
- Children and Pets Safety: Keep all cleaning solutions, even DIY ones, out of reach of children and pets. Although ingredients are common, ingestion can still be harmful.
- Proper Storage: Store your DIY cleaner in a clearly labeled container, out of sight and reach of children and pets.
- Avoid Mixing with Incompatible Chemicals: This is CRITICAL. NEVER, under any circumstances, mix vinegar with bleach. The combination creates toxic chlorine gas, which can be lethal. While this recipe does not include bleach, it’s an essential warning for general cleaning practices.
- Wear Gloves: Protect your hands from prolonged exposure to cleaning solutions, even natural ones, by wearing rubber gloves.
- Eye Protection: If there’s a risk of splashing, consider wearing eye protection to prevent irritation.
Frequently Asked Questions
How long does this DIY bathroom cleaner last?
The cleaning paste is most effective when used fresh due to the fizzing reaction between baking soda and vinegar. However, it can be stored in an airtight container for up to 1-2 weeks, though its effervescence might decrease over time. For best results, try to make a fresh batch for deep cleaning.
Can I prepare it in advance?
Yes, you can prepare the paste in advance, but be aware that the fizzing action will subside. It will still work as an effective cleaning abrasive and degreaser, but the immediate bubbly reaction will be gone. Store it in an airtight container.
Can I swap an ingredient for another?
While some substitutions are possible (e.g., lemon juice for vinegar in some cases for a fresh scent and similar acidic properties, or different essential oils), it’s generally best to stick to the recommended ingredients for optimal performance. Swapping baking soda, vinegar, or dish soap significantly alters the cleaner’s effectiveness.
Does it work on all bathroom surfaces?
This cleaner works well on ceramic tiles, porcelain, fiberglass, chrome fixtures, and most sealed surfaces. However, avoid using vinegar-based solutions on natural stone (like marble, granite, travertine), cast iron, or unsealed grout, as the acidity can cause etching or damage. Always test in an inconspicuous area first.
Is it safe for pets and children?
The ingredients themselves (baking soda, vinegar, dish soap) are generally non-toxic in small amounts. However, it’s always best to keep all cleaning products, DIY or commercial, out of reach of children and pets. Ensure surfaces are thoroughly rinsed after cleaning, especially if pets tend to lick surfaces.
Can I use this cleaner to remove mold and mildew?
Yes, the vinegar in the solution is effective at killing and removing many types of mold and mildew. For significant mold growth, allow the paste to sit for at least an hour, or even longer, before scrubbing. Ensure good ventilation when tackling mold.
Why does the mixture fizz when I add vinegar to baking soda?
The fizzing is a chemical reaction between the acidic vinegar and the alkaline baking soda. This reaction produces carbon dioxide gas, which creates bubbles that help lift dirt, break down grime, and loosen tough stains from surfaces.
What if my paste is too thick or too thin?
If your paste is too thick, add a very small amount of warm water or a tiny bit more vinegar, stirring well until you reach the desired consistency. If it’s too thin, add a small amount of baking soda. You want a consistency that’s easy to spread but also clings to vertical surfaces.
Can I use essential oils other than tea tree or lemon?
Absolutely! Feel free to use other essential oils like lavender for a calming scent, peppermint for an invigorating aroma, or eucalyptus for its fresh, clean scent. Choose oils that you enjoy and that are safe for household use.
Will this cleaner remove rust stains?
While the vinegar in this solution can help with light rust stains, it may not be strong enough for heavy rust. For more stubborn rust, a specialized rust remover or a paste made from lemon juice and salt might be more effective.
Conclusion
Conquering bathroom grime doesn’t have to be a dreaded chore filled with harsh chemicals and endless scrubbing. By harnessing the power of simple, natural ingredients like baking soda, white vinegar, and dish soap, you can create an incredibly effective DIY cleaning solution that leaves your bathroom sparkling clean and fresh.
This guide has walked you through every step, from mixing your powerful paste to expert tips for tackling the toughest spots and ensuring safety. Not only will you achieve a cleaner bathroom, but you’ll also enjoy the peace of mind that comes with using eco-friendly, budget-conscious methods. So go ahead, give this easy DIY solution a try and reclaim the shine in your bathroom today!
You’ll be amazed at how simple and satisfying it is to achieve professional-level clean results with ingredients found right in your home. Happy cleaning!