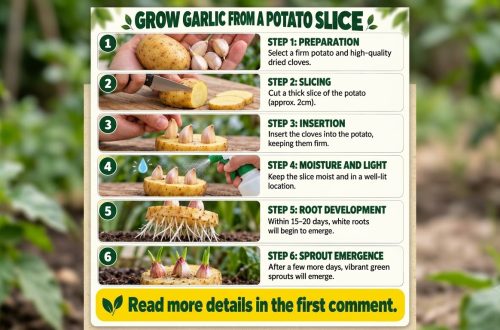
Are you looking for a creative, eco-friendly way to expand your garden, even if space is limited? Look no further! Today, we’re diving into a super fun and sustainable project: creating DIY vertical garlic planters using recycled plastic bottles. Not only is this a fantastic way to repurpose materials, but it also allows you to grow fresh garlic shoots right in your own home or garden.
Garlic is one of the easiest and most rewarding plants to grow. Its vibrant green shoots add a touch of freshness, and the bulbs themselves are a kitchen staple. With our DIY vertical garden, you can turn old plastic bottles into thriving mini-farms, perfect for small patios, balconies, or even sunny windowsills.
Why Grow Garlic in Recycled Bottles?
This method offers a host of benefits:
- Sustainability: Give plastic bottles a second life, reducing waste and your environmental footprint.
- Space-Saving: Vertical gardening is perfect for urban dwellers or anyone with limited ground space. You can stack or hang multiple planters to maximize your growing area.
- Cost-Effective: All you need are some old bottles, soil, and garlic cloves – making it a very budget-friendly project.
- Educational: It’s a wonderful project for families, teaching kids about recycling, gardening, and where food comes from.
- Fresh & Flavorful: Enjoy fresh garlic shoots for salads, stir-fries, and garnishes, or let them mature into full bulbs.
What You’ll Need:
- Empty plastic bottles (2-liter soda bottles work great)
- Sharp knife or box cutter (adult supervision required for children)
- Drill or a heated nail/skewer (for drainage holes)
- Potting mix or nutrient-rich soil
- Garlic cloves (preferably organic, non-treated ones from your local grocery store or garden center)
- String, zip ties, or a frame for hanging (optional, for vertical arrangement)
Step-by-Step Guide: Creating Your Vertical Garlic Planter
Step 1: Prepare Your Bottles
Start by thoroughly cleaning your plastic bottles. Remove labels and wash them out. For each bottle, you have two main options:
- Horizontal Planter: Lay the bottle horizontally and cut a large rectangular opening on the top side. This creates a long planting trough.
- Vertical Planter (Stacked/Hung): Cut off the top third of the bottle. Invert the top part and place it into the bottom part, like a funnel. This design can be good for self-watering or creating individual pods. Alternatively, simply use the bottom portion of a bottle as a single pot, drilling holes for string to hang them.
Step 2: Add Drainage Holes
This is crucial for healthy plants. If you’re using the horizontal method, drill or poke several small holes along the bottom of the bottle to allow excess water to drain. If using the stacked vertical method, ensure there are holes in the bottom piece. Good drainage prevents root rot.
Step 3: Fill with Soil
Fill your prepared bottle sections with a good quality potting mix. Leave about an inch of space from the top. A rich, well-draining soil will give your garlic the best start.
Step 4: Plant Your Garlic Cloves
Separate a garlic bulb into individual cloves. Choose firm, healthy cloves. Plant each clove with the wider, root end down and the pointed end facing up. Bury them about 1-2 inches deep, leaving a few inches between each clove if planting multiples in a horizontal planter.
Step 5: Water Thoroughly
After planting, water your garlic thoroughly. The soil should be moist but not waterlogged. Water until you see water draining from the bottom holes.
Step 6: Arrange Your Vertical Garden
If you’re making a truly vertical garden, you can stack the bottles (ensure they are stable), or string them together using holes drilled near the top edges and hang them from a sturdy support. Get creative with your arrangement!
Caring for Your Garlic Planters
- Sunlight: Garlic needs plenty of sunlight, ideally 6-8 hours a day. Place your vertical garden in a sunny spot on your patio, balcony, or near a south-facing window.
- Watering: Keep the soil consistently moist, especially as the shoots grow. Check the soil moisture daily by sticking your finger about an inch deep. Water if it feels dry.
- Nutrients: While garlic doesn’t need heavy feeding, you can add a balanced liquid fertilizer every few weeks, especially if your potting mix isn’t enriched.
- Harvesting Shoots: You’ll start to see green shoots emerge in about 1-2 weeks. You can snip these ‘garlic greens’ or ‘scapes’ as needed for cooking. They have a mild garlic flavor.
- Harvesting Bulbs: If you want to grow full garlic bulbs, it usually takes 6-9 months. Once the lower leaves start to turn yellow and brown, and the plant has developed 4-5 green leaves, it’s time to harvest. Gently pull the entire plant out of the soil. Cure them in a dry, airy place for a few weeks before storing.
Get Started on Your Green Project!
Creating a DIY vertical garlic planter from recycled bottles is a rewarding project that combines sustainability with the joy of gardening. It’s an easy way to add fresh flavors to your meals and a touch of green to your living space. Give it a try and share your green creations with us!
Happy gardening!