Imagine fresh produce right from your kitchen counter, without a trip to the grocery store! Regrowing kitchen scraps is a fantastic way to reduce waste, save money, and enjoy the satisfaction of growing your own food, even if you don’t have a large garden. It’s an easy, sustainable practice that brings a touch of green to your home.
Many common fruits and vegetables have the amazing ability to regenerate from their discarded parts. With just a little water, sunlight, and patience, you can watch new life sprout from what would otherwise be thrown away. Let’s dive into how you can start your own kitchen scrap garden!
Getting Started: Essential Tools and Tips
You don’t need much to begin your regrowing journey. Here’s what you’ll typically need:
- Glass jars or small containers: Clear containers are great for observing root growth.
- Water: Fresh tap water is usually sufficient.
- Sunlight: A sunny windowsill is ideal.
- Your kitchen scraps: The stars of the show!
Remember to change the water every day or two to prevent mold and keep it fresh for your sprouting plants.
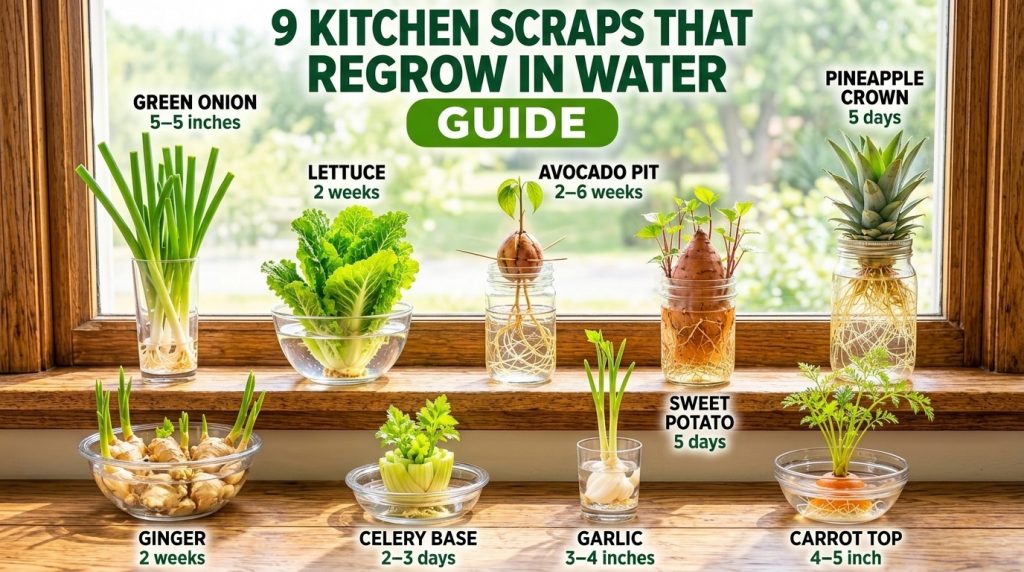
Regrowing Green Onions: Your Easiest Starting Point
Green onions (scallions) are arguably the easiest and most rewarding kitchen scrap to regrow. You can harvest from them multiple times!
Step-by-Step Guide for Green Onions:
- Save the ends: After using the green parts, save the white bottoms with about an inch of the green stalk still attached, along with their roots.
- Place in water: Stand the green onion bases root-side down in a small glass or jar. Add just enough water to cover the roots.
- Find a sunny spot: Place the glass on a windowsill where it will receive plenty of indirect sunlight.
- Change water regularly: Replenish the water every day or two to keep it fresh.
- Watch them grow: Within a few days, you’ll see new green shoots emerging from the tops and roots continuing to develop.
- Harvest: Once they reach a desired height, snip off what you need for your cooking. The base will continue to produce new growth!
- Optional: Plant in soil: After a few harvests, you can transplant the green onion bases into a pot with soil to give them more nutrients and prolong their life.
Other Amazing Kitchen Scraps You Can Regrow
Beyond green onions, many other items from your kitchen can be given a second life. Here are a few popular choices:
Celery
Cut about two inches from the base of a celery stalk. Place it in a shallow bowl with about an inch of water. New shoots will appear from the center within a week. Once roots develop and new leaves are strong, transplant it into soil.
Romaine Lettuce & Bok Choy
Similar to celery, cut the base of the lettuce or bok choy, leaving about an inch. Place it in a shallow dish with a small amount of water. New leaves will grow from the center. Once robust, transfer to soil.
Ginger
Take a piece of ginger root with a visible ‘eye’ (a small bud). Plant it directly in a pot of moist potting mix with the eye facing up. Keep the soil consistently moist but not waterlogged, and place it in a warm, sunny spot. You’ll soon see shoots and can harvest new ginger in a few months.
Garlic
If you have a garlic clove that’s starting to sprout, plant it root-side down in a small pot with soil. Water it regularly, and green shoots will emerge. You can harvest the green garlic tops (similar to chives) or let it grow to potentially produce a new garlic bulb, though this takes longer.
Sweet Potatoes
Cut a sweet potato in half or in large chunks. Suspend the pieces in water using toothpicks, ensuring about half of the potato is submerged. Place in a sunny window. ‘Slips’ (shoots) will form. Once slips are about 4-6 inches long, twist them off and place their bottoms in water to root, then plant the rooted slips in soil.
Pineapple Crowns
Twist off the leafy crown of a pineapple. Remove a few of the lower leaves to expose about an inch of the stem. Let it dry for a day or two to prevent rot. Place the crown in a glass of water, ensuring the bottom is submerged but the leaves are not. Roots will form in a few weeks, after which you can plant it in a large pot.
Avocado Pits
Carefully clean an avocado pit. Stick three or four toothpicks around the middle and suspend the pit over a glass of water, with the wider, flatter end submerged. Place it in a warm spot. Patience is key here; it can take weeks or even months for a root to emerge from the bottom and a sprout from the top.
Carrot Tops
Cut about an inch off the top of a carrot. Place it in a shallow dish with a small amount of water. New green foliage will sprout, perfect for adding to salads or garnishes. While you won’t get a new carrot root this way, you’ll get delicious, edible greens!
Troubleshooting and Tips for Success
- Rotting: If you notice a slimy texture or foul odor, the scrap might be rotting. Discard it and try again with a fresh piece. Changing water frequently is crucial.
- Lack of growth: Ensure your scraps are getting enough light. Also, some plants (like avocado pits) simply take a very long time.
- Transition to soil: Most scraps will thrive best in soil once they’ve developed a good root system in water. This provides them with more nutrients for sustained growth.
- Patience: Gardening, even with scraps, requires patience. Enjoy the process of watching new life emerge!
Regrowing kitchen scraps is a simple yet profound way to connect with nature, practice sustainability, and add fresh flavors to your meals. It’s a wonderful project for gardeners of all skill levels, turning everyday waste into a thriving mini-garden. Give it a try and transform your kitchen into a hub of green growth!