Are you tired of constantly checking your plants’ soil, worrying if they’re getting enough water, or finding them wilted after a busy day? We’ve all been there! But what if we told you there’s a super easy, eco-friendly, and budget-friendly solution to keep your plants perfectly hydrated? Enter the DIY self-watering planter made from a plastic bottle!
This clever gardening hack is not only fantastic for thirsty plants but also a wonderful way to upcycle plastic waste. It’s perfect for busy gardeners, those new to plant care, or anyone looking to add a touch of sustainable green to their home or balcony. Let’s dive into how you can make your own!
Why Self-Watering Planters Are a Game-Changer
Self-watering planters work on the principle of capillary action, drawing water up from a reservoir as the plant needs it. This consistent moisture supply offers several benefits:
- Consistent Hydration: No more guesswork! Plants get water precisely when they need it, preventing both over and under-watering.
- Less Frequent Watering: The reservoir holds a good amount of water, meaning you don’t have to water your plants every single day. Perfect for vacations or busy schedules!
- Healthy Root Development: Constant moisture encourages stronger, healthier root systems.
- Water Conservation: Water is absorbed directly by the roots, minimizing evaporation and waste.
- Pest Reduction: The topsoil stays drier, which can deter some common garden pests.
What You’ll Need
Gathering your materials is the first step to creating your sustainable plant haven. You probably have most of these items around your home already!
- A clean plastic bottle (2-liter soda bottles or similar work great)
- Sharp scissors or a utility knife (adult supervision recommended if children are involved)
- A small piece of fabric or twine (an old cotton t-shirt strip, shoelace, or mop strand works well for a wick)
- Potting mix
- Your chosen plant or seeds
Step-by-Step Guide: Making Your Self-Watering Planter
This project is surprisingly quick and easy!
-
Prepare Your Bottle
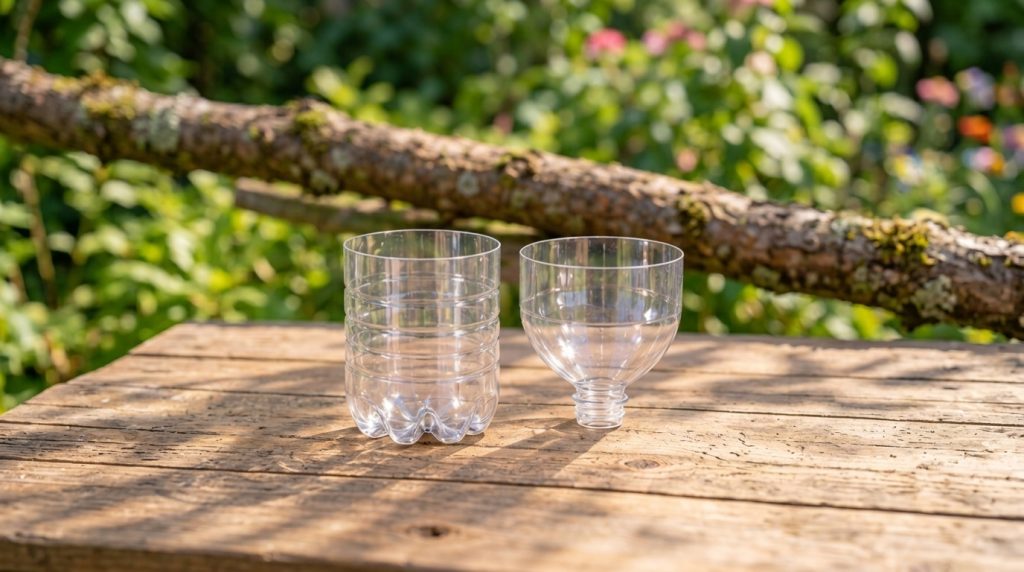
Wash your plastic bottle thoroughly. Carefully cut the bottle in half, just below the label or where the bottle starts to curve. Try to make the cut as straight as possible for stability. The top half will become your planting section, and the bottom half will be your water reservoir.
-
Create the Wick
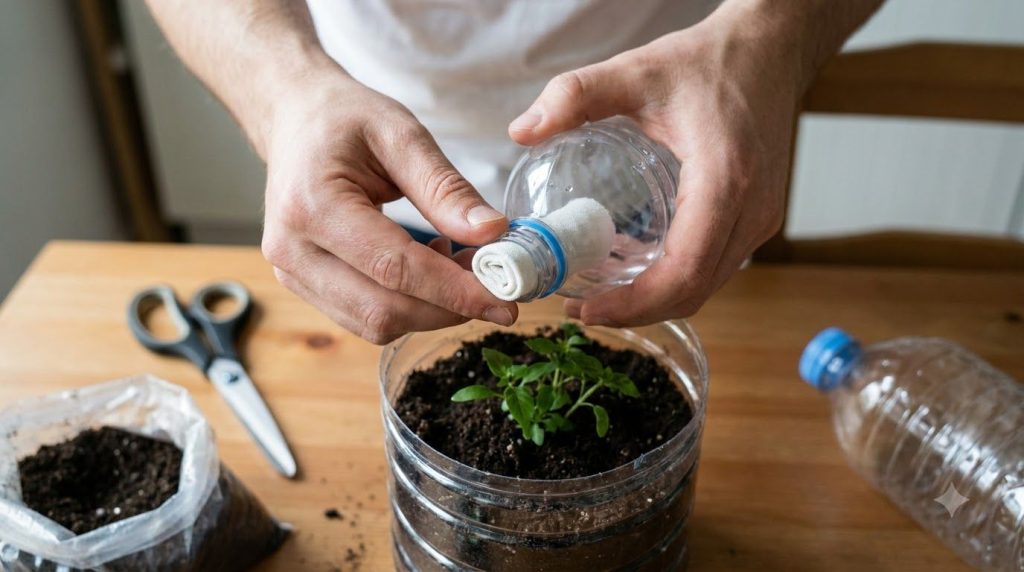
Take your chosen fabric strip or twine and fold it in half. Thread it through the opening of the bottle cap from the inside. You want about 2-3 inches of the wick hanging out of the bottle’s neck, and the rest should be long enough to reach the bottom of your reservoir section when assembled.
-
Assemble the Planter
Invert the top half of the bottle (the part with the bottle cap and wick) and place it into the bottom half. The neck of the top section should fit snugly into the opening of the bottom section. Ensure the wick extends down into the bottom reservoir.
-
Add Soil and Plant
Fill the top inverted section with your potting mix. Make sure the wick is buried within the soil. Gently plant your chosen plant or sow your seeds. Water the soil from the top thoroughly the first time to help it settle and activate the wick.
-
Fill the Reservoir
Pour water into the bottom reservoir section, making sure the wick is submerged. Replenish the water when the reservoir runs low. You can even add a tiny bit of liquid plant food to the reservoir for an added boost!
Choosing the Right Plants
While many plants can thrive in a self-watering planter, some are particularly well-suited:
- Herbs: Basil, mint, parsley, and cilantro love consistent moisture.
- Leafy Greens: Lettuce, spinach, and other small greens will flourish.
- Small Vegetables: Cherry tomatoes (bush varieties), strawberries, and peppers can do well.
- Flowering Plants: Impatiens, petunias, and African violets enjoy steady hydration.
- Indoor Plants: Many houseplants like consistent soil moisture.
Avoid plants that prefer dry conditions, such as succulents and cacti, as they might rot in consistently moist soil.
Tips for Success
- Monitor Water Levels: Regularly check the reservoir and refill it before it completely dries out.
- Cleanliness is Key: Periodically clean the reservoir to prevent algae growth. You can do this by emptying the water, scrubbing with a brush, and refilling with fresh water.
- Nutrient Boost: Add a diluted liquid fertilizer to the reservoir every few weeks during the growing season.
- Sunlight: Ensure your plants still get adequate sunlight for their specific needs, as the self-watering system handles only hydration.
Embrace Sustainable Gardening!
Creating a self-watering planter from a plastic bottle is a fantastic example of upcycling in action. You’re not just giving your plants a better home; you’re also reducing waste and contributing to a greener planet. It’s a win-win for everyone!
So, grab an old bottle and give this DIY project a try. Your plants (and the environment) will thank you for it! Happy gardening!