Do your cherished silver pieces look dull and lackluster? Tarnished silver is a common problem, but you don’t need harsh chemicals or expensive polishing kits to bring back its shine. This clever home hack uses common kitchen staples to gently lift away years of buildup, revealing the beautiful sparkle underneath.
It’s a simple, effective, and surprisingly satisfying method that avoids abrasive scrubbing, making it ideal for intricate items or delicate finishes. If you’re looking for an easy, non-toxic way to revitalize your silver, this DIY is definitely worth trying.
What You’ll Need
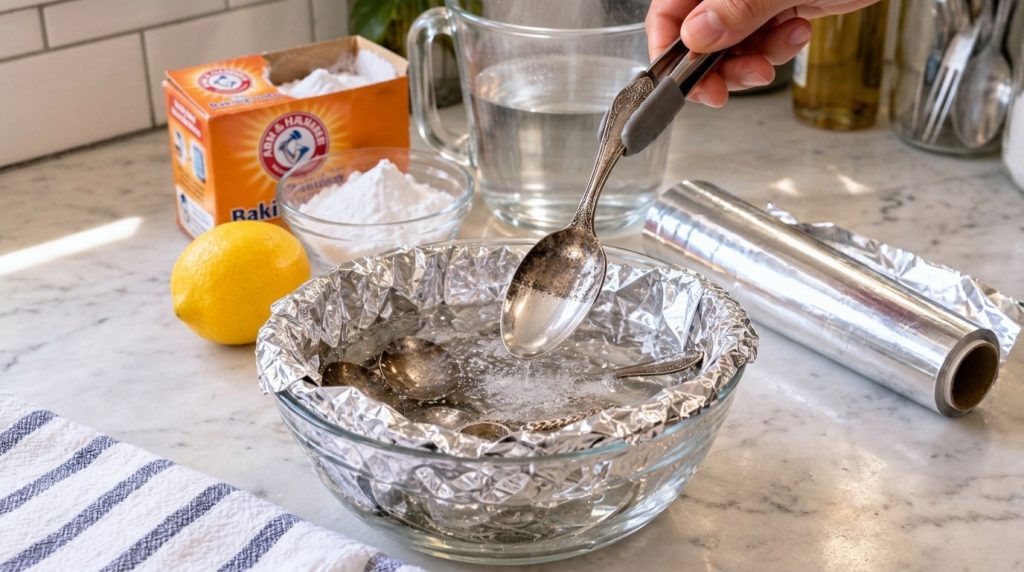
- Aluminum Foil: A sheet large enough to line your bowl
- Baking Soda: 1/2 cup
- Salt: 1 tablespoon (optional, but enhances the reaction)
- Hot Water: Enough to fully submerge your silver items (typically 2-4 cups)
- Lemon Juice: From half a lemon (optional, for added cleaning power)
- Glass or Ceramic Bowl: Ensure it’s not metal, as this could interfere with the reaction
- Tongs: For safely handling hot items
- Soft Cloth: For drying and polishing
Why This DIY Can Be Useful
Tarnish on silver is actually silver sulfide, a chemical compound that forms when silver reacts with sulfur-containing gases in the air. This DIY method works through a harmless chemical process called ion exchange. When aluminum foil, baking soda (or salt), and hot water are combined, they create an electrolyte solution. The hot water speeds up the chemical reaction, and the baking soda (or salt) helps conduct electricity.
The aluminum acts as a sacrificial metal, drawing the sulfur ions away from the silver and onto itself. This effectively reverses the tarnishing process without needing to physically abrade the silver, making it a very gentle and effective way to restore your items.
How to Make It
- Prepare the Bowl: Line the bottom and sides of your glass or ceramic bowl with aluminum foil, making sure the shiny side of the foil faces upwards.
- Arrange Silver: Place your tarnished silver items directly on the aluminum foil, ensuring each piece is touching the foil. Do not overcrowd the bowl; work in batches if necessary.
- Add Ingredients: Sprinkle the 1/2 cup of baking soda and 1 tablespoon of salt evenly over the silver items.
- Pour Hot Water: Carefully pour enough very hot (but not boiling) water into the bowl to completely submerge all the silver items. You should immediately see a bubbling reaction begin.
- Add Lemon Juice (Optional): If using, squeeze the juice from half a lemon into the solution. This can further enhance the cleaning action.
How to Use It
Once you’ve assembled your silver cleaning solution, the rest is easy:
- Let it Soak: Allow the silver to soak in the solution for 5 to 10 minutes. For heavily tarnished items, you might let them soak a bit longer, up to 15-20 minutes, or repeat the process. You’ll often see the tarnish visibly transfer to the aluminum foil.
- Remove and Inspect: Using tongs, carefully remove the silver items from the hot solution. Be cautious as the items will be hot.
- Rinse Thoroughly: Rinse each silver piece thoroughly under cool, running water to remove any baking soda or salt residue.
- Dry and Polish: Dry the silver immediately with a soft, clean cloth. A gentle buff with the cloth will enhance the shine.
What to Expect
You can expect a significant reduction or complete removal of tarnish on most silver items. Your silver should look noticeably brighter and shinier, often appearing as good as new. Keep in mind that this method is best for removing surface tarnish. It will not repair scratches, dents, or remove deep pitting in your silver. Extremely heavy tarnish might require a second treatment, or a slightly longer soak.
Helpful Tips
- Ensure Contact: Make sure every piece of silver is in direct contact with the aluminum foil for the reaction to work effectively.
- Use Hot Water: The hotter the water, the faster and more effective the reaction will be.
- Don’t Overcrowd: Work in smaller batches if you have many items to ensure adequate contact with the foil and solution for each piece.
- Patina Preservation: Do NOT use this method on silver items that have an intentional oxidized or ‘antiqued’ finish, as it will remove the dark patina.
Important Notes / Safety
- Always use a glass or ceramic bowl, not a metal one, to avoid unwanted reactions.
- Exercise caution when handling hot water and removing hot items from the solution; use tongs.
- Always rinse your silver thoroughly after cleaning to remove any residual solution, which could otherwise dull the silver over time.
- This method is generally safe for sterling silver and silver-plated items. However, avoid using it on silver items with precious or semi-precious stones (especially soft or porous ones like pearls, opals, or turquoise), as the hot water or solution could damage them.
- Ensure good ventilation, though the method itself does not produce strong fumes.