Are you craving that irresistible, savory garlic bread experience but need a gluten-free option? Look no further! This Fluffy, Cheesy, and Gluten-Free Garlic Bread recipe is about to become your family’s new obsession. Imagine sinking your teeth into a light, airy, and incredibly flavorful slice of garlic bread, without a single speck of flour. Yes, it’s entirely possible, and it’s surprisingly easy to make!
This unique recipe harnesses the magic of whipped egg whites combined with savory cheeses and aromatic spices to create a bread-like texture that’s both delicate and satisfying. It’s perfect for anyone following a gluten-free diet, those looking to reduce their carb intake, or simply curious home cooks wanting to try something new and delicious. Forget dense, chewy gluten-free alternatives; this recipe delivers a truly fluffy and delightful experience.
Get ready to elevate your weeknight dinners, impress guests, or simply enjoy a comforting snack. You’ll learn how to whip up this incredible side dish in no time, with simple ingredients and straightforward steps. Prepare for a chorus of compliments – your family will be asking for seconds!
Recipe Summary
- Prep Time: 15 minutes
- Cook Time: 20-25 minutes
- Total Time: 35-40 minutes
- Servings: 4-6
- Difficulty Level: Easy
- Course: Side Dish, Snack
- Cuisine: American, Italian-inspired
- Diet Type: Gluten-Free, Low-Carb
Why You’ll Love This Recipe
- Flour-Free & Gluten-Free: Perfect for those with dietary restrictions or looking to reduce carbs.
- Incredibly Fluffy Texture: Thanks to whipped egg whites, it’s light and airy, not dense.
- Rich & Cheesy Flavor: A savory blend of cheeses and garlic makes every bite delicious.
- Quick & Easy: Ready from start to finish in under 40 minutes, with minimal fuss.
- Versatile Side Dish: Pairs perfectly with pasta, soups, salads, or as a standalone snack.
- Kid-Approved: Even picky eaters will ask for more of this cheesy goodness!
- Simple Ingredients: Uses common kitchen staples you likely already have.
Ingredients
- 4 large egg whites, at room temperature
- ¼ teaspoon cream of tartar (optional, helps stabilize egg whites)
- 4 ounces cream cheese, softened
- ½ cup shredded mozzarella cheese
- ¼ cup grated Parmesan cheese
- 1 teaspoon garlic powder
- ½ teaspoon onion powder
- ¼ teaspoon sea salt
- ⅛ teaspoon black pepper
- For Topping:
- 2 tablespoons unsalted butter, melted
- 1-2 cloves garlic, minced (or ½ teaspoon garlic powder)
- 1 tablespoon fresh parsley, chopped (optional, for garnish)
Equipment Needed
- Large mixing bowl
- Electric hand mixer or stand mixer with whisk attachment
- Rubber spatula
- Measuring cups and spoons
- Baking sheet
- Parchment paper
- Small microwave-safe bowl for butter
- Small knife for mincing garlic
Step-by-Step Instructions
- Preheat Oven & Prep Baking Sheet: Preheat your oven to 325°F (160°C). Line a large baking sheet with parchment paper. This will prevent sticking and make cleanup a breeze.
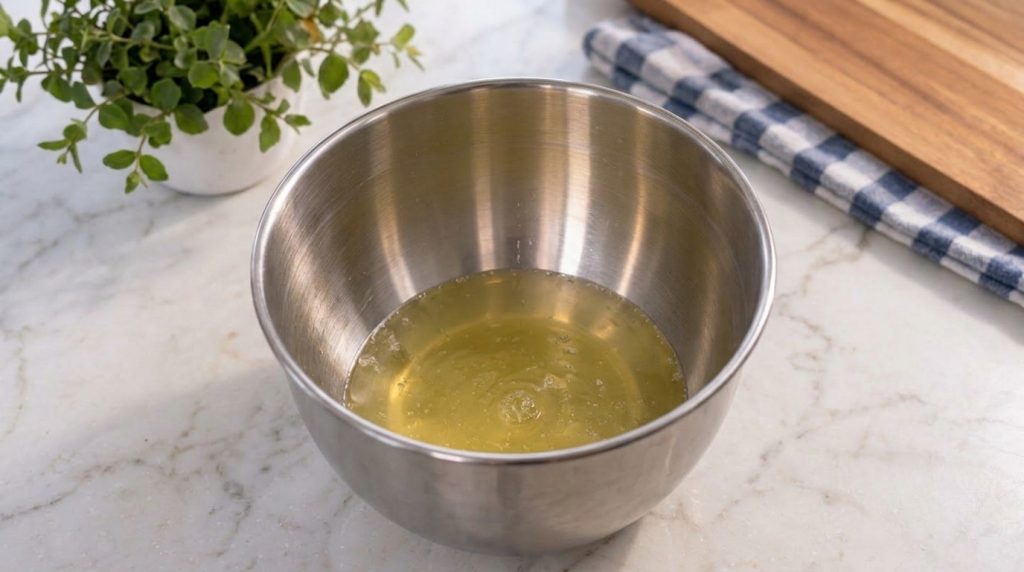
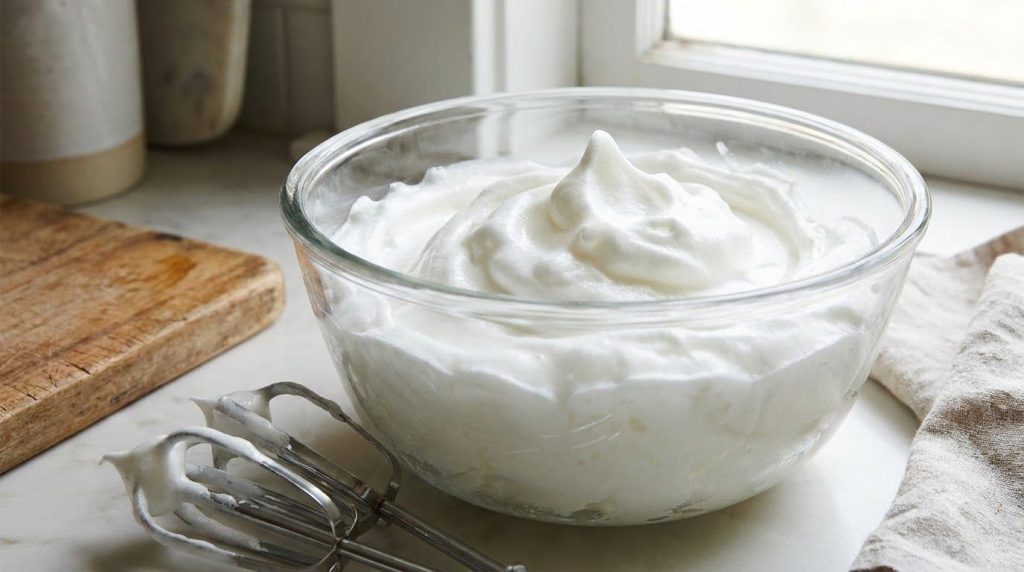
- Whip Egg Whites: In a large, clean mixing bowl (preferably glass or metal), add the egg whites and cream of tartar (if using). Using an electric hand mixer or stand mixer, beat the egg whites on medium-high speed until stiff peaks form. This means when you lift the whisk, the egg whites hold their shape without drooping. This step is crucial for the fluffy texture, so take your time, usually 3-5 minutes.
- Prepare Cheese Mixture: In a separate medium bowl, combine the softened cream cheese, shredded mozzarella, grated Parmesan, garlic powder, onion powder, sea salt, and black pepper. Mix until well combined and relatively smooth. It’s okay if there are still small lumps of cream cheese.
- Gently Fold Mixtures: Carefully add the cheese mixture to the whipped egg whites. Using a rubber spatula, gently fold the cheese mixture into the egg whites. Use an upward scooping motion, trying to maintain as much air in the egg whites as possible. Do not overmix, as this will deflate the egg whites and make your bread less fluffy. Stop once just combined.
- Shape the Bread: Spoon the mixture onto the prepared baking sheet, shaping it into a rustic loaf or rectangle, about 1-inch thick. You can also make individual rounds if preferred. The mixture will be soft and a bit sticky, so gently shape it with your spatula.
- Bake: Place the baking sheet in the preheated oven and bake for 20-25 minutes, or until the bread is golden brown on top and feels firm to the touch. The cooking time may vary slightly depending on your oven and the thickness of your bread.
- Prepare Garlic Butter Topping: While the bread bakes, melt the butter in a small microwave-safe bowl or saucepan. Stir in the minced garlic (or garlic powder if using) and chopped fresh parsley.
- Finish & Serve: Once the bread is baked, remove it from the oven. Brush the top generously with the prepared garlic butter mixture. Slice immediately and serve warm. This bread is best enjoyed fresh!
Nutrition Highlights
This Gluten-Free Garlic Bread is a fantastic option if you’re looking for a recipe that’s naturally free of gluten and rich in protein, thanks to the egg whites and cheese. It also provides a good source of healthy fats from the cheese and butter, contributing to satiety. With its savory flavor, it’s a smart way to enjoy a delicious side dish without the added carbohydrates found in traditional bread, making it suitable for low-carb lifestyles. The spices like garlic and onion powder add flavor without extra calories, making it a flavorful yet lighter alternative.
Ingredient Benefits
- Egg Whites: Provide the incredibly light and fluffy structure for this ‘bread’. They are an excellent source of lean protein, contributing to muscle repair and satiety without adding fat or cholesterol.
- Cream Cheese: Adds richness, moisture, and a subtle tang to the base, helping to bind the ingredients and create a tender crumb. It contributes healthy fats and a creamy texture.
- Mozzarella Cheese: Melts beautifully, providing that classic cheesy stretch and a mild, milky flavor that complements the garlic. It’s a good source of calcium and protein.
- Parmesan Cheese: Delivers a sharp, salty, and umami-rich flavor that enhances the overall savory profile of the garlic bread. Also a great source of calcium and protein.
- Garlic Powder & Minced Garlic: The star flavor! Garlic provides a pungent, savory aroma and taste. It’s known for its robust flavor and is a staple in many cuisines.
- Onion Powder: Adds a foundational layer of savory flavor, complementing the garlic without overpowering it.
- Sea Salt & Black Pepper: Essential for seasoning, bringing out all the other flavors and balancing the richness of the cheeses.
- Unsalted Butter: Used for the classic garlic butter topping, providing a rich, creamy base for the garlic flavor and a beautiful golden sheen.
- Fresh Parsley: Offers a vibrant pop of color and a fresh, herbaceous note that brightens the rich flavors of the bread and garlic.
Expert Tips
- Room Temperature Egg Whites: For the best volume and stability, ensure your egg whites are at room temperature. This allows them to whip up faster and hold more air.
- Clean Bowl for Egg Whites: Any trace of grease or yolk in your mixing bowl or on your whisk can prevent egg whites from whipping properly. Use a very clean, dry bowl.
- Don’t Overmix the Fold: When folding the cheese mixture into the egg whites, be gentle and stop as soon as it’s just combined. Overmixing will deflate the egg whites, leading to a denser bread.
- Customize Your Cheese: Feel free to experiment with other meltable, savory cheeses like cheddar, provolone, or Gruyere for different flavor profiles.
- Fresh Garlic is Best for Topping: While garlic powder works, fresh minced garlic in the butter topping provides a more pungent, authentic garlic bread flavor.
- Baking Uniformity: Try to shape the mixture into an even thickness on the baking sheet to ensure it bakes consistently and browns evenly.
- Serve Immediately: This garlic bread is truly at its best when served warm, straight from the oven. The fluffy texture and melted cheese are unparalleled.
- Adjust Garlic Intensity: If you’re a true garlic lover, feel free to increase the amount of garlic powder in the batter or minced garlic in the topping.
Recipe Variations
- Herb Garden Variation: Add 1 teaspoon of dried Italian seasoning or a mix of dried oregano, basil, and thyme to the cheese mixture for an aromatic twist.
- Spicy Kick: A pinch of red pepper flakes (¼ teaspoon) added to the cheese mixture or the garlic butter topping will give your bread a subtle heat.
- Cheesy Bacon Garlic Bread: Fold in ¼ cup of cooked and crumbled bacon bits into the cheese mixture before combining with the egg whites for an extra savory treat.
- Everything Bagel Seasoning: Sprinkle a generous amount of Everything Bagel seasoning over the top before baking for a crunchy, flavorful crust.
- Roasted Garlic Infusion: For a deeper, sweeter garlic flavor, mash 1-2 cloves of roasted garlic into the softened cream cheese before mixing with other ingredients.
Storage Instructions
This Gluten-Free Garlic Bread is definitely best enjoyed fresh, warm from the oven, for the optimal fluffy texture. However, if you have leftovers, here’s how to store them:
- Refrigerator Storage: Store any leftover garlic bread in an airtight container in the refrigerator for up to 2-3 days.
- Reheating: To reheat, place slices on a baking sheet and warm in a preheated oven at 300°F (150°C) for about 5-7 minutes, or until heated through and slightly crispy. Avoid microwaving, as it can make the texture rubbery.
- Freezer Storage: While possible, freezing is not recommended as it can significantly alter the fluffy texture upon thawing. If you must freeze, wrap individual slices tightly in plastic wrap, then place in a freezer-safe bag for up to 1 month. Thaw in the refrigerator overnight and reheat as directed.
Frequently Asked Questions
Can I make this ahead of time?
It’s best made fresh, as the fluffy texture is optimal right out of the oven. You can prepare the cheese mixture a day in advance and store it in the refrigerator, then whip and fold the egg whites just before baking.
Can I use an egg substitute?
No, this recipe relies heavily on the structural integrity and aeration of whipped egg whites. Egg substitutes will not provide the same fluffy texture.
What kind of cream cheese should I use?
Full-fat cream cheese is recommended for the best flavor and texture, but you can use a reduced-fat version if preferred. Just make sure it’s softened to room temperature.
Can I add other herbs?
Absolutely! Fresh chives, oregano, or a mix of Italian herbs would be delicious additions to the cheese mixture or sprinkled on top.
Is this recipe suitable for a keto diet?
Yes, this recipe is naturally low in carbohydrates and high in healthy fats and protein, making it an excellent choice for those following a ketogenic diet.
Why did my bread turn out flat or dense?
This usually happens if the egg whites were not whipped to stiff peaks, or if they were deflated by overmixing when folding in the cheese mixture. Be gentle and work quickly!
Can I make individual garlic bread rolls?
Yes! Instead of shaping into a loaf, spoon individual dollops onto the parchment paper, leaving space between them. Adjust baking time as they may cook faster.
Conclusion
Who knew going gluten-free could be so delicious and satisfying? This Fluffy, Cheesy & Gluten-Free Garlic Bread is a game-changer, proving that you don’t need traditional flour to enjoy one of life’s simple culinary pleasures. Its light, airy texture and robust garlic-cheese flavor make it an instant hit for any meal or snack occasion. It’s incredibly easy to prepare, perfect for busy weeknights, and versatile enough to pair with almost anything.
So, why wait? Gather your ingredients, whip up some magic, and prepare to delight your taste buds and those of your loved ones. This recipe is a testament to how healthy eating can be both simple and incredibly flavorful. Enjoy your new favorite side dish!