Get ready to satisfy your sweet tooth in the most delicious way possible! These homemade chocolate peanut butter cups are an absolute dream come true for anyone who loves that classic combination of rich chocolate and creamy peanut butter. Forget store-bought versions; making your own means you get to control the ingredients, making them a healthier and even more delightful treat.
This recipe is incredibly easy to follow, even if you’re new to making desserts. You’ll be amazed at how quickly you can whip up a batch of these indulgent, yet wholesome, treats. They’re perfect for a quick snack, a delightful dessert after dinner, or even as a thoughtful homemade gift.
We’ll walk you through every step, ensuring you achieve that perfect balance of sweetness and a wonderfully smooth texture. Plus, we’ll share plenty of tips for variations, storage, and making them fit various dietary needs. So, let’s get started on creating your new favorite healthy indulgence!
Recipe Summary
- Prep Time: 15 minutes
- Cook Time: 5 minutes (melting chocolate)
- Total Time: 1 hour 20 minutes (includes chilling)
- Servings: 12 cups
- Difficulty Level: Easy
- Course: Dessert, Snack
- Cuisine: American
- Diet Type: Vegetarian (can be adapted to Vegan, Gluten-Free, Dairy-Free)
Why You’ll Love This Recipe
- Ready in Minutes: Active prep time is super quick!
- Beginner-Friendly: Simple steps, no complex techniques.
- Naturally Sweetened: You control the sugar content.
- Customizable: Easily adapt to your taste and dietary needs.
- Better-for-You: Made with wholesome ingredients, unlike store-bought.
- Kid-Approved: A treat everyone in the family will adore.
- Perfect for Gifting: Homemade treats always make a thoughtful present.
- No-Bake Delight: No oven required, just a freezer or fridge!
Ingredients
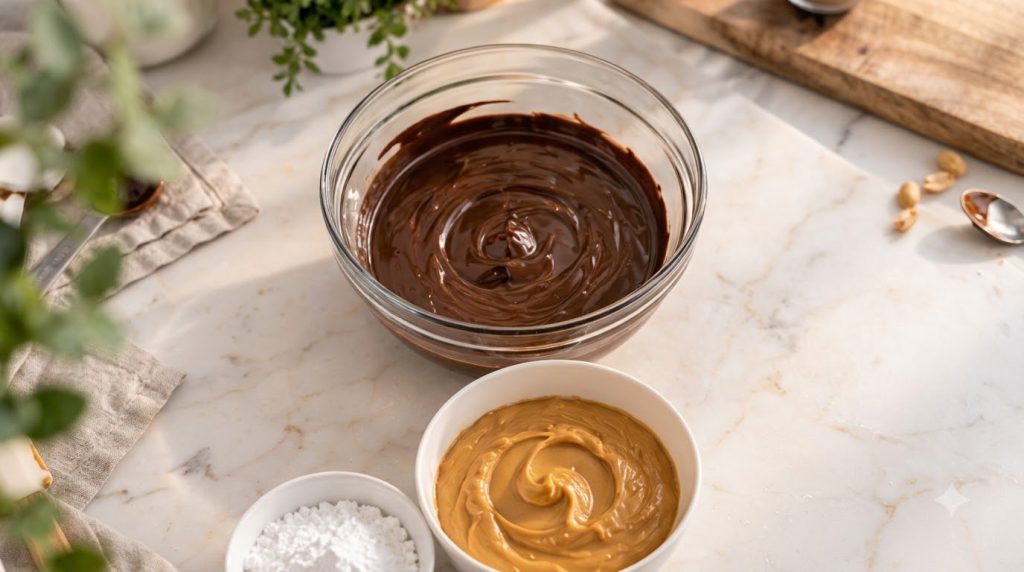
- 1 cup chocolate chips: (dark chocolate chips, about 60-70% cacao are recommended for a richer flavor and less sugar; milk or semi-sweet chocolate chips also work if preferred)
- 1 tablespoon coconut oil: (optional, but helps make the chocolate smoother and easier to work with, especially for coating)
- ¾ cup creamy peanut butter: (natural, unsweetened peanut butter is best for flavor and to control sugar; almond butter or cashew butter can be substituted)
- ¼ cup powdered sugar: (or maple syrup for a refined sugar-free option, adjust to taste)
- ½ teaspoon vanilla extract: (optional, but adds a lovely aromatic depth)
- Pinch of sea salt: (enhances the chocolate and peanut butter flavors)
- 12 paper mini-muffin liners or silicone cups: (essential for shaping)
Equipment Needed
- Muffin tin or mini muffin tin
- Paper mini-muffin liners or silicone cups
- Microwave-safe bowl or double boiler
- Spatula or spoon
- Measuring cups and spoons
- Small mixing bowl
Step-by-Step Instructions
-
Prepare Your Muffin Tin (2 minutes)
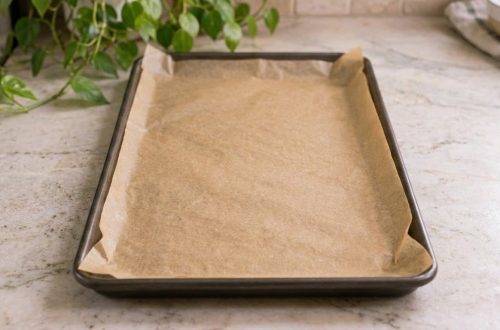
Line a standard muffin tin or mini muffin tin with 12 paper liners or silicone cups. This will make it easy to remove your finished peanut butter cups. If you’re using silicone cups, they don’t necessarily need a tin for support, but it can help keep them stable.
-
Melt the Chocolate (3-5 minutes)
In a microwave-safe bowl, combine the chocolate chips and coconut oil (if using). Microwave on high for 30-second intervals, stirring well after each, until the chocolate is completely melted and smooth. Alternatively, you can use a double boiler on the stovetop for a more controlled melting process. Be careful not to overheat the chocolate, as it can seize.
-
Create the Chocolate Base (5 minutes)
Spoon about 1 tablespoon of melted chocolate into the bottom of each prepared liner. Gently tap the muffin tin on the counter a few times to spread the chocolate evenly and remove any air bubbles. Place the muffin tin in the freezer for 5-10 minutes, or until the chocolate is set.
-
Prepare the Peanut Butter Filling (5 minutes)
While the chocolate base is chilling, combine the peanut butter, powdered sugar (or maple syrup), vanilla extract (if using), and a pinch of sea salt in a small mixing bowl. Stir until well combined and smooth. The mixture should be thick enough to hold its shape. Taste and adjust sweetness if desired.
-
Add the Peanut Butter Layer (10 minutes)
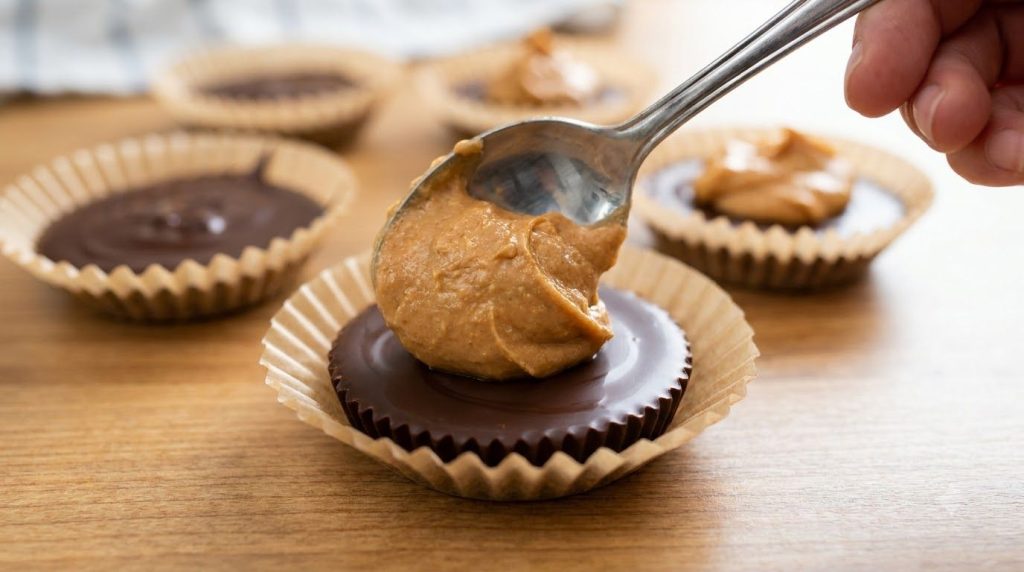
Remove the muffin tin from the freezer. Spoon about 1-1½ tablespoons of the peanut butter mixture onto the center of each hardened chocolate base. Gently flatten it slightly with the back of a spoon, leaving a small gap around the edges for the top chocolate layer. Don’t press too hard, or you might crack the bottom chocolate.
-
Top with More Chocolate (10 minutes)
Pour the remaining melted chocolate over the peanut butter layer, using about 1 tablespoon per cup, ensuring the peanut butter is fully covered. Again, gently tap the muffin tin to spread the chocolate evenly. You can also use a spoon to smooth out the tops.
-
Chill Until Set (60 minutes)
Return the muffin tin to the freezer for at least 1 hour, or until the chocolate peanut butter cups are completely firm. This chilling time is crucial for them to set properly and be easy to handle.
-
Enjoy! (Immediate)
Once fully set, remove the peanut butter cups from the muffin tin and peel off the paper liners. Serve immediately or store them for later. Enjoy your homemade, healthier treats!
Nutrition Highlights
These homemade chocolate peanut butter cups offer a more wholesome alternative to their store-bought counterparts. By using natural peanut butter and dark chocolate, you’re getting a good source of healthy fats and antioxidants. Making them at home also allows you to control the sugar content, ensuring your treat is satisfying without being overly sweet. They can be a great source of protein and energy, making them a fantastic post-workout snack or a delightful dessert.
Ingredient Benefits
- Chocolate Chips: Provide that essential rich, decadent chocolate flavor. Dark chocolate, in particular, is packed with antioxidants and can contribute to a feeling of indulgence without excessive sugar.
- Coconut Oil: Helps to thin the chocolate slightly, creating a smoother texture that’s easier to pour and results in a glossy finish. It’s also a source of medium-chain triglycerides (MCTs).
- Creamy Peanut Butter: The star of the show, delivering a creamy, nutty flavor and texture. Natural peanut butter is a good source of healthy monounsaturated fats, protein, and fiber, contributing to satiety.
- Powdered Sugar: Adds sweetness and helps create a smooth, pliable peanut butter filling. Using powdered sugar gives a classic texture, but alternatives like maple syrup can make it refined sugar-free.
- Vanilla Extract: Enhances the overall flavor profile, adding a warm, aromatic note that complements both chocolate and peanut butter beautifully.
- Sea Salt: A pinch of salt is crucial for balancing the sweetness and intensifying the flavors of both the chocolate and peanut butter, making each bite more complex and satisfying.
Expert Tips
- Use Quality Ingredients: Since there are so few ingredients, the quality really shines through. Opt for good quality chocolate and natural peanut butter for the best flavor.
- Don’t Overheat Chocolate: When melting chocolate, do it slowly and stir frequently. Overheated chocolate becomes thick and clumpy, or ‘seizes’, which is difficult to fix.
- Chill Between Layers: Don’t rush the chilling steps. Ensuring each layer is fully set prevents them from mixing and creates distinct, beautiful layers.
- Adjust Sweetness: Taste your peanut butter mixture before adding to the cups. If you prefer it sweeter, add a little more powdered sugar or maple syrup until it’s just right.
- Room Temperature Peanut Butter: If your natural peanut butter is very stiff, warm it slightly in the microwave for a few seconds to make it easier to mix and spread.
- Smooth Tops: After pouring the final chocolate layer, gently tap the muffin tin on the counter. This helps level the chocolate and release any air bubbles, giving you a smooth, professional-looking top.
- Easy Liner Removal: If you’re having trouble peeling off paper liners, try freezing the cups for an extra 10-15 minutes just before serving. This can make them a bit firmer and easier to unwrap.
- Consider Tempering (Advanced): For a truly professional, shiny, and snap-able chocolate shell that won’t melt easily at room temperature, consider tempering your chocolate. This is an advanced technique but yields excellent results.
Recipe Variations
- Vegan & Dairy-Free Version: Simply use dairy-free chocolate chips (many dark chocolate brands are naturally dairy-free, but always check the label) and ensure your peanut butter is vegan.
- High-Protein Version: Mix 1-2 tablespoons of your favorite vanilla or unflavored protein powder into the peanut butter mixture. You might need to add a touch more liquid (like milk of choice) to maintain the creamy consistency.
- Nut-Free Version: Substitute peanut butter with sunflower seed butter (SunButter) for a safe and delicious alternative.
- Low-Sugar/Keto-Friendly: Use sugar-free chocolate chips (sweetened with stevia or erythritol) and replace powdered sugar with a powdered erythritol sweetener.
- Flavored Peanut Butter: Experiment with flavored peanut butter, such as honey-roasted or cinnamon swirl, for a unique twist.
- Extra Crunch: Add a tablespoon of finely chopped roasted peanuts or a sprinkle of flaky sea salt to the top chocolate layer before it sets for added texture and flavor.
- Mint Chocolate: Add a few drops of food-grade peppermint extract to the melted chocolate for a refreshing minty twist.
Storage Instructions
These homemade chocolate peanut butter cups are best stored in the refrigerator to maintain their firm texture and prevent the chocolate from melting, especially if your kitchen is warm.
- Refrigerator Storage: Store the cups in an airtight container in the refrigerator for up to 2 weeks. Layer them with parchment paper if stacking to prevent sticking.
- Freezer Storage: For longer storage, place the set peanut butter cups in a single layer on a baking sheet and freeze for about an hour until solid. Then, transfer them to a freezer-safe airtight container or a heavy-duty freezer bag. They can be stored in the freezer for up to 3 months. When ready to enjoy, let them thaw in the refrigerator for a few minutes or enjoy them frozen for a firmer treat.
- Best Storage Containers: Use rigid, airtight containers to protect the cups from absorbing odors and getting crushed. Glass containers or sturdy plastic ones work well.
Frequently Asked Questions
- Can I make these ahead of time?
Absolutely! These are a fantastic make-ahead treat. You can store them in the refrigerator for up to 2 weeks or in the freezer for up to 3 months. - Can I use fresh peanut butter straight from the fridge?
It’s best to use peanut butter that’s at room temperature or slightly warmed. Cold, stiff peanut butter will be harder to mix and spread smoothly. - What kind of chocolate works best?
Dark chocolate chips (60-70% cacao) are highly recommended for a richer flavor and less sugar. However, semi-sweet or even milk chocolate chips can be used based on your preference. Just be sure it’s a good quality chocolate that melts smoothly. - Can I use crunchy peanut butter?
While creamy peanut butter provides the smoothest texture, you can certainly use crunchy peanut butter for added texture. Just be aware that it might not spread as easily. - Why do you add coconut oil to the chocolate?
The coconut oil helps thin the melted chocolate slightly, making it smoother and easier to pour and spread. It also contributes to a lovely glossy finish and a satisfying snap when bitten into. - My chocolate seized, what happened?
Chocolate usually seizes if it gets overheated or if even a tiny drop of water gets into it. Make sure your bowls and utensils are completely dry, and melt the chocolate slowly, stirring frequently. - How do I prevent the paper liners from sticking?
Ensuring the cups are fully chilled and frozen can help with easier removal. You can also lightly grease the paper liners before adding chocolate, or opt for silicone baking cups which release very easily. - Are these good for meal prep?
Yes, they are! Make a big batch at the beginning of the week, and you’ll have a healthy, portion-controlled snack or dessert ready to go anytime you need a sweet fix.
Conclusion
There you have it – the ultimate guide to making your own healthy and utterly delicious homemade chocolate peanut butter cups! This recipe proves that you don’t need complicated steps or unhealthy ingredients to create a truly satisfying treat. With just a few simple ingredients and a little bit of chilling time, you can enjoy a classic confection that’s miles better than anything you’d buy at the store.
So, why wait? Gather your ingredients, get creative with variations, and treat yourself and your loved ones to these irresistible delights. Happy making!