Homemade Crispy Chicken Nuggets: A Healthy & Easy Family Favorite
Say goodbye to the freezer aisle and hello to the most delicious, healthy, and easy-to-make crispy chicken nuggets you’ll ever taste! These aren’t just for kids; everyone in the family will adore these golden-brown bites. With a perfectly crispy exterior and a wonderfully juicy interior, they’re miles better than anything you’d buy pre-made.
Making chicken nuggets from scratch might sound like a big undertaking, but we promise it’s simpler than you think. This recipe is designed for home cooks of all skill levels, offering a healthier alternative to fast-food versions, free from questionable ingredients and excessive sodium. You control exactly what goes into them, ensuring a nutritious and satisfying meal or snack.
In this article, you’ll learn how to whip up a batch of these irresistible nuggets in no time, complete with step-by-step instructions, clever tips for extra crispiness, and healthy variations to suit any dietary preference. Get ready to impress your family and friends with a wholesome meal that tastes like a treat!
Recipe Summary
- Prep Time: 15 minutes
- Cook Time: 15-20 minutes
- Total Time: 30-35 minutes
- Servings: 4
- Difficulty Level: Easy
- Course: Main Course, Snack
- Cuisine: American
- Diet Type: High-Protein, Kid-Friendly
Why You’ll Love This Recipe
- Healthier Choice: Made with wholesome ingredients, ditching preservatives and excessive sodium found in store-bought options.
- Crispy & Juicy: Achieves that perfect crispy coating with a tender, juicy chicken interior.
- Kid-Approved: A guaranteed hit with children, making healthy eating fun.
- Quick & Easy: Ready in just over 30 minutes, perfect for busy weeknights.
- Customizable: Easily adapt seasonings and coatings to your preference.
- Budget-Friendly: More economical than buying pre-made frozen nuggets.
- Great for Meal Prep: Cook a larger batch and store for quick meals throughout the week.
Ingredients
- 1.5 lbs boneless, skinless chicken breasts (cut into 1-inch cubes)
- ½ cup all-purpose flour (or gluten-free flour blend for a GF option)
- 1 large egg (beaten)
- 1 cup Panko breadcrumbs (for extra crispiness, or regular breadcrumbs)
- 1 teaspoon garlic powder
- ½ teaspoon onion powder
- ½ teaspoon paprika
- ¼ teaspoon salt
- ⅛ teaspoon black pepper
- 2-3 tablespoons olive oil or avocado oil (for frying)
- Optional: Dipping sauces like ketchup, honey mustard, BBQ sauce
Equipment Needed
- Sharp knife
- Cutting board
- Three shallow bowls (for dredging)
- Large skillet or frying pan
- Tongs or slotted spoon
- Paper towel-lined plate or cooling rack
- Measuring cups and spoons
Step-by-Step Instructions
-
Prepare the Chicken:
Start by patting the chicken breast cubes thoroughly dry with paper towels. This step is crucial for achieving a crispy coating, as excess moisture can make the breading soggy. Once dry, cut the chicken into uniform 1-inch pieces. Uniform pieces ensure even cooking.
-
Set Up the Dredging Station:
Prepare three shallow bowls. In the first bowl, combine the all-purpose flour, garlic powder, onion powder, paprika, salt, and black pepper. Whisk these dry ingredients together well. In the second bowl, beat the large egg until it’s smooth and consistent. In the third bowl, place the Panko breadcrumbs. This assembly line approach makes the coating process efficient and less messy.
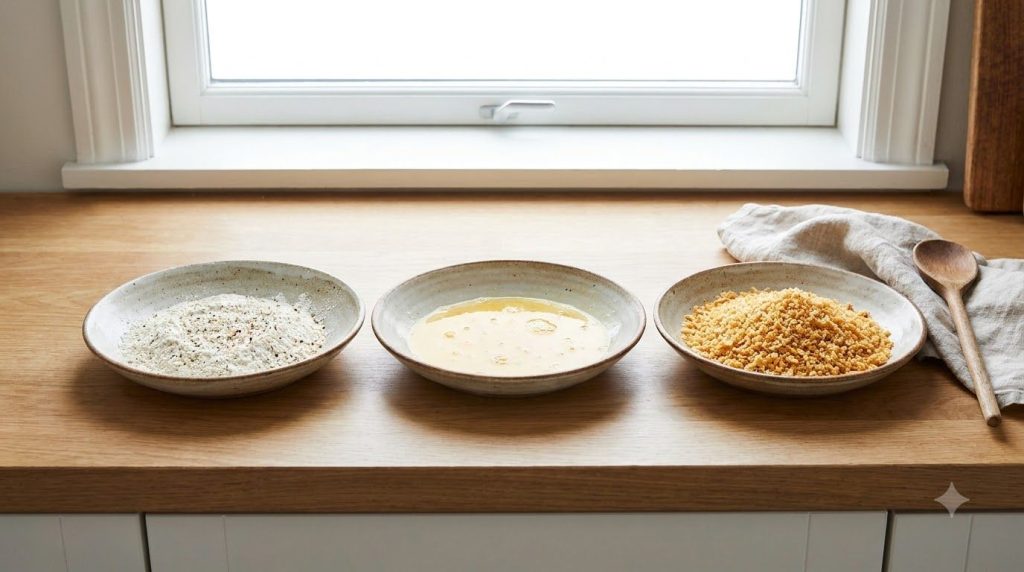
A simple dredging station makes coating your chicken nuggets a breeze! -
Coat the Chicken:
Working in small batches, take each chicken piece and first dredge it in the seasoned flour, ensuring it’s fully coated. Shake off any excess flour. Next, dip the flour-coated chicken into the beaten egg, letting any excess egg drip off. Finally, press the chicken into the Panko breadcrumbs, making sure every side is generously covered. Really press the breadcrumbs onto the chicken to help them adhere. Place the coated nuggets on a clean plate or baking sheet as you go, ensuring they don’t touch each other.
-
Heat the Oil:
Heat 2-3 tablespoons of olive oil or avocado oil in a large skillet over medium-high heat. The oil should be shimmering but not smoking. To test if the oil is ready, drop a tiny pinch of breadcrumb into the pan; if it sizzles immediately, you’re good to go. Adjust the heat as needed to maintain a consistent temperature.
-
Cook the Nuggets:
Carefully place the coated chicken nuggets into the hot oil in a single layer, ensuring not to overcrowd the pan. Cook in batches if necessary to avoid lowering the oil temperature too much, which can result in soggy nuggets. Cook for 3-4 minutes per side, or until golden brown and cooked through. The internal temperature of the chicken should reach 165°F (74°C).
-
Drain and Serve:
Once cooked, use tongs or a slotted spoon to transfer the crispy chicken nuggets to a paper towel-lined plate or a wire cooling rack. This helps drain any excess oil, keeping them extra crispy. Serve immediately with your favorite dipping sauces and enjoy!
Nutrition Highlights
These homemade crispy chicken nuggets are a fantastic source of lean protein, essential for muscle repair and satiety. By using minimal healthy oils and baking or air frying, you can keep the fat content in check. They are also lower in sodium and free from artificial additives often found in processed versions, making them a much healthier choice for you and your family.
Ingredient Benefits
- Chicken Breast: The star of the show, providing lean protein vital for building and repairing tissues. It’s a versatile and widely available source of essential amino acids.
- Flour: Creates the initial layer for the coating, helping the egg and breadcrumbs adhere. It contributes to the crispy texture.
- Egg: Acts as a binder, helping the breadcrumbs stick to the chicken. It also adds a touch of richness and helps achieve a golden-brown finish.
- Panko Breadcrumbs: These Japanese-style breadcrumbs are coarser than regular ones, which results in an incredibly light, airy, and extra-crispy texture that holds up well during cooking.
- Spices (Garlic Powder, Onion Powder, Paprika): These seasonings don’t just add incredible flavor; they also contribute to the appealing aroma and golden color of the nuggets. Paprika, in particular, adds a touch of warmth and vibrancy.
- Olive Oil/Avocado Oil: Used for pan-frying, these oils are healthier fats compared to many alternatives. They provide a medium for cooking, ensuring the nuggets get beautifully crisp.
Expert Tips
- Pat Dry for Maximum Crispiness: Always pat your chicken very dry before breading. Moisture is the enemy of crispiness!
- Don’t Overcrowd the Pan: Cook in batches to maintain a consistent oil temperature. Overcrowding cools the oil, leading to less crispy and potentially greasy nuggets.
- Use Panko Breadcrumbs: For the best crunch, Panko breadcrumbs are highly recommended. Their flaky texture creates a superior crispiness compared to regular breadcrumbs.
- Season the Flour Well: Don’t just rely on the breading for flavor. Seasoning the flour mixture ensures the nuggets are flavorful from the inside out.
- Even Coating is Key: Make sure each piece of chicken is fully and evenly coated in each step of the dredging process for a consistent texture.
- Monitor Oil Temperature: If the oil is too hot, the coating will burn before the chicken cooks through. If it’s too cool, the nuggets will absorb too much oil and become greasy. Aim for medium-high heat.
- Rest After Frying: Place cooked nuggets on a wire rack or paper towel to drain excess oil. This helps them stay crispy.
- Check for Doneness: The easiest way to ensure chicken is cooked through is with an instant-read thermometer. It should register 165°F (74°C).
Recipe Variations
- Gluten-Free Version: Substitute all-purpose flour with a gluten-free flour blend and ensure your Panko breadcrumbs are certified gluten-free.
- Spicy Kick: Add ¼ teaspoon of cayenne pepper or a pinch of chili powder to the flour mixture for a bit of heat.
- Herby Nuggets: Mix 1 tablespoon of finely chopped fresh parsley or thyme into the breadcrumbs for an aromatic twist.
- Baked or Air Fried: For an even lighter version, arrange coated nuggets on a baking sheet and bake at 400°F (200°C) for 18-25 minutes, flipping halfway, until golden and cooked through. Or air fry at 375°F (190°C) for 12-15 minutes, shaking the basket halfway.
- Cheese Infusion: Add 2 tablespoons of finely grated Parmesan cheese to the breadcrumbs for a savory, cheesy flavor.
- Sesame Nuggets: Mix 1 tablespoon of sesame seeds into the breadcrumbs for a nutty flavor and added crunch.
Storage Instructions
Refrigerator Storage: Leftover cooked chicken nuggets can be stored in an airtight container in the refrigerator for up to 3-4 days. To reheat, you can use an oven (350°F/175°C for 10-15 minutes) or an air fryer (375°F/190°C for 5-7 minutes) to help them regain some crispiness. Microwaving is not recommended as it can make them soggy.
Freezer Storage: Cooked and cooled chicken nuggets can be frozen for up to 2-3 months. Arrange them in a single layer on a baking sheet and freeze until solid, then transfer to a freezer-safe bag or container. This prevents them from sticking together. When ready to eat, reheat from frozen in an oven or air fryer until heated through and crispy.
Frequently Asked Questions
Can I make these ahead of time?
Yes, you can prepare and coat the chicken nuggets up to a few hours in advance and store them uncovered in the refrigerator. This helps the breading adhere better. You can also cook and then reheat them later.
Can I freeze uncooked nuggets?
While technically possible, it’s generally better to cook them first. If you must freeze uncooked, flash freeze them on a baking sheet, then transfer to a freezer bag. Cook from frozen, adding a few extra minutes to the cooking time.
What kind of chicken is best for nuggets?
Boneless, skinless chicken breasts are ideal due to their lean nature and uniform texture. Chicken thighs can also be used for a slightly richer, juicier nugget, but they may require a longer cooking time.
What’s the secret to extra crispy nuggets?
Panko breadcrumbs, patting the chicken dry, not overcrowding the pan, and cooking at the right oil temperature are the key factors for maximum crispiness.
Can children help make these?
Absolutely! This is a fantastic kid-friendly recipe. Kids can help with patting chicken (under supervision), mixing spices, and breading the chicken. Just ensure an adult handles the hot oil and cooking.
What dipping sauces go well with these?
Classic options include ketchup, honey mustard, and BBQ sauce. For a healthier twist, try a homemade yogurt ranch dip or a simple sriracha mayo.
Are these suitable for meal prep?
Definitely! Cook a big batch, let them cool, and portion them out for quick lunches or dinners throughout the week. They reheat wonderfully.
Can I bake or air fry these instead of frying?
Yes, for a lighter option, baking or air frying works great. Refer to the ‘Recipe Variations’ section for instructions on how to do this.
Conclusion
Ditch the processed stuff and embrace the joy of homemade with these incredibly crispy, juicy, and healthy chicken nuggets! They are a testament that healthy eating doesn’t have to be bland or complicated. Perfect for a busy weeknight dinner, a fun family meal, or a satisfying snack, this recipe is sure to become a staple in your kitchen.
So, gather your ingredients, enlist some eager helpers, and get ready to create a batch of nuggets that will have everyone asking for more. Happy cooking!