Tough, burnt-on grease and stubborn grime on your pots, pans, and kitchen surfaces can feel like an impossible challenge. No matter how much you scrub, those baked-on stains seem to cling on forever. Instead of reaching for harsh chemicals or expensive specialized cleaners, why not try a simple, effective DIY solution using ingredients you likely already have in your pantry?
This straightforward cleaning hack combines the power of common household items to create a potent grease-busting mixture. It’s an affordable and practical way to restore your kitchenware and surfaces to a sparkling clean, saving you effort and money.
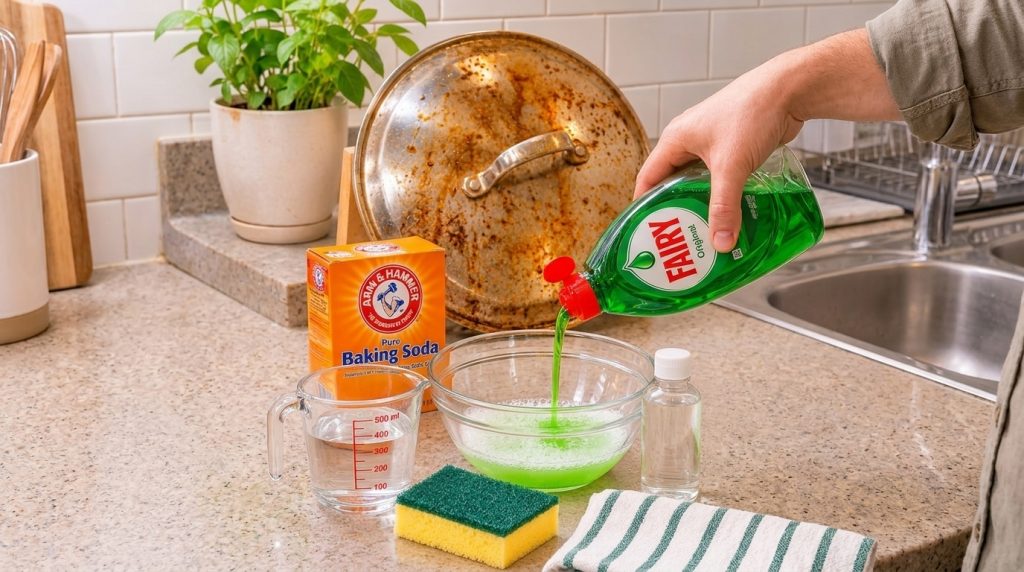
What You’ll Need
Ingredients:
- Dish soap (any standard green dish soap works well)
- Baking soda
- Warm water
Tools:
- Mixing bowl
- Scrubbing sponge (or a brush for tougher spots)
- Measuring cup
- Clean towel for wiping/drying
- Your greasy, grimy kitchen item (e.g., pot, pan, oven rack, stovetop)
Why This DIY Can Be Useful
This DIY cleaning mixture leverages the distinct properties of its ingredients to tackle grease effectively:
- Dish Soap: Designed to break down grease and oil, dish soap acts as a powerful degreaser, lifting stubborn residues from surfaces.
- Baking Soda: A mild abrasive, baking soda helps to gently scrub away baked-on grime without scratching most surfaces. It also acts as a natural deodorizer, neutralizing unpleasant odors often associated with old grease.
- Warm Water: Helps to dissolve the grease and activates both the dish soap and baking soda, making them more effective. It also makes it easier to create a spreadable paste or slurry.
How to Make It
- Pour Water: Add about 1 cup of warm water into your mixing bowl.
- Add Dish Soap: Pour a generous squirt of dish soap (approximately 1-2 tablespoons) into the water. Swirl gently to create some light suds.
- Add Baking Soda: Slowly add 1/4 to 1/2 cup of baking soda to the soapy water. The exact amount will depend on the desired consistency.
- Mix Thoroughly: Stir the mixture well until it forms a thick paste or a smooth slurry. It should be consistent enough to apply easily and stick to the grimy areas. If it’s too thin, add more baking soda; if too thick, add a tiny bit more water.
How to Use It
- Apply the Mixture: Scoop some of your DIY cleaning paste onto your scrubbing sponge. Apply a generous layer of the mixture directly onto the heavily soiled, greasy, or burnt-on areas of your kitchen item or surface.
- Let It Soak: For best results, allow the mixture to sit on the grime for at least 15-30 minutes. For extremely tough, baked-on stains, you might let it sit for a few hours or even overnight to really loosen the residue.
- Scrub: After the soaking time, use your scrubbing sponge to firmly scrub the treated areas. You should notice the grime starting to lift and break apart. Apply more mixture and continue scrubbing until the surface feels clean.
- Rinse Well: Thoroughly rinse the item under warm running water, ensuring all the cleaning mixture and loosened grime are washed away. For larger surfaces like stovetops, wipe clean with a damp cloth until no residue remains.
- Dry: Dry the cleaned item with a clean towel.
What to Expect
You can expect a significant improvement in the cleanliness of your kitchenware. Most fresh grease and moderately baked-on grime should come off with relative ease. For older, tougher, or very thick layers of burnt-on residue, you might need to apply the mixture and scrub a second time. While not always instant, this method offers a powerful solution to persistent kitchen messes, leaving your items looking much cleaner and feeling less sticky.
Helpful Tips
- Warm Water Boost: Always use warm or hot water for both mixing and rinsing, as heat helps to further break down grease.
- Targeted Application: Focus the paste directly on the grimiest spots rather than diluting it over the entire surface.
- Soaking is Key: Don’t skip the soaking step, especially for stubborn stains. Time allows the ingredients to work their magic.
- Repeat if Necessary: If the grime doesn’t completely disappear after the first attempt, simply reapply the mixture and repeat the process.
- Gloves for Protection: While these are common household items, wearing cleaning gloves can protect your hands, especially if you have sensitive skin or plan on a prolonged scrubbing session.
Important Notes / Safety
- Patch Test: Before applying the mixture to an entire surface, especially on delicate finishes, coated non-stick pans, or stainless steel, test it on a small, inconspicuous area to ensure it doesn’t cause discoloration or damage.
- Avoid Abrasive Scrubbers: While baking soda is a mild abrasive, avoid using extremely harsh metal scrubbers on non-stick coatings or highly polished surfaces to prevent scratching. A standard scrubbing sponge or a nylon brush is usually sufficient.
- Rinse Thoroughly: Always rinse off all cleaning solution completely to prevent any residue build-up or streaks.
- Ventilation: Work in a well-ventilated area, especially if dealing with large amounts of grime, although this DIY is generally mild.

