Craving a sweet treat that’s also wholesome? This High-Protein Banana & Berry Cheesecake is incredibly easy to make and absolutely delicious. It’s the perfect solution for satisfying your sweet tooth without derailing your healthy eating goals. This no-bake wonder combines a naturally sweet banana-infused protein filling with a vibrant berry topping, all resting on a simple, wholesome crust. It’s creamy, fruity, and packed with beneficial protein, making it an ideal dessert, a satisfying snack, or even a delightful breakfast option.
With its delightful layers of creamy banana goodness and a burst of fresh berries, this cheesecake offers a fantastic balance of flavors and textures. The subtle sweetness from ripe bananas and a hint of maple syrup complements the tang of the berries beautifully. You’ll love how simple it is to prepare, requiring no oven time and just a few common ingredients. Get ready to enjoy a guilt-free indulgence that tastes incredible!
Why You’ll Love This High-Protein Banana & Berry Cheesecake
- Protein-Packed: A fantastic way to boost your protein intake, keeping you feeling full and satisfied.
- No-Bake & Easy: Requires no oven, making it perfect for beginners and warm weather. Simply blend, assemble, and chill!
- Wholesome Ingredients: Made with natural sweeteners, whole grains (for the crust), and fresh fruit.
- Delicious Flavor: The combination of creamy banana, sweet berries, and a hint of vanilla is irresistible.
- Versatile Treat: Enjoy it as a healthy dessert, a filling breakfast, or a nutritious snack anytime.
- Customizable: Easily adapt the fruits, protein powder flavor, or crust ingredients to your preference.
Ingredients
For the Crust:
- 1 cup (90 g) rolled oats
- ¼ cup (60 g) pitted Medjool dates
- 1 tbsp (15 ml) melted coconut oil or butter
- Pinch of salt
For the Banana Protein Filling:
- 1 ½ cups (360 g) plain Greek yogurt (full-fat or 0% fat)
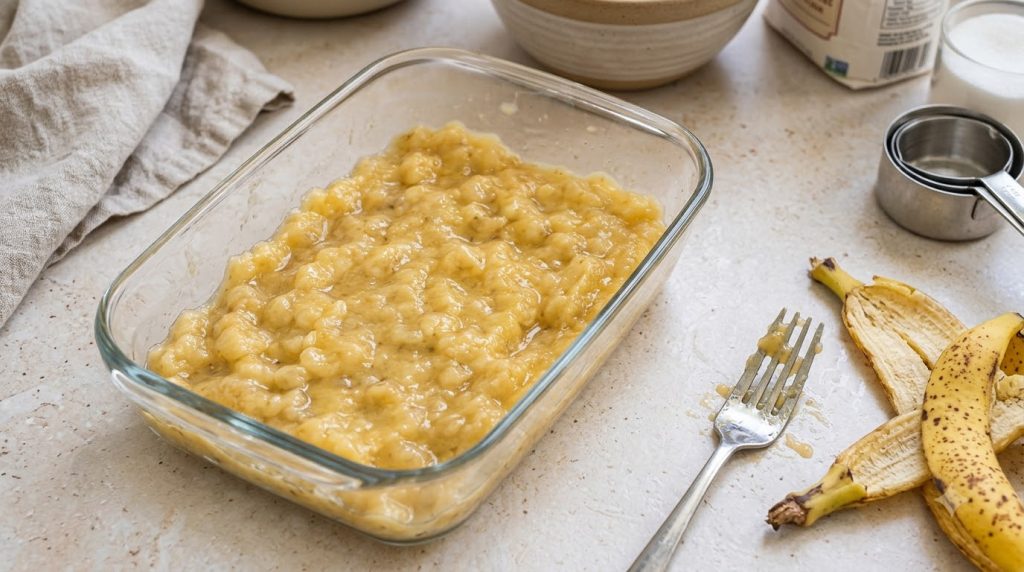
- 1 large (about 120 g) ripe banana, peeled
- ½ cup (60 g) vanilla protein powder (whey or plant-based)
- 2 tbsp (30 ml) maple syrup or honey (adjust to taste)
- 1 tsp (5 ml) vanilla extract
- 1 tbsp (15 ml) fresh lemon juice (optional, for tang)
For the Berry Topping:
- 1 cup (150 g) mixed berries (fresh or frozen, such as blueberries, raspberries, strawberries)
- 1 tbsp (15 ml) maple syrup or honey (optional, for extra sweetness)
- 1 tsp (5 g) chia seeds (optional, if making a quick jam)
Ingredient Notes
- Rolled Oats: Old-fashioned rolled oats work best for the crust, providing a good texture. Quick oats can be used but may result in a slightly finer crust.
- Medjool Dates: Ensure they are fresh and soft for easy blending. If they feel hard, soak them in warm water for 10 minutes, then drain before using. They act as a natural sweetener and binder for the crust.
- Greek Yogurt: Opt for thick, plain Greek yogurt. Full-fat will yield a creamier, richer texture, while 0% fat works well for a lighter option without sacrificing protein.
- Protein Powder: Vanilla protein powder is recommended as it complements the banana and berry flavors. Both whey and plant-based protein powders work, but be aware that some plant-based powders might absorb more liquid, potentially requiring a splash more liquid (milk or water) in the filling.
- Ripe Banana: Use a ripe banana with some brown spots for maximum natural sweetness and flavor.
- Mixed Berries: Fresh berries are ideal for a vibrant topping, but frozen berries can be used, especially if you’re making a quick berry compote or jam.
Equipment You’ll Need
- 9-inch (23 cm) springform pan
- Food processor or high-speed blender
- Mixing bowls
- Spatula
How to Make High-Protein Banana & Berry Cheesecake
- Prepare the Pan: Lightly grease a 9-inch (23 cm) springform pan. You can also line the bottom with parchment paper for easier removal.
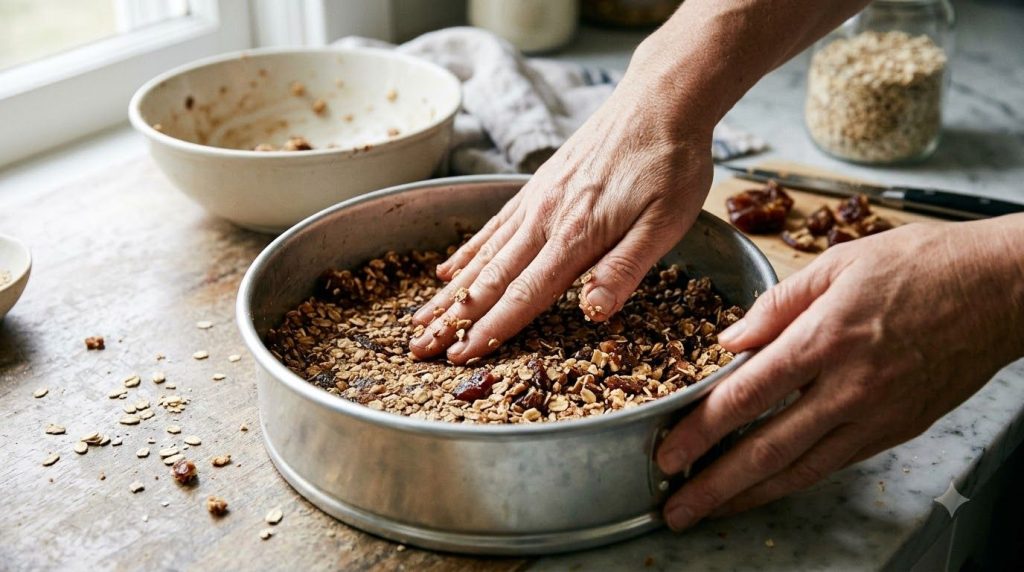
- Make the Crust: In a food processor, combine the rolled oats, pitted Medjool dates, melted coconut oil (or butter), and a pinch of salt. Process until the mixture is finely crumbled and sticks together when pressed.
- Form the Crust: Press the oat mixture evenly into the bottom of the prepared springform pan. Use the back of a spoon or your fingers to compact it firmly. Place the crust in the refrigerator to chill while you prepare the filling, for at least 15 minutes.
- Prepare the Filling: In a clean food processor or high-speed blender, combine the Greek yogurt, ripe banana, vanilla protein powder, maple syrup (or honey), vanilla extract, and optional lemon juice. Blend until completely smooth and creamy, scraping down the sides as needed. The mixture should be thick and pourable.
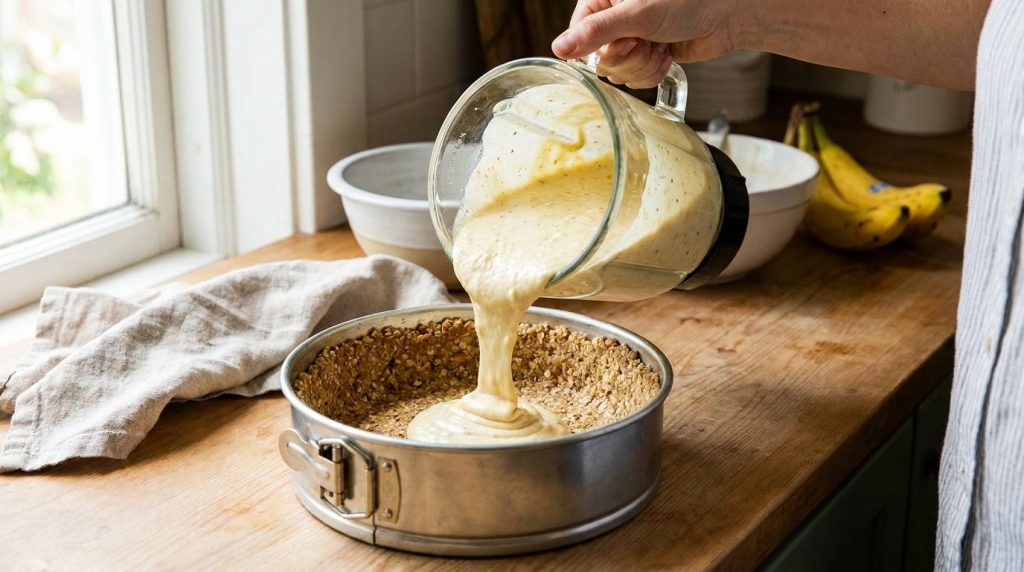
- Assemble the Cheesecake: Pour the banana protein filling over the chilled crust in the springform pan. Gently tap the pan on the counter a few times to release any air bubbles and help level the surface.
- Chill the Cheesecake: Cover the springform pan loosely with plastic wrap and refrigerate for a minimum of 4 hours, or ideally overnight, until the cheesecake is firm and set.
- Prepare the Berry Topping: While the cheesecake chills or just before serving, prepare your berry topping. If using fresh berries, simply wash and pat them dry. If using frozen berries, you can gently thaw them. For a quick berry jam: combine berries, optional maple syrup, and chia seeds in a small saucepan. Cook over medium-low heat for 5-7 minutes, stirring occasionally, until the berries break down and the mixture thickens slightly. Let it cool completely.
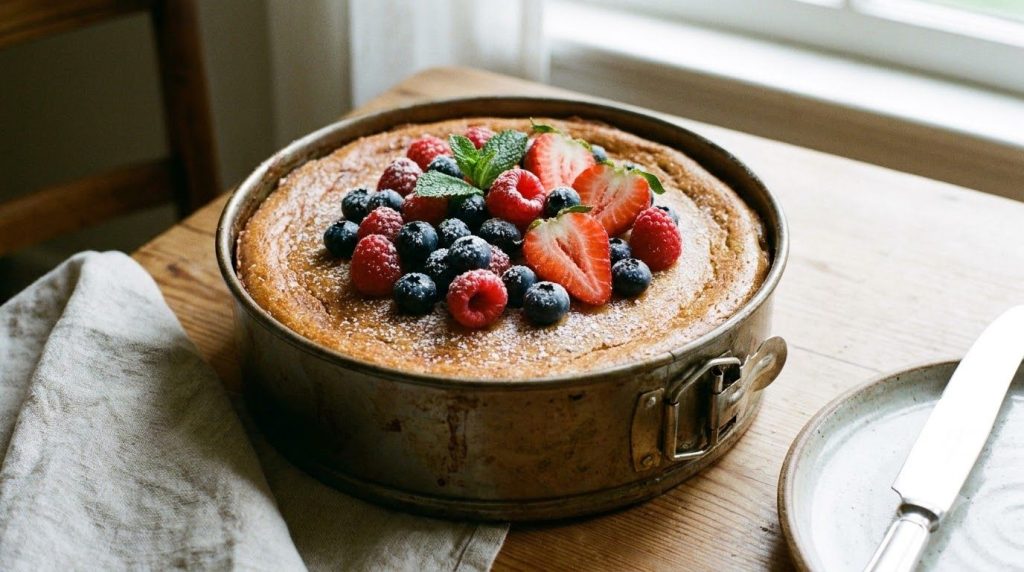
- Serve: Once the cheesecake is firm, carefully remove the sides of the springform pan. Top generously with fresh mixed berries or the cooled berry jam. Slice and serve immediately.
Pro Tips for the Best Results
- Use Ripe Bananas: The riper the banana (with brown spots), the sweeter and more flavorful your filling will be, reducing the need for additional sweeteners.
- Chill Thoroughly: This is crucial for the cheesecake to set properly and achieve that firm, sliceable texture. Don’t rush the chilling process; overnight is always best.
- High-Quality Greek Yogurt: Using a thick, good-quality Greek yogurt will contribute significantly to the creamy texture and tangy flavor of your filling.
- Process Dates Well: When making the crust, ensure the dates are fully broken down and sticky to help bind the oats properly. If the mixture seems too dry, add another date or a tiny bit more coconut oil.
- Smooth Filling: Blend the filling ingredients until absolutely smooth. Any lumps will affect the final texture of your cheesecake.
- Fresh vs. Frozen Berries: While fresh berries look beautiful, don’t hesitate to use frozen mixed berries, especially if you’re making a quick compote for the topping.
Common Mistakes to Avoid
- Not Chilling Long Enough: The most common mistake! If the cheesecake isn’t chilled sufficiently, it will be too soft and won’t hold its shape when sliced.
- Over-Processing Crust: While you want the crust to stick, over-processing can turn it into a paste. Stop when it’s finely crumbled and cohesive.
- Using Unripe Bananas: This will result in a less sweet filling and a banana flavor that isn’t as pronounced.
- Thin Filling: If your Greek yogurt is too thin or your protein powder doesn’t thicken well, the filling might be runny. Ensure you use thick Greek yogurt and a good quality protein powder. If the filling seems too thin, you can add 1-2 tablespoons of almond flour or coconut flour to help thicken it slightly, blending well.
Variations & Substitutions
- Crust Variations: Instead of oats, use crushed graham crackers, digestive biscuits, or a mix of nuts (almonds, walnuts) for the crust.
- Protein Source: You can swap Greek yogurt for cottage cheese (blended until smooth) or even silken tofu for a different protein base.
- Flavor Swaps: Experiment with different protein powder flavors like chocolate or unflavored (adding more vanilla and sweetener), or add a pinch of cinnamon or nutmeg to the filling.
- Other Fruits: While banana and berry are classic, try a mango topping, sliced kiwi, or even a peach compote.
- Add-ins: Fold mini chocolate chips into the filling for a chocolatey twist, or sprinkle chopped nuts on top for extra crunch.
- Vegan Option: Use plant-based Greek yogurt, plant-based protein powder, and ensure your crust ingredients are vegan.
Serving Suggestions
This High-Protein Banana & Berry Cheesecake is incredibly versatile. It makes a delightful light dessert after dinner, especially paired with a cup of herbal tea or coffee. For a nutritious start to your day, serve a slice alongside a strong cup of coffee or a smoothie. It’s also fantastic as a mid-afternoon pick-me-up or a post-workout snack, thanks to its high protein content. The fresh, vibrant berries complement the creamy filling beautifully, making every bite a refreshing experience.
Storage & Reheating
Refrigerator: Store leftover High-Protein Banana & Berry Cheesecake in an airtight container in the refrigerator for up to 3-4 days. If topped with fresh berries, it’s best to add them just before serving, as they can become soft over time.
Freezer: This cheesecake freezes well! Once completely set, slice the cheesecake into individual portions. Place them on a baking sheet and freeze for 1-2 hours until solid. Then, transfer the frozen slices to an airtight freezer-safe container or wrap them individually in plastic wrap, followed by foil. Store in the freezer for up to 1 month. Thaw individual slices in the refrigerator overnight or at room temperature for about 30-60 minutes before serving. Do not reheat.
FAQ
Can I make this High-Protein Banana & Berry Cheesecake ahead of time?
Absolutely! In fact, it’s best made a day in advance to allow ample chilling time for the cheesecake to firm up perfectly.
Can I use a different type of fruit for the topping?
Yes, feel free to get creative! Sliced peaches, mango, kiwi, or even a simple lemon curd would be delicious alternatives to mixed berries.
What kind of protein powder works best?
Vanilla whey protein powder is generally recommended for its smooth texture and flavor. However, a good quality plant-based vanilla protein powder can also work well. Be aware that some plant-based proteins might make the filling slightly thicker or give it a different texture.
Why is my cheesecake filling not setting?
This is usually due to insufficient chilling time. Ensure you refrigerate the cheesecake for at least 4 hours, or preferably overnight, to allow the protein and yogurt to firm up. Using a thicker Greek yogurt can also help achieve a firmer set.
Is this recipe suitable for meal prepping?
Yes, it’s excellent for meal prepping! You can make a whole cheesecake and slice it into individual portions for easy grab-and-go snacks or breakfasts throughout the week. Store slices in airtight containers in the fridge.
Can I add nuts to the crust?
Absolutely! You can substitute up to half of the rolled oats with raw almonds, walnuts, or pecans for added flavor and texture in the crust. Process them along with the oats and dates.
Recipe Card
Recipe Name: High-Protein Banana & Berry Cheesecake
Short Description: A delicious and healthy no-bake cheesecake packed with protein, featuring a creamy banana filling and fresh berry topping on a wholesome oat crust.
Prep Time: 25 minutes
Cook Time: 0 minutes
Total Time: 4 hours 25 minutes (including chilling)
Servings: 8 servings
Course: Dessert, Breakfast, Snack
Cuisine: American (Modern Healthy)
Cooking Method: No-Bake, Chilling
Ingredients:
For the Crust:
- 1 cup (90 g) rolled oats
- ¼ cup (60 g) pitted Medjool dates
- 1 tbsp (15 ml) melted coconut oil or butter
- Pinch of salt
For the Banana Protein Filling:
- 1 ½ cups (360 g) plain Greek yogurt
- 1 large (about 120 g) ripe banana, peeled
- ½ cup (60 g) vanilla protein powder
- 2 tbsp (30 ml) maple syrup or honey
- 1 tsp (5 ml) vanilla extract
- 1 tbsp (15 ml) fresh lemon juice (optional)
For the Berry Topping:
- 1 cup (150 g) mixed berries (fresh or frozen)
- 1 tbsp (15 ml) maple syrup or honey (optional)
- 1 tsp (5 g) chia seeds (optional)
Instructions:
- Prepare the Pan: Lightly grease a 9-inch (23 cm) springform pan.
- Make the Crust: In a food processor, combine rolled oats, pitted Medjool dates, melted coconut oil (or butter), and salt. Process until finely crumbled and sticky.
- Form the Crust: Press the mixture firmly into the bottom of the prepared pan. Chill in the refrigerator for at least 15 minutes.
- Prepare the Filling: In a food processor or blender, combine Greek yogurt, ripe banana, vanilla protein powder, maple syrup (or honey), vanilla extract, and optional lemon juice. Blend until smooth and creamy.
- Assemble: Pour the filling over the chilled crust. Gently tap the pan to level the surface.
- Chill: Cover and refrigerate for a minimum of 4 hours, or ideally overnight, until firm.
- Prepare Topping: Just before serving, top with fresh mixed berries. For a quick jam, cook berries with optional maple syrup and chia seeds until thickened, then cool before topping.
- Serve: Carefully remove the pan sides, slice, and serve.
Notes:
For the best texture and flavor, ensure your banana is ripe and the cheesecake is chilled thoroughly, ideally overnight. Adjust sweetness to your preference.
Storage:
Store in an airtight container in the refrigerator for up to 3-4 days. Can be frozen for up to 1 month; thaw in the refrigerator before serving.
Nutrition:
Nutrition information is an estimate and may vary depending on the ingredients and brands used.