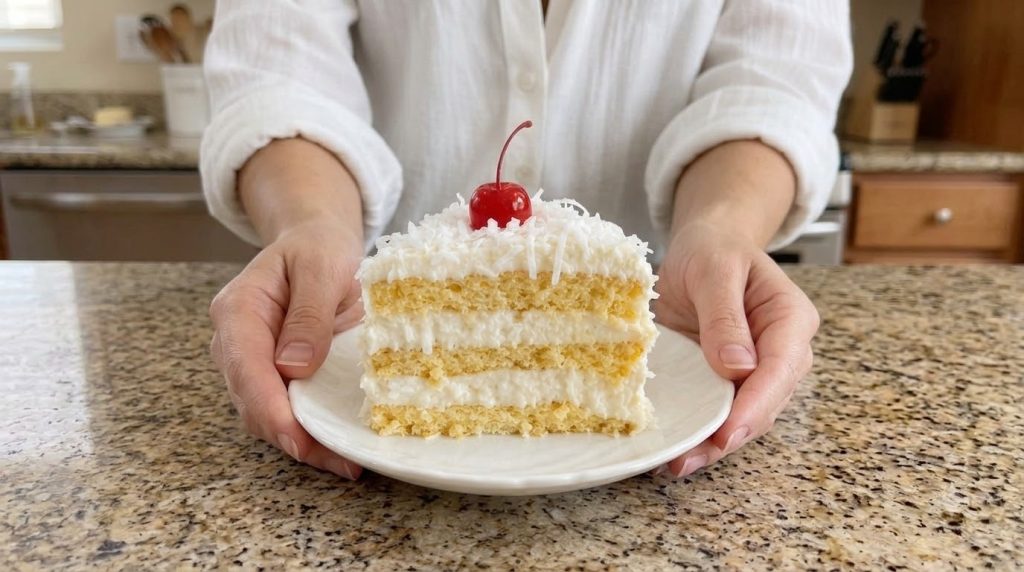
Irresistible Coconut Cream Dream Cake Recipe
This coconut cream dream cake is a classic homemade dessert with tender, fluffy vanilla-coconut layers, a light coconut cream filling, and a generous topping of sweet shredded coconut. It is a good choice for birthdays, potlucks, holiday tables, or any time you want a showy cake without complicated decorating.
Why You’ll Love This Coconut Cream Dream Cake
- Simple ingredients: Most of what you need is pantry staples, plus heavy cream and shredded coconut.
- Light, fluffy texture: The cake stays soft, and the whipped filling keeps each bite creamy rather than heavy.
- Make-ahead friendly: The layers can be baked a day ahead, and the cake is easy to assemble later.
- Crowd-pleasing flavor: Coconut is familiar and sweet without being overpowering.
Ingredients
For the Cake
- 2 1/4 cups (280 g) all-purpose flour
- 1 1/2 cups (300 g) granulated sugar
- 1 tbsp (12 g) baking powder
- 1/2 tsp (3 g) fine salt
- 1/2 cup (113 g) unsalted butter, softened
- 3 large eggs, room temperature
- 1 cup (240 ml) whole milk, room temperature
- 1 tsp vanilla extract
- 1/2 tsp coconut extract
For the Coconut Cream Filling
- 1 cup (240 ml) cold heavy cream
- 1/3 cup (40 g) powdered sugar
- 1/2 tsp coconut extract
- 1/2 cup (45 g) sweetened shredded coconut, lightly toasted and cooled
For Topping
- 1 1/2 cups (120 g) sweetened shredded coconut
Ingredient Notes
Softened butter and room-temperature eggs and milk blend more evenly into the batter, which helps the cake bake up light. Coconut extract adds a clear coconut flavor that shredded coconut alone may not deliver. Toasting the shredded coconut for the filling adds a nutty depth and keeps it from tasting flat.
Equipment You’ll Need
- Two 9-inch (23 cm) round cake pans
- Parchment paper
- Electric mixer or stand mixer
- Mixing bowls and a rubber spatula
- Offset spatula or butter knife for frosting
- Wire cooling rack
How to Make Coconut Cream Dream Cake
- Prepare the pans and oven. Heat the oven to 350°F (175°C). Grease two 9-inch pans, line the bottoms with parchment, and set them aside.
- Mix the dry ingredients. In a medium bowl, whisk the flour, baking powder, and salt until evenly combined.
- Cream the butter and sugar. Beat the butter and granulated sugar on medium speed for about 3 minutes, until pale and fluffy.
- Add the eggs. Beat in the eggs one at a time, mixing well after each addition and scraping down the bowl as needed. Stir in the vanilla and coconut extracts.
- Alternate flour and milk. On low speed, add the flour mixture in three additions, alternating with the milk in two additions. Mix only until the batter is smooth, which usually takes less than a minute after the last addition.
- Bake the layers. Divide the batter evenly between the pans and smooth the tops. Bake for about 25 to 30 minutes, until the centers spring back when lightly pressed and a toothpick inserted in the center comes out clean. Bake times vary by oven, so start checking at 25 minutes.
- Cool completely. Let the layers cool in the pans for 10 minutes, then turn them onto a wire rack and cool completely before filling.
- Toast the coconut for the filling. Spread the 1/2 cup of shredded coconut on a dry baking sheet and bake at 350°F (175°C) for about 5 minutes, stirring once, until golden. Let it cool.
- Whip the cream. Beat the cold heavy cream, powdered sugar, and coconut extract on medium-high speed until soft peaks form. The cream should hold its shape but still look smooth and spreadable. Fold in the cooled toasted coconut.
- Assemble the cake. Place one cake layer on a serving plate and spread about half the filling over it. Top with the second layer, then spread the remaining filling over the top and sides.
- Top with coconut. Press the 1 1/2 cups of shredded coconut onto the sides and top of the cake. Chill for at least 1 hour before slicing so the filling firms up.
Pro Tips for the Best Results
- Chill the heavy cream and mixing bowl before whipping for a fuller, more stable filling.
- Stop whipping as soon as soft peaks form. Overbeaten cream can turn grainy.
- Use a toothpick test rather than relying only on the timer.
- Level the cake layers with a serrated knife if they domed in the oven.
- Press the coconut into the frosting gently so it sticks without tearing the cake.
Common Mistakes to Avoid
- Dense cake: Overmixing after adding the flour develops gluten. Mix only until the batter comes together.
- Runny filling: Warm cream will not whip well. Use cold cream and cold equipment.
- Melting layers: Frosting a warm cake causes the filling to slide. Let the layers cool completely first.
- Dry cake: Overbaking is the most common cause. Begin checking at the low end of the baking time.
Variations and Substitutions
- Lighter filling: Replace half the heavy cream with coconut cream from a can, chilled overnight, for a richer coconut flavor.
- Chocolate version: Scatter chocolate shavings between the layers for a contrast.
- Cupcakes: Divide the batter among lined muffin cups and bake until a toothpick comes out clean, checking early.
Serving Suggestions
Serve the cake chilled or at cool room temperature. Fresh berries, sliced mango, or a cup of hot coffee pair well with its sweet, creamy flavor.
Storage and Reheating
Store the cake covered in the refrigerator. Because it contains whipped cream, it is best eaten within a few days. Reheating is not necessary, and the cake should be served cold or at cool room temperature. Freezing is not recommended because the whipped filling can separate when thawed.
Frequently Asked Questions
Can I make this cake ahead of time?
Yes. Bake the layers up to a day ahead, wrap them tightly, and store them at room temperature. Assemble the cake on the day you plan to serve it for the best texture.
Can I use canned coconut milk instead of heavy cream?
Chilled coconut cream from a can can work in place of part of the heavy cream, but it will be less stable. Whip it cold and use it soon after.
Why did my filling turn soupy?
The cream was likely too warm or overbeaten. Chill the cream and bowl, and whip only until soft peaks form.
How do I know when the cake layers are done?
The layers are done when the centers spring back when touched and a toothpick comes out clean. Exact baking time depends on your oven and pan size.
Recipe Card
Recipe Name: Coconut Cream Dream Cake
Short Description: Fluffy vanilla-coconut cake layers with a light coconut cream filling and shredded coconut topping.
Prep Time: About 30 minutes
Cook Time: About 30 minutes, plus cooling
Total Time: About 3 hours, including cooling and chilling
Servings: 12 slices
Course: Dessert
Cuisine: American
Cooking Method: Baking
Ingredients: See the ingredient list above.
Instructions: See the numbered steps above.
Notes: Baking times are estimates and vary by oven. Use the toothpick test to confirm doneness.
Storage: Refrigerate covered and eat within a few days.
Nutrition: Nutrition information is not provided because reliable ingredient quantities for brand-specific items are not available.