Keeping high-touch surfaces clean is a daily job in most homes, and store-bought disinfectants can get expensive fast. A homemade spray can be a practical option for everyday wiping of counters, sinks, and other hard surfaces. It is also a good way to control what goes into your cleaning routine.
One important note before you start: a homemade mixture is not the same as an EPA-registered disinfectant. If you need to kill germs on surfaces during illness or after a household outbreak, use a product that is registered for that purpose and follow its label. The recipe below is best treated as a general-purpose cleaning spray that works well for routine wiping.
What You’ll Need
- 1 clean glass or plastic spray bottle, about 16 to 24 ounces
- 1 cup distilled water
- 1 cup isopropyl alcohol (70% concentration)
- A small measuring cup and a funnel
- A small ceramic or glass bowl for mixing
- A permanent marker and a label
- Clean microfiber cloths or paper towels
Why This DIY Can Be Useful
Isopropyl alcohol evaporates quickly and helps lift grease and residue from hard surfaces, which is why it is a common ingredient in cleaning sprays. Distilled water helps the mixture stay clear and leaves fewer mineral spots than tap water. Together, they make a light, fast-drying spray that is easy to use on many everyday surfaces.
How to Make It
- Wash the spray bottle with warm soapy water, rinse it well, and let it air dry completely.
- Measure 1 cup of distilled water into your mixing bowl.
- Measure 1 cup of 70% isopropyl alcohol and add it to the water.
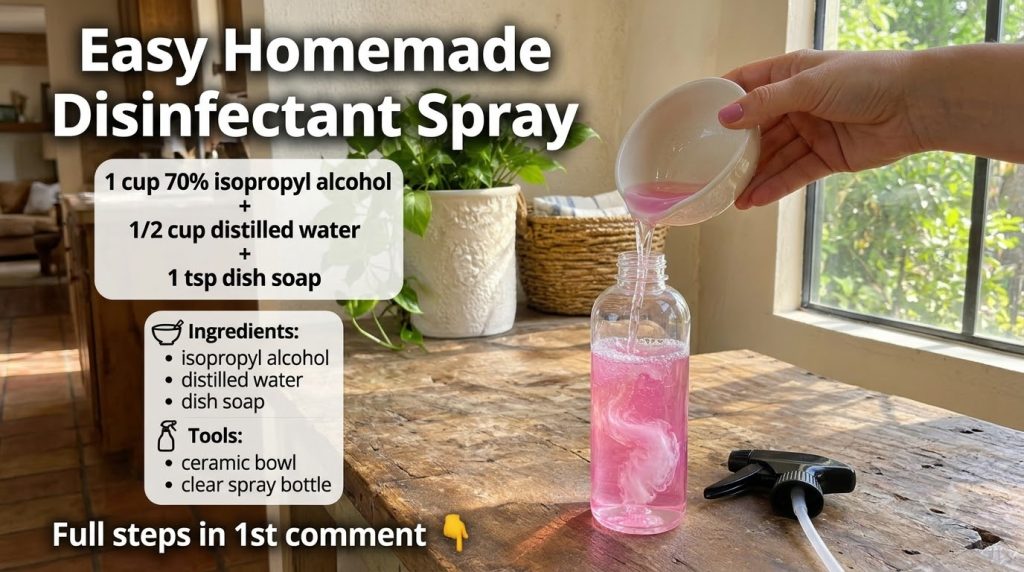
- Stir gently to combine. If you want the pink color shown in the photo, add a single drop of food coloring and stir again, but this is optional and does not change how the spray works.
- Use the funnel to pour the mixture into the spray bottle, leaving a little space at the top.
- Attach the trigger nozzle, label the bottle with the contents and the date, and store it out of reach of children and pets.
How to Use It
Test the spray on a small, hidden area first, especially on wood, painted surfaces, or stone, since alcohol can dull some finishes. Once you know it is safe for the surface, spray a light, even mist onto the area. Do not soak it.
Let the surface stay visibly wet for about one minute so the solution has time to work. Then wipe the area with a clean microfiber cloth. For sinks, counters, and doorknobs, repeat as needed. You generally do not need to rinse hard surfaces after wiping, but you can wipe with a damp cloth if you prefer.
What to Expect
This spray is well suited to removing everyday grime, fingerprints, and light residue, and it leaves surfaces looking fresh. It is not a guaranteed germ killer, and results depend on the surface, how much spray you use, and how long it stays wet. Expect a practical, everyday cleaner rather than an instant fix for heavy messes.
Helpful Tips
- Make small batches so the mixture stays fresh and you are not storing large amounts at home.
- Keep the spray away from heat and open flames, since isopropyl alcohol is flammable.
- Use a fine mist rather than a heavy stream, which wastes product and can leave streaks.
- Wipe with a clean cloth instead of paper towels that may leave lint behind on glass.
Important Notes / Safety
Never mix this spray with bleach, vinegar, ammonia, or hydrogen peroxide. Combining cleaning products can release harmful fumes or create dangerous reactions. Use only one cleaner on a surface at a time, and rinse or wipe the area before switching products.
Work in a room with good airflow and open a window if you are cleaning for a longer period. Wear gloves if you have sensitive skin, and avoid spraying near the face. Keep the bottle clearly labeled, store it in a cool place away from sunlight, and keep it out of reach of children and pets.
If you have a favorite homemade cleaning recipe, share it in the comments and tell us what surfaces you use it on most.