Fresh pita bread is one of those kitchen staples that tastes far better when it is still warm from the oven or skillet. The good news is that pita bread is easy to make at home with a short ingredient list and a basic dough. This guide walks you through each stage, from mixing the dough to getting those soft, hollow pockets that make pita so useful.
Homemade pita is also flexible. Once you have a batch, it works as a side for soups and salads, a wrap for fillings, or a warm companion for your favorite dips.
Why Bake Pita Bread at Home?
Store-bought pita is convenient, but homemade pita bread has a softer texture and a fresher flavor. You also control the ingredients, which makes it easier to keep your baking simple and familiar. A single batch yields about 8 pitas, so it is a practical choice when you are cooking for a family or planning a make-ahead meal.

Ingredients for Homemade Pita Bread
This recipe makes about 8 pitas. Measurements are in standard US cups and tablespoons.
- 3 cups all-purpose flour
- 1 cup warm water (about 110°F / 43°C)
- 1 tablespoon instant yeast
- 1 tablespoon sugar
- 2 tablespoons olive oil
- 1/2 tablespoon salt (about 1 1/2 teaspoons)
- 2 tablespoons extra flour, for dusting
Prep time: about 20 minutes, plus about 1 hour 15 minutes of rising time
Cook time: about 5 minutes per pita
Yield: 8 pitas
Step-by-Step: How to Make Pita Bread
- Activate the yeast mixture. Stir the warm water, sugar, and instant yeast together in a small bowl. Let it sit for 5 to 10 minutes until it looks slightly foamy.
- Combine the dry ingredients. In a large bowl, whisk the flour and salt together so the salt is evenly distributed.
- Form the dough. Add the yeast mixture and olive oil to the flour. Stir until a rough, shaggy dough forms.
- Knead until smooth. Turn the dough onto a lightly floured surface and knead for 8 to 10 minutes, until it feels smooth and springy. Use the extra flour only as needed to keep the dough from sticking.
- Let the dough rise. Place the dough in an oiled bowl, cover it, and let it rest in a warm spot for about 1 hour, or until doubled in size.
- Divide the dough. Gently press the air out, then divide the dough into 8 equal pieces. Shape each piece into a ball and cover them with a clean towel for about 10 minutes so they relax.
- Roll out the pitas. On a floured sheet of parchment, roll each ball into a circle about 1/4 inch thick and 6 to 7 inches wide. Keep the thickness even across the circle, since uneven spots can prevent a good pocket from forming.
- Preheat your cooking surface. Heat a baking sheet or pizza stone in the oven at 475°F (245°C) for about 30 minutes. You can also heat a dry skillet over medium-high heat.
- Bake or cook the pitas. In the oven, bake each pita for 3 to 5 minutes, until it puffs and turns lightly golden. In a skillet, cook each pita for about 1 to 2 minutes per side, pressing gently with a spatula, until it puffs and shows golden-brown spots.
- Keep them soft. Stack the cooked pitas and wrap them in a clean kitchen towel while you finish the batch. This traps steam and keeps them pliable.
Tips for Getting Perfect Pockets
- Keep the thickness even. Thin, consistent circles puff more reliably than thick or uneven ones.
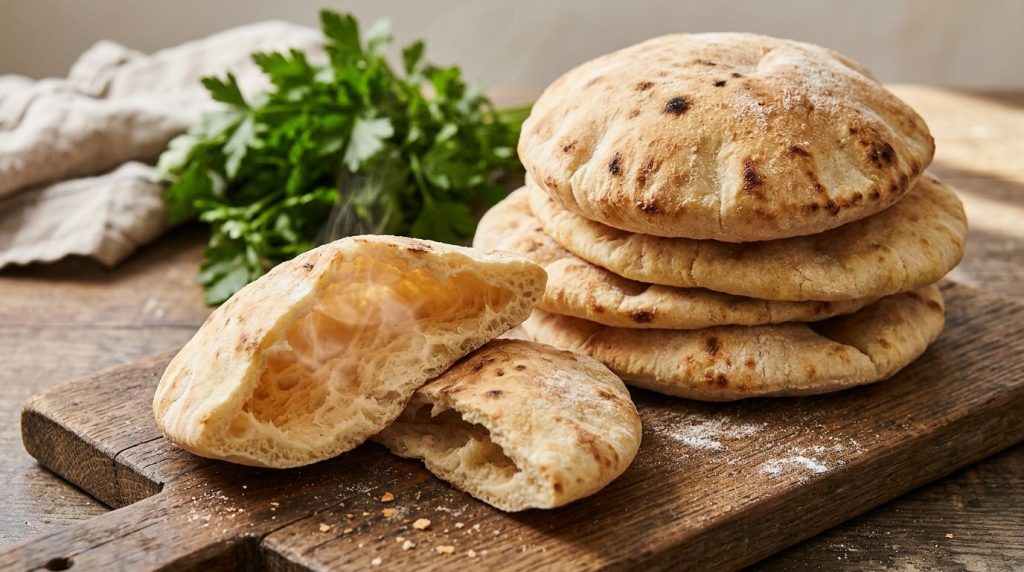
- Use a very hot surface. The sudden heat turns the moisture inside the dough into steam, which lifts the top layer and creates the pocket.
- Avoid overflouring. Too much flour can dry out the dough and make it tough.
- Let the dough rest. If the dough springs back when rolled, cover it and wait a few minutes before trying again.
How to Store and Serve Homemade Pita
Pita is best eaten the same day, but it keeps well when stored properly. Let the pitas cool completely, then place them in an airtight bag or container at room temperature for up to 2 days. For longer storage, freeze them in a sealed bag for up to 3 months and reheat them briefly in a dry skillet or oven before serving.
Serve warm pita alongside soups, grilled vegetables, or your favorite dips. You can also cut the pitas into wedges and bake them until crisp for a simple snack.
Frequently Asked Questions
Can I make pita bread without a rolling pin?
Yes. Gently press the dough into circles with your hands, working from the center outward. The rolling pin helps with even thickness, but careful hand-shaping can also work.
Why didn’t my pita puff?
The most common reasons are a surface that was not hot enough, dough rolled too thick, or dough that was not allowed to rise fully. Check your oven or skillet temperature and make sure the dough is an even thickness.
Is pita bread suitable for everyone?
Pita is made from wheat flour and contains gluten, so it is not suitable for people with celiac disease or wheat allergies. If you have dietary restrictions or health concerns, check with a qualified healthcare professional before adding new foods to your routine.
Final Thoughts
Learning to bake pita bread at home is a practical skill that rewards you with fresh, warm bread in under two hours. With a simple dough, even thickness, and a hot cooking surface, you can enjoy soft pitas with any meal or dip.