Imagine fresh, creamy ricotta, made right in your kitchen! Making your own cheese is surprisingly simple and so rewarding. Forget store-bought options when you can whip up fresh, additive-free mozzarella, ricotta, cream cheese, and cottage cheese with just a few everyday ingredients. Not only will you save money, but you’ll also enjoy wholesome dairy made exactly to your liking. Get ready to discover how easy it is to craft your own delicious homemade cheese recipes.
Quick Overview
- Main topic: Homemade Cheese Recipes
- Best for: Home cooks, dairy enthusiasts, those seeking additive-free options
- Number of recipes: 4
- Prep style: Simple, stovetop cheesemaking
- Reader benefit: Cost savings, fresh taste, control over ingredients
Recipe 1: Homemade Ricotta Cheese

This classic Italian cheese is incredibly versatile and surprisingly easy to make at home. Enjoy it in lasagna, on toast, or with fresh fruit.
Servings: 8-10
Prep time: 15 minutes
Cook / chill / rest time: 45-75 minutes
Ingredients:
- 1 Gallon Whole Milk
- 1 Cup Heavy Cream
- 1 Tsp Salt
- 1/4 Cup White Vinegar
Instructions:
- Combine the whole milk, heavy cream, and salt in a large, heavy-bottomed pot over medium heat. Stir occasionally to prevent scorching.
- Heat the mixture until it reaches 190°F (88°C), just before it comes to a boil. Use a food thermometer to ensure accuracy.
- Remove the pot from the heat and gently stir in the white vinegar.
- Let the mixture sit undisturbed for 10-15 minutes. During this time, the curds will separate from the whey.
- Line a colander with a few layers of cheesecloth and place it over a large bowl to catch the whey. Gently scoop the separated curds into the cheesecloth-lined colander.
- Let the curds drain for 30 minutes to an hour, depending on your desired consistency. For a firmer ricotta, drain longer; for a creamier texture, drain less.
- Transfer the fresh ricotta to an airtight container and refrigerate.
Storage / Serving / Usage Note: Store homemade ricotta in the refrigerator for up to 5 days. It’s delicious in both sweet and savory applications.
Recipe 2: Homemade Mozzarella Cheese

Making your own mozzarella is a rewarding experience, yielding a fresh, milky cheese far superior to many store-bought varieties. It’s fantastic on pizza, in salads, or simply enjoyed on its own.
Servings: 6-8
Prep time: 10 minutes
Cook / chill / rest time: 30 minutes
Ingredients:
- 1 Gallon Whole Milk
- 1.5 Tsp Citric Acid (dissolved in 1/4 cup cool water)
- 1/4 Tsp Liquid Rennet (dissolved in 1/4 cup cool water)
- 1 Tsp Salt
Instructions:
- Pour the whole milk into a large, non-reactive pot. Add the dissolved citric acid solution and stir well.
- Heat the milk over medium-low heat to 90°F (32°C), stirring gently.
- Remove from heat and gently stir in the dissolved liquid rennet solution using an up-and-down motion for about 30 seconds. Cover the pot and let it sit undisturbed for 5-10 minutes, allowing a firm curd to form.
- Check for a clean break (when a knife inserted into the curd creates a clear cut). If not, let it sit for a few more minutes.
- Cut the curds into 1-inch cubes using a long knife.
- Place the pot back on medium-low heat and slowly heat the curds to 105°F (40°C), stirring gently every few minutes. The curds will shrink, and the whey will separate.
- Remove the pot from heat. Using a slotted spoon, transfer the curds to a colander, allowing the whey to drain. Gently press the curds to remove excess whey.
- Heat the reserved whey (or fresh water) to 170-175°F (77-79°C). Dip a portion of the curds into the hot whey for about 30 seconds, then, using gloves, begin to stretch and fold the cheese until it’s smooth and pliable. Incorporate the salt during this process. Repeat dipping and stretching until the cheese is smooth and shiny.
- Form into desired shapes (balls or logs) and immediately plunge into an ice bath for 15-30 minutes to cool and set.
Storage / Serving / Usage Note: Store fresh mozzarella submerged in lightly salted cold water or whey in an airtight container in the refrigerator for up to a week. Serve at room temperature for best flavor.
Recipe 3: Homemade Cream Cheese
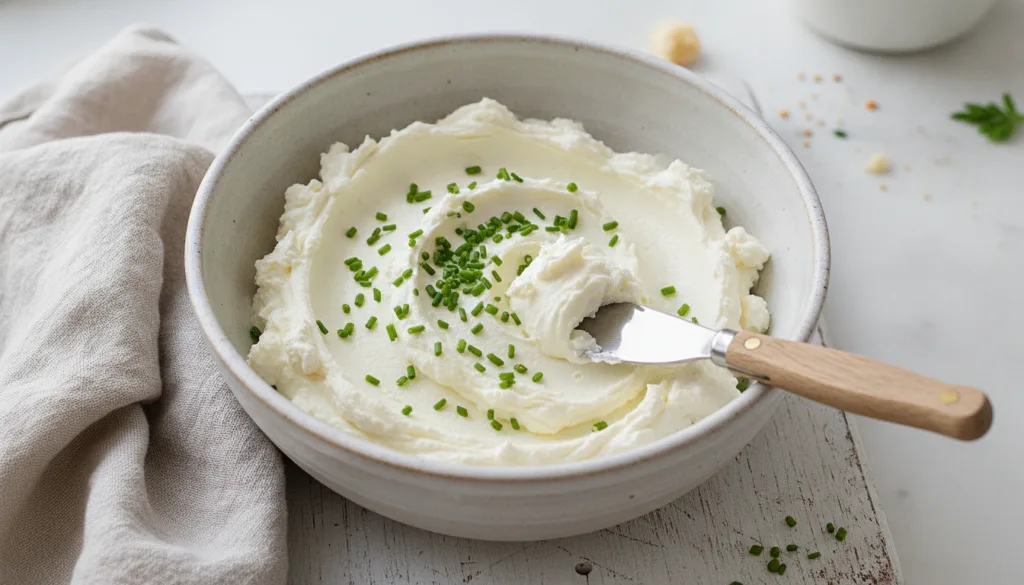
Enjoy the rich, tangy flavor of homemade cream cheese without any stabilizers or additives. It’s surprisingly easy and tastes incredible on bagels, in dips, or as a cheesecake ingredient.
Servings: 4-6
Prep time: 10 minutes
Cook / chill / rest time: 12-24 hours
Ingredients:
- 1/2 Gallon Whole Milk
- 1 Cup Heavy Cream
- 1/4 Cup Lemon Juice
- 1/2 Tsp Salt
Instructions:
- Combine the whole milk and heavy cream in a large pot. Heat over medium heat, stirring occasionally, until the mixture reaches 180°F (82°C). Do not let it boil.
- Remove the pot from the heat and stir in the lemon juice and salt. Let it sit undisturbed for 10-15 minutes, allowing the curds to separate.
- Line a colander with several layers of cheesecloth and place it over a large bowl. Carefully pour the curds and whey into the cheesecloth.
- Gather the corners of the cheesecloth and tie them to form a bag. Hang the bag over the bowl or tie it to a kitchen faucet, allowing the whey to drain for 6-12 hours at room temperature, or in the refrigerator for 12-24 hours, until it reaches your desired cream cheese consistency.
- Once drained, transfer the curds to a food processor. Process until smooth and creamy. If it’s too thick, add a tablespoon of the reserved whey until desired consistency is reached.
Storage / Serving / Usage Note: Store homemade cream cheese in an airtight container in the refrigerator for up to 1 week. It can be flavored with herbs, spices, or sweeteners.
Recipe 4: Homemade Cottage Cheese
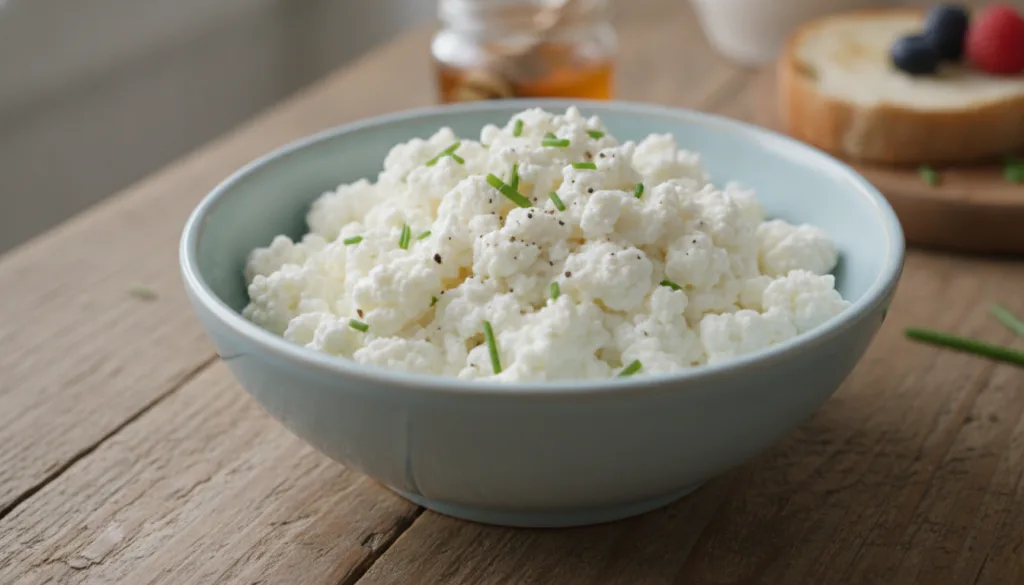
Cottage cheese is a wonderfully versatile dairy product, packed with protein and perfect for a light snack or a meal component. Making it at home gives you a fresh taste and control over the curd size.
Servings: 8-10
Prep time: 10 minutes
Cook / chill / rest time: 2-3 hours
Ingredients:
- 1 Gallon Whole Milk
- 1/2 Cup White Vinegar
- 1 Tsp Salt
Instructions:
- Pour the whole milk into a large, heavy-bottomed pot. Heat over medium heat, stirring occasionally, until it reaches 120°F (49°C).
- Remove from heat and stir in the white vinegar. Let the milk sit undisturbed for 30 minutes to an hour, allowing the curds to separate.
- Gently cut the large curds into 1/2-inch cubes with a knife.
- Place the pot back on low heat and slowly warm the curds to 115°F (46°C) for about 20-30 minutes, stirring very gently to keep the curds from sticking. This step firms up the curds.
- Line a colander with cheesecloth and place it over a large bowl. Carefully pour the curds and whey into the cheesecloth.
- Rinse the curds under cool running water for a few minutes to remove excess whey and vinegar taste. Gently squeeze the cheesecloth to remove excess water.
- Transfer the curds to a bowl and stir in the salt. For a creamier texture, you can add a tablespoon or two of milk or cream.
Storage / Serving / Usage Note: Store homemade cottage cheese in an airtight container in the refrigerator for up to 5-7 days. Enjoy with fruit, vegetables, or as a side dish.
Simple Tips for Best Results
- Use Quality Milk: For best results, use fresh, whole milk that is not ultra-pasteurized, as it makes curd formation more challenging.
- Accurate Temperatures: A good cooking thermometer is essential for precise cheesemaking. Minor temperature differences can significantly affect the outcome.
- Gentle Handling: Handle curds gently to prevent them from breaking apart too much, which can lead to a crumbly texture.
- Proper Drainage: Ensure adequate draining time for your cheese to achieve the desired consistency. A longer drain time usually results in a firmer cheese.
- Cleanliness is Key: Always work with clean utensils and surfaces to prevent contamination.
FAQ
Can I use low-fat milk for these homemade cheese recipes?
While you can use lower-fat milk, whole milk is recommended for richer flavor and better yield. Lower fat content may result in smaller, less creamy curds.
How do I know if the curds have separated properly?
You’ll see a clear separation between solid white curds and yellowish, watery whey. When you gently scoop the curds, they should hold together.
What can I do with the leftover whey?
Whey is packed with nutrients! You can use it in smoothies, as a base for soups, to water plants, or even to knead bread dough for added flavor and moisture.
Final Thoughts
Ditching store-bought and embracing the joy of crafting your own homemade cheese recipes is a journey worth taking. These four simple recipes for ricotta, mozzarella, cream cheese, and cottage cheese empower you to enjoy fresh, wholesome dairy products free from unnecessary additives. Experiment with flavors, savor the process, and impress your taste buds with the incredible freshness only homemade can offer. Happy cheesemaking!
MEDICAL DISCLAIMER: The information provided in this article is for general knowledge and informational purposes only, and does not constitute medical advice. Always consult with a qualified healthcare professional before making any decisions about your health or diet.