Get ready to discover your new favorite comfort treat! There’s nothing quite like biting into a warm, crispy golden bun, only to find a rich, gooey melted chocolate core spilling out. This simple yet incredibly satisfying dessert is easier to make than you think and promises pure bliss in every bite. Whether you’re a seasoned baker or just starting, these delightful treats are guaranteed to impress.
We’re starting with the star of the show, the irresistible Melted Chocolate Buns, and then exploring several other easy-to-make sweet bun and doughnut variations. Perfect for weekend indulgence, special occasions, or just a sweet pick-me-up, these recipes are sure to become a staple in your kitchen.
Quick Overview
- Main topic: Sweet fried buns and doughnuts
- Best for: Dessert, comfort food, special treats
- Number of recipes: 6
- Prep style: Frying and simple dough work
- Reader benefit: Easy-to-follow recipes for indulgent, homemade sweet treats
Recipe 1: Melted Chocolate Buns

The original star! These golden buns with their irresistible melted chocolate core are a true delight. Perfect for a cozy treat, they are surprisingly simple to prepare and offer a rewardingly rich experience.
Servings: 8 buns
Prep time: 2 hours (including rise time)
Cook / chill / rest time: 10 minutes
Ingredients:
- 2 ¼ cups (270g) all-purpose flour, plus more for dusting
- ¼ cup (50g) granulated sugar
- 2 ¼ teaspoons active dry yeast
- ½ teaspoon salt
- 1 large egg, lightly beaten
- ½ cup (120ml) warm milk (105-115°F / 40-46°C)
- 2 tablespoons (28g) unsalted butter, melted
- 4 (1.5 oz / 43g) chocolate bars, each cut into 2 pieces (e.g., milk chocolate, dark chocolate)
- 4 cups (960ml) vegetable oil, for deep-frying
Instructions:
- In a large bowl, combine flour, sugar, yeast, and salt. Make a well in the center.
- Add the beaten egg, warm milk, and melted butter to the well. Mix with a spoon or your hands until a shaggy dough forms.
- Turn the dough out onto a lightly floured surface and knead for 5-7 minutes until smooth and elastic.
- Place the dough in a lightly oiled bowl, cover with plastic wrap, and let it rise in a warm place for 1-1.5 hours, or until doubled in size.
- Once risen, gently punch down the dough. Divide it into 8 equal portions.
- Take one portion, flatten it into a disk, and place a piece of chocolate bar in the center. Carefully pinch and seal the edges of the dough around the chocolate, forming a smooth ball. Repeat with the remaining dough and chocolate.
- Heat the vegetable oil in a large heavy-bottomed pot or Dutch oven to 350°F (175°C).
- Carefully lower 2-3 buns into the hot oil, ensuring not to overcrowd the pot. Fry for 2-3 minutes per side, or until golden brown and cooked through.
- Remove the buns with a slotted spoon and place them on a wire rack lined with paper towels to drain excess oil.
- Serve warm to enjoy the melted chocolate core.
Storage / Serving / Usage Note: Best served immediately while warm. Leftovers can be stored in an airtight container at room temperature for up to 2 days, but the chocolate will not be as melted.
Recipe 2: Cinnamon Sugar Donut Holes

These classic donut holes are light, fluffy, and coated in a delightful cinnamon sugar blend. They’re a perfect snack or breakfast treat, reminiscent of your favorite fair food.
Servings: 12-15 donut holes
Prep time: 1 hour 30 minutes
Cook / chill / rest time: 15 minutes
Ingredients:
- 1 ½ cups (180g) all-purpose flour
- ¼ cup (50g) granulated sugar
- 1 teaspoon active dry yeast
- ½ teaspoon salt
- ½ cup (120ml) warm milk (105-115°F / 40-46°C)
- 1 large egg yolk
- 2 tablespoons (28g) unsalted butter, melted
- 3 cups (720ml) vegetable oil, for deep-frying
- For coating: ½ cup (100g) granulated sugar, 1 tablespoon ground cinnamon
Instructions:
- In a bowl, combine flour, sugar, yeast, and salt.
- Add warm milk, egg yolk, and melted butter. Mix to form a soft dough.
- Knead on a lightly floured surface for 5 minutes until smooth.
- Place in an oiled bowl, cover, and let rise for 1 hour, or until doubled.
- Punch down dough. Roll it out to ½-inch thickness. Use a small round cutter or knife to cut into small pieces.
- Heat oil to 350°F (175°C). Fry donut holes in batches for 2-3 minutes, turning until golden brown.
- While still warm, toss donut holes in a mixture of sugar and cinnamon until fully coated.
Storage / Serving / Usage Note: Best enjoyed fresh. Store in an airtight container at room temperature for up to 1 day.
Recipe 3: Nutella Stuffed Doughnuts

Elevate your doughnut game with a luscious Nutella filling. These decadent treats combine fluffy dough with the rich, creamy flavor of hazelnut chocolate spread.
Servings: 6 doughnuts
Prep time: 2 hours
Cook / chill / rest time: 15 minutes
Ingredients:
- 1 ½ cups (180g) all-purpose flour
- 2 tablespoons (25g) granulated sugar
- 1 teaspoon active dry yeast
- ¼ teaspoon salt
- ½ cup (120ml) warm milk
- 1 large egg
- 2 tablespoons (28g) unsalted butter, softened
- ½ cup (120g) Nutella, chilled slightly
- 3 cups (720ml) vegetable oil, for deep-frying
- Powdered sugar, for dusting
Instructions:
- Combine flour, sugar, yeast, and salt in a bowl.
- Add warm milk, egg, and softened butter. Mix and knead for 6-8 minutes until smooth.
- Place dough in an oiled bowl, cover, and let rise for 1.5 hours, or until doubled.
- Punch down dough and divide into 6 equal pieces. Roll each into a ball.
- Heat oil to 350°F (175°C). Fry doughnuts 2-3 at a time for 2-3 minutes per side until golden.
- Remove and drain on paper towels.
- Once cooled slightly, use a piping bag with a long, thin nozzle to inject Nutella into the center of each doughnut.
- Dust generously with powdered sugar before serving.
Storage / Serving / Usage Note: Best consumed within hours of making. Store leftover doughnuts in an airtight container at room temperature for up to 1 day.
Recipe 4: Raspberry Jam Filled Fritters

These light and airy fritters are filled with a bright, sweet-tart raspberry jam, offering a lovely contrast to the rich fried dough. A perfect dessert for fruit lovers!
Servings: 10 fritters
Prep time: 1 hour 30 minutes
Cook / chill / rest time: 15 minutes
Ingredients:
- 1 ½ cups (180g) all-purpose flour
- 2 tablespoons (25g) granulated sugar
- 1 teaspoon baking powder
- ½ teaspoon salt
- ¾ cup (180ml) milk
- 1 large egg
- 2 tablespoons (28g) melted butter
- ¾ cup (200g) raspberry jam
- 3 cups (720ml) vegetable oil, for deep-frying
- Powdered sugar, for dusting
Instructions:
- In a large bowl, whisk together flour, sugar, baking powder, and salt.
- In a separate bowl, whisk milk, egg, and melted butter.
- Pour the wet ingredients into the dry ingredients and mix until just combined (do not overmix; a few lumps are fine).
- Heat oil to 350°F (175°C).
- Drop tablespoons of batter into the hot oil, creating fritters. Fry for 2-3 minutes per side until golden brown.
- Remove and drain on paper towels.
- While still warm, gently make a small incision in each fritter and pipe in about 1-2 teaspoons of raspberry jam.
- Dust with powdered sugar before serving.
Storage / Serving / Usage Note: These fritters are best fresh. Store leftovers in an airtight container for up to 1 day.
Recipe 5: Cream Cheese Filled Doughnuts

For those who love a bit of tang with their sweet, these cream cheese-filled doughnuts are a revelation. The creamy, slightly tart filling perfectly complements the rich, fried dough.
Servings: 8 doughnuts
Prep time: 2 hours
Cook / chill / rest time: 15 minutes
Ingredients:
- 2 cups (240g) all-purpose flour
- ¼ cup (50g) granulated sugar
- 2 ¼ teaspoons active dry yeast
- ½ teaspoon salt
- ¾ cup (180ml) warm milk
- 1 large egg
- 3 tablespoons (42g) unsalted butter, softened
- For filling: 4 oz (113g) cream cheese, softened, ¼ cup (30g) powdered sugar, ½ teaspoon vanilla extract
- 3 cups (720ml) vegetable oil, for deep-frying
- Granulated sugar, for coating
Instructions:
- In a large bowl, combine flour, sugar, yeast, and salt.
- Add warm milk, egg, and softened butter. Mix and knead for 7-9 minutes until the dough is smooth and elastic.
- Place the dough in an oiled bowl, cover, and let rise in a warm place for 1.5 hours, or until doubled in size.
- While dough rises, prepare the filling: Beat softened cream cheese, powdered sugar, and vanilla extract until smooth and creamy. Chill until ready to use.
- Punch down the risen dough and divide it into 8 equal portions. Roll each portion into a smooth ball.
- Heat oil to 350°F (175°C). Fry doughnuts in batches for 2-3 minutes per side until golden brown.
- Remove and drain on paper towels.
- Once slightly cooled, use a piping bag with a thin nozzle to inject the cream cheese filling into the center of each doughnut.
- Roll the filled doughnuts in granulated sugar before serving.
Storage / Serving / Usage Note: Refrigerate any leftover doughnuts due to the cream cheese filling. Best consumed within 1-2 days.
Recipe 6: Lemon Glazed Doughnut Twists
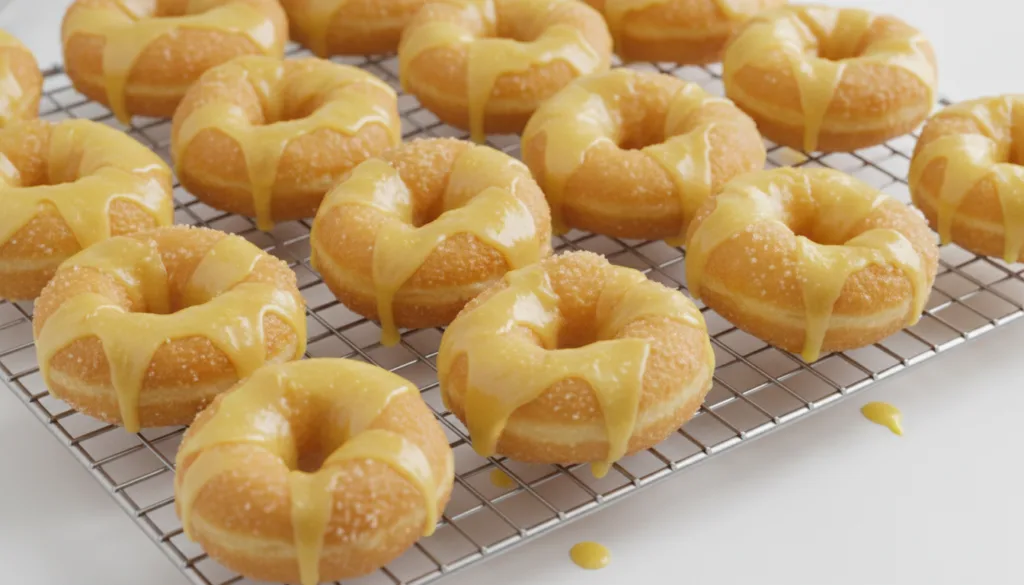
These fun doughnut twists are light, airy, and coated in a tangy lemon glaze that adds a refreshing zest to every bite. They’re a delightful alternative to traditional round doughnuts.
Servings: 10-12 twists
Prep time: 1 hour 45 minutes
Cook / chill / rest time: 10 minutes
Ingredients:
- 1 ¾ cups (210g) all-purpose flour
- 3 tablespoons (38g) granulated sugar
- 1 teaspoon active dry yeast
- ½ teaspoon salt
- ¾ cup (180ml) warm milk
- 1 large egg yolk
- 2 tablespoons (28g) unsalted butter, melted
- 3 cups (720ml) vegetable oil, for deep-frying
- For glaze: 1 cup (120g) powdered sugar, 2-3 tablespoons fresh lemon juice, 1 teaspoon lemon zest
Instructions:
- In a bowl, combine flour, sugar, yeast, and salt.
- Add warm milk, egg yolk, and melted butter. Mix and knead for 6-8 minutes until smooth.
- Place dough in an oiled bowl, cover, and let rise for 1.5 hours, or until doubled.
- Punch down dough. Roll it out into a rectangle (approx. 12×8 inches). Cut into ½-inch wide strips.
- Take two strips, twist them together, and then pinch the ends to seal, forming a twist. Repeat for all strips.
- Heat oil to 350°F (175°C). Fry doughnut twists in batches for 2-3 minutes, turning until golden brown.
- Remove and drain on paper towels.
- While twists cool, whisk together powdered sugar, lemon juice, and lemon zest for the glaze.
- Dip each cooled twist into the lemon glaze, allowing excess to drip off. Place on a wire rack for the glaze to set.
Storage / Serving / Usage Note: Store in an airtight container at room temperature for up to 2 days. The glaze will set firm after about 30 minutes.
Simple Tips for Best Results
- Dough Consistency is Key: Don’t rush the kneading process. A smooth, elastic dough will yield light and fluffy buns.
- Proper Oil Temperature: Use a thermometer to maintain the oil temperature at 350°F (175°C). Too cold, and the buns will be greasy; too hot, and they’ll brown too quickly on the outside, remaining raw inside.
- Don’t Overcrowd the Pot: Fry buns in small batches to maintain oil temperature and ensure even cooking.
- Serve Warm: For the ultimate experience, especially with melted chocolate, serve these treats while they are still warm from frying.
- Experiment with Fillings: Feel free to customize with different types of chocolate, jams, or even a caramel center for unique variations.
FAQ
What kind of chocolate works best for melted chocolate buns?
Any good quality chocolate bar (milk, semi-sweet, or dark) that melts well will work. Avoid chocolate chips designed to hold their shape, as they won’t give you that gooey melted core.
Can I bake these buns instead of frying them?
While frying gives them their signature crispy exterior and soft interior, you can bake them at 375°F (190°C) for 12-15 minutes until golden brown for a slightly different texture and less oil. The chocolate will still melt.
How can I make the buns less greasy?
Ensure your oil is at the correct temperature (350°F / 175°C) and drain the fried buns thoroughly on a wire rack lined with paper towels immediately after removing them from the oil.
Final Thoughts
These golden buns with their melted chocolate core, along with their delicious variations, are more than just a dessert; they’re an experience. Simple to create yet incredibly satisfying, they bring a touch of comforting indulgence to any day. Whether you stick to the classic melted chocolate buns or explore the zesty lemon twists, you’re in for a treat that’s worth every bit of effort. So go ahead, treat yourself and your loved ones to these homemade delights!