Do you often find yourself tossing out old potting soil after a season of use? What if we told you that you could breathe new life into that soil, saving money and reducing waste? Reviving your old potting soil is not only an eco-friendly practice but also an effective way to ensure your plants get the best start every time. Join us as we explore a simple, step-by-step guide to transforming depleted soil into a nutrient-rich foundation for your beloved plants!
Why Revive Old Potting Soil?
Many gardeners fall into the habit of replacing all their potting soil annually. While fresh soil is undeniably great, old soil isn’t necessarily ‘bad’ – it’s just depleted. Here’s why reviving it is a fantastic idea:
- Cost-Effective: Potting mix can be expensive. Rejuvenating your existing soil significantly cuts down on gardening expenses.
- Environmentally Friendly: Less waste going to landfills means a happier planet.
- Resourceful: You’re utilizing what you already have, embodying sustainable gardening practices.
- Customizable: By adding specific amendments, you can tailor your soil mix to suit the particular needs of your plants.
Signs Your Potting Soil Needs a Boost
How do you know if your soil is ready for a revival? Look out for these common indicators:
- Compacted and Hard: If the soil feels dense and water struggles to penetrate, it’s lost its airy structure.
- Crusty Surface: A white or yellowish crust can indicate mineral salt buildup.
- Poor Drainage: Water sitting on the surface for too long or running straight through without absorption.
- Lack of Organic Matter: The soil looks uniform and devoid of those lovely dark, crumbly bits.
- Stunted Plant Growth: If new plants aren’t thriving despite adequate watering and light, the soil might be lacking nutrients.
What You’ll Need for Soil Revival
Gather these simple ingredients and tools to get started:
- Old potting soil
- Compost or well-rotted manure (for organic matter and nutrients)
- Perlite or vermiculite (for aeration and drainage)
- A balanced slow-release granular fertilizer (optional, if your compost isn’t rich enough)
- Gardening gloves
- A large tarp, wheelbarrow, or mixing tub
- A trowel or hand rake for mixing
Step-by-Step Guide to Reviving Your Potting Soil
Step 1: Empty and Break Up
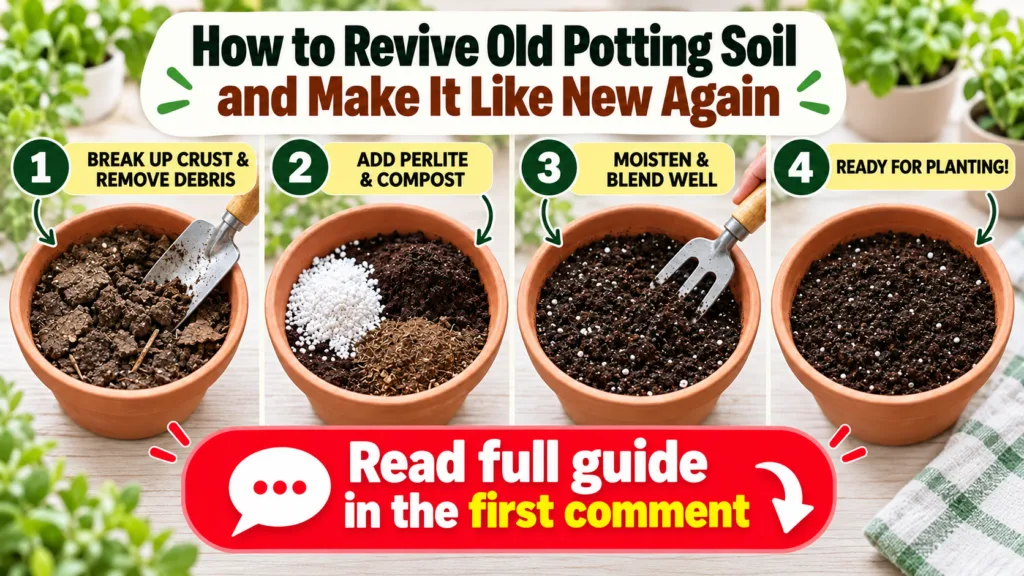
Carefully empty your old potting soil from pots and containers onto a tarp or into a mixing tub. Break up any large clumps and gently sift through the soil. You want a loose, uniform base to work with.
Step 2: Remove Old Roots and Debris
While breaking up the soil, remove any large roots, plant debris, or weeds. Small fibrous roots are generally fine and will break down over time, but big pieces can hinder new plant growth or harbor pests. If you suspect your previous plants had diseases or severe pest issues, it might be best to sterilize the soil (via solarization) or simply discard it to prevent spreading problems.
Step 3: Assess and Amend
Now, it’s time to add life back into your soil!
- Organic Matter: This is crucial. Add a generous amount of fresh compost or well-rotted manure. A good rule of thumb is to add about 1 part compost to 3-4 parts old potting soil. This restores nutrients and improves soil structure.
- Aeration & Drainage: If your soil feels compacted or heavy, mix in perlite or vermiculite. Perlite helps with drainage and aeration, while vermiculite retains moisture and nutrients. Add about 1 part perlite/vermiculite to 5-6 parts of the soil-compost mix.
- Nutrients (Optional): If you’re not using super-rich compost, consider adding a slow-release granular fertilizer according to package directions. This ensures your plants have a steady supply of food.
Step 4: Mix Thoroughly
Once all your amendments are added, mix everything thoroughly. Use your trowel, hand rake, or even your gloved hands to ensure the compost, perlite, and any fertilizer are evenly distributed throughout the old soil. The goal is a uniform, crumbly texture that feels light and airy.
Step 5: Store or Use
Your revitalized potting soil is now ready to use! You can immediately plant new seedlings or transplants, or store it in breathable containers (like burlap sacks or old potting mix bags with holes) in a cool, dry place for future use.
Tips for Success
- Don’t Over-Compact: When repotting, gently tap the pot to settle the soil instead of pressing down hard, which can negate your aeration efforts.
- Observe Your Plants: Pay attention to how your new plants perform in the revived soil. This will help you adjust your amendment ratios for future batches.
- Regular Feeding: Even with revived soil, consider a light feeding schedule with a balanced liquid fertilizer during the growing season.
Reviving your potting soil is a rewarding practice that benefits your garden, your wallet, and the environment. Give it a try, and watch your plants flourish in their refreshed, nutrient-rich home!