Dreaming of fresh, crisp apples picked right from your backyard? Growing your own apple tree can be an incredibly rewarding experience, connecting you closer to nature and providing delicious fruit for years to come. Whether you’re a seasoned gardener or just starting out, understanding the two primary methods—growing from seed or grafting—will set you up for success. Let’s dig in!
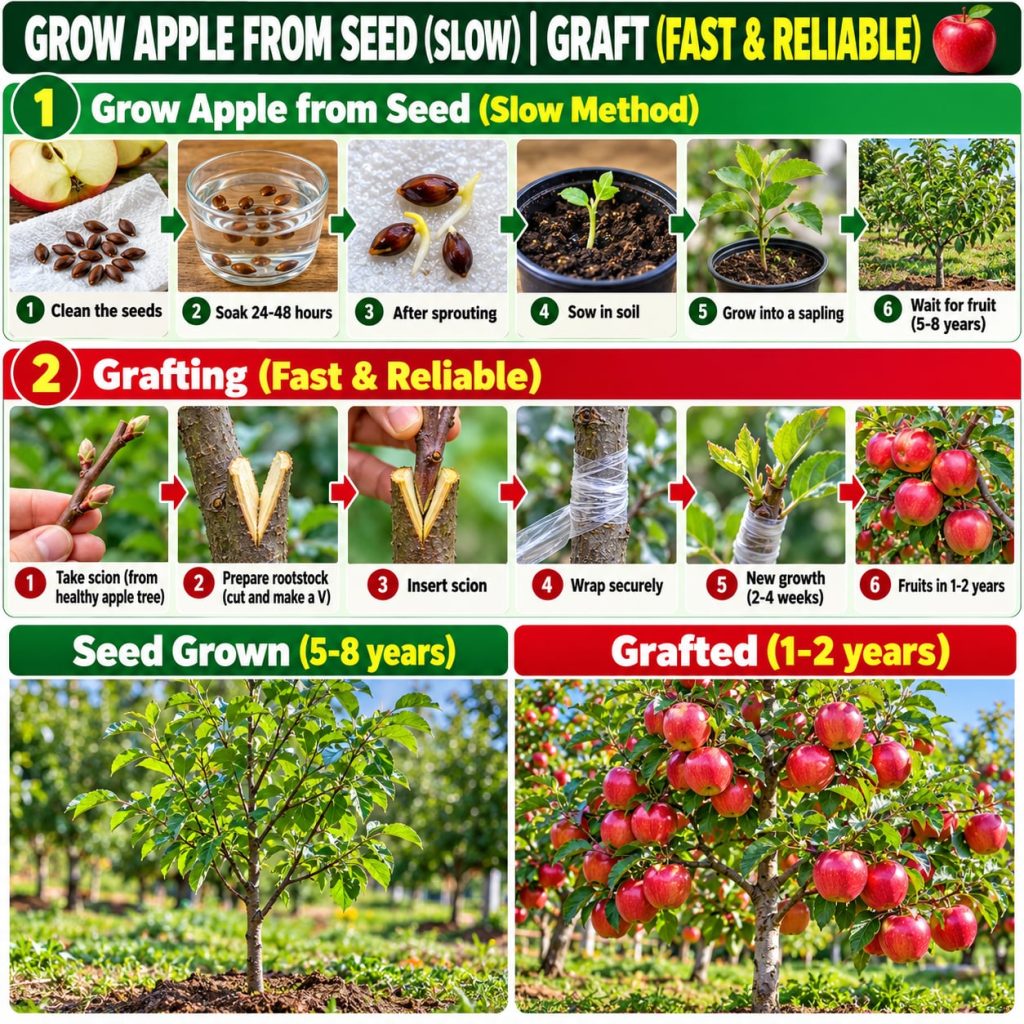
Method 1: Growing Apple Trees from Seed
Growing an apple tree from seed is an exciting venture, often pursued out of curiosity or for the sheer joy of watching something grow from scratch. However, it comes with a few considerations.
Pros of Growing from Seed:
- Cost-Effective: All you need is an apple and a little patience!
- Unique Trees: Each seed is a genetic mix, meaning your tree will be unique and may produce fruit different from the parent apple.
- Rewarding Experience: There’s a special satisfaction in nurturing a tree from a tiny seed.
Cons of Growing from Seed:
- Long Wait: Seed-grown apple trees can take 7-10 years, or even longer, to produce fruit.
- Unpredictable Fruit: The apples may not be true to the parent type, and sometimes they may not be as flavorful or suitable for eating.
- Vigor Varies: Seedlings have varying resistance to diseases and pests, and their size can be unpredictable.
Steps to Grow from Seed:
-
Step 1: Get Your Seeds
Choose seeds from organic apples, as conventional apples might have treated seeds that won’t sprout. Gently remove the seeds and clean them, making sure to remove any fruit flesh. Pat them dry.
-
Step 2: Stratification (Mimicking Winter)
Apple seeds need a cold, moist period to break dormancy. This process is called stratification. Place your seeds in a damp paper towel, then put the towel in a plastic bag or an airtight container. Store this in your refrigerator (around 40°F or 4°C) for 60-90 days. Check periodically to ensure the paper towel remains damp.
-
Step 3: Planting
After stratification, carefully plant the seeds about half an inch deep in a small pot filled with well-draining potting mix. Keep the soil consistently moist, but not waterlogged. Place the pot in a sunny spot.
-
Step 4: Care and Transplanting
Once your seedling emerges and grows a few true leaves, ensure it gets plenty of sunlight. Water regularly and protect it from pests. After the last frost and once the seedling is sturdy enough (usually 6-12 inches tall), you can transplant it to a larger pot or directly into your garden if the climate is suitable.
Method 2: Growing Apple Trees by Grafting
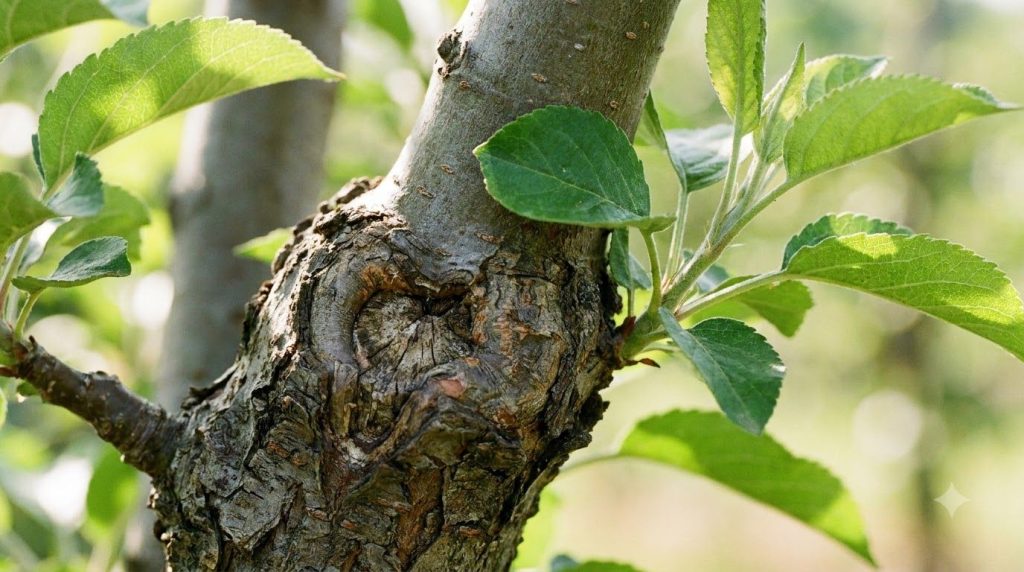
Grafting is a more reliable method for growing apple trees that produce specific varieties of fruit. It involves joining a scion (a shoot or bud from a desired apple variety) onto a rootstock (the root system and lower stem of another tree).
Pros of Grafting:
- True-to-Type Fruit: The grafted tree will produce apples identical to the scion’s parent tree.
- Faster Fruiting: Grafted trees typically bear fruit much sooner, often within 2-5 years.
- Controlled Size and Vigor: You can choose a rootstock that controls the tree’s ultimate size (dwarf, semi-dwarf, standard) and imparts disease resistance.
Cons of Grafting:
- Requires Skill: Grafting requires specific techniques and some practice to be successful.
- Initial Cost: You’ll need to acquire both rootstock and scion wood, which usually incurs a cost.
Steps to Graft an Apple Tree:
-
Step 1: Choose Rootstock and Scion
Select a compatible rootstock for your climate and desired tree size. Obtain dormant scion wood (a 6-12 inch section of a 1-year-old shoot) from the apple variety you wish to grow. Ensure both are healthy and free from disease.
-
Step 2: Prepare for Grafting
The best time for grafting is late winter or early spring when both rootstock and scion are dormant but sap is starting to flow. Use a very sharp, clean knife to make precise cuts on both the rootstock and the scion. Common grafting methods include whip-and-tongue, cleft, or bark grafting.
-
Step 3: Make the Graft
Carefully align the cambium layers (the green layer just under the bark) of the scion and rootstock. This is crucial for a successful union. Secure the graft firmly with grafting tape or rubber bands, ensuring no air can enter the wound. You can also apply grafting wax over the entire joint to prevent drying.
-
Step 4: Aftercare
Once grafted, keep the rootstock moist and protect the graft union. Remove any new shoots that emerge from the rootstock below the graft union, as these will be from the rootstock’s variety, not your desired apple. Monitor for successful healing and growth.
Which Method is Right for You?
The choice between growing from seed and grafting depends on your goals:
- For a unique, unpredictable adventure and a longer-term project: Go with seeds.
- For specific apple varieties, faster fruiting, and controlled tree size: Grafting is your best bet.
Both methods offer a chance to engage with your garden in a meaningful way. Regardless of your chosen path, the journey of cultivating an apple tree is a deeply satisfying one. Imagine enjoying your own homegrown apples, fresh and full of flavor!
Have you tried growing apple trees before? Share your tips and experiences in the comments below!