Orchids are truly magnificent plants, bringing an exotic touch of beauty to any home. Their stunning, intricate blooms can last for weeks, making them a favorite among plant enthusiasts. However, to keep your orchids healthy and blooming year after year, proper care, including timely repotting, is essential. Don’t let the thought of repotting intimidate you; with this easy-to-follow guide from Garden – L. Quyên, you’ll have your orchids thriving in no time!
Why Do Orchids Need Repotting?
Unlike many other houseplants, orchids often outgrow their pots or their potting medium breaks down over time. Here are the main reasons why repotting is crucial for your orchid’s health:
- Degraded Potting Mix: Orchid potting mixes, typically made of bark, sphagnum moss, or coconut coir, decompose over time. This breakdown can restrict airflow to the roots and retain too much moisture, leading to root rot.
- Root Bound: As your orchid grows, its roots can become tightly packed in the pot, making it difficult for the plant to absorb water and nutrients efficiently.
- Nutrient Depletion: Old potting mixes can lose their nutritional value, depriving your orchid of essential elements.
- Pest and Disease Prevention: Repotting allows you to inspect the roots for any signs of pests or diseases and address them promptly.
When is the Best Time to Repot Your Orchid?
Timing is key when it comes to repotting. The ideal time is typically in the spring or early summer, right after your orchid has finished blooming and before it starts a new growth cycle. Look for these signs:
- New root growth appearing at the top or sides of the pot.
- The potting medium has decomposed and looks mushy or compacted.
- Roots are spilling out of the pot.
- The plant seems unstable or top-heavy in its current pot.
Avoid repotting an orchid that is currently in bloom, as this can stress the plant and cause it to drop its flowers.
What You’ll Need: Tools and Materials
Gathering your supplies beforehand will make the repotting process smooth and stress-free:
- New Orchid Pot: Choose a pot that is only slightly larger (1-2 inches in diameter) than the old one, with plenty of drainage holes. Clear plastic pots are excellent as they allow you to monitor root health.
- Fresh Orchid Potting Mix: Use a high-quality mix specifically formulated for orchids. The type of mix depends on your orchid variety (e.g., bark for Phalaenopsis, sphagnum moss for humidity-loving species).
- Sterilized Pruning Shears or Scissors: Essential for trimming dead or damaged roots. Sterilize them with rubbing alcohol before and after use.
- Gloves: To keep your hands clean.
- Hydrogen Peroxide (optional): For disinfecting roots if rot is present.
- Newspaper or Tarp: To protect your work surface.
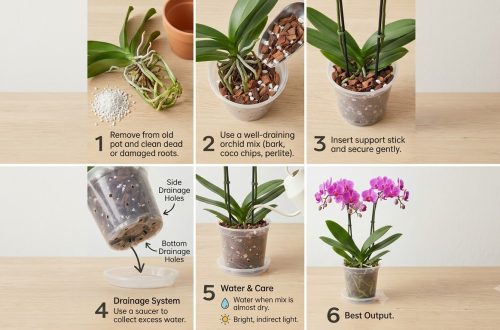
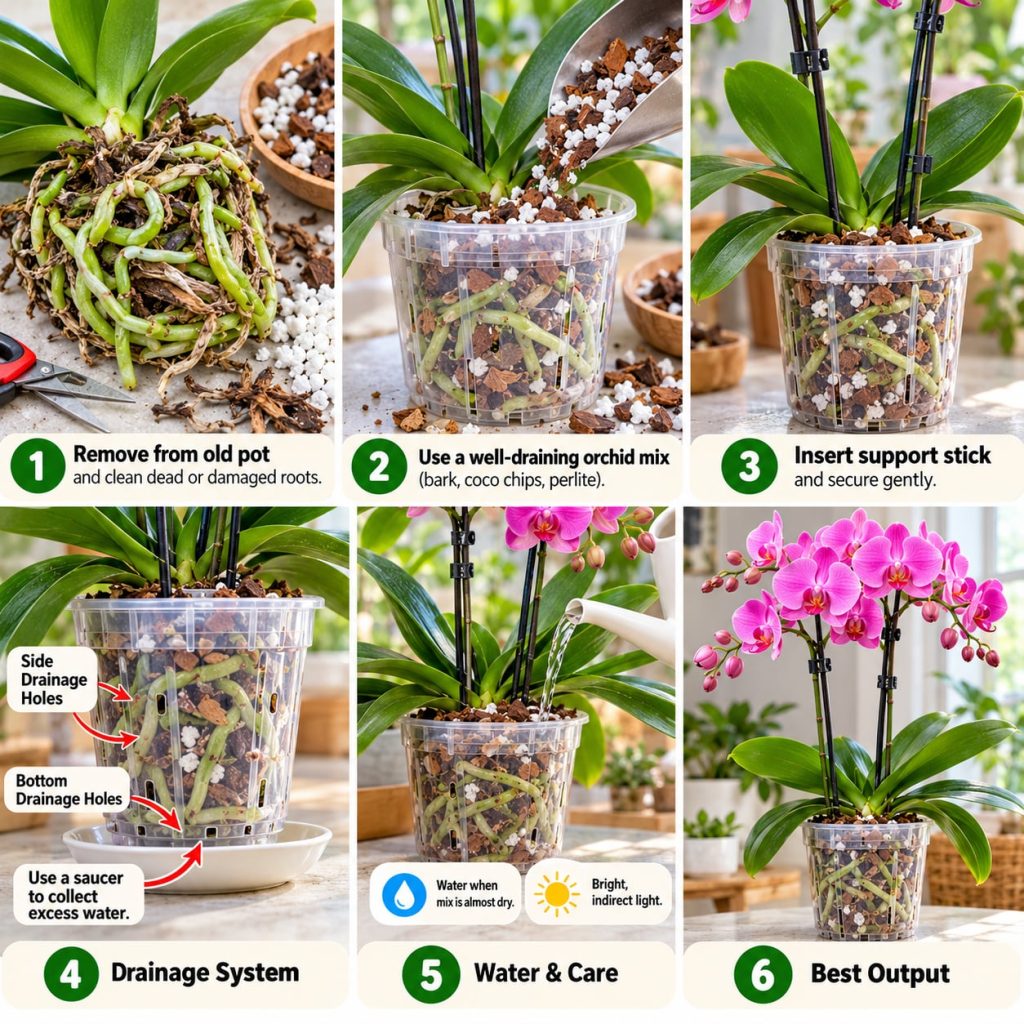
Step-by-Step Orchid Repotting Guide
1. Preparation
Lay down newspaper or a tarp to catch any spills. Sterilize your pruning shears. If your orchid is in a clear plastic pot, you might want to water it a day before repotting to make the roots more pliable.
2. Gently Remove the Orchid
Carefully take the orchid out of its old pot. You might need to gently squeeze the sides of the pot or even cut the pot if it’s plastic and the roots are very attached. Be gentle to avoid damaging the roots.
3. Clean and Trim Roots
Once out of the pot, gently remove all the old potting mix from the roots. You can use your fingers or a gentle stream of water. Inspect the roots carefully:
- Healthy roots: Firm, plump, and typically white, green, or silvery.
- Unhealthy roots: Mushy, black, brown, or papery and hollow.
Using your sterilized shears, cut away any unhealthy or dead roots. If you encounter root rot, you can dab the affected areas with a bit of hydrogen peroxide to help sanitize them.
4. Choose and Prepare the New Pot
Place a small layer of your fresh orchid potting mix at the bottom of the new pot. This provides a base for your orchid to rest on.
5. Place the Orchid in the New Pot
Center your orchid in the new pot, ensuring the base of the plant (where the roots meet the stem) is level with or just below the rim of the pot. Avoid burying the crown of the plant.
6. Add Fresh Potting Mix
Carefully fill the pot with the new potting mix around the roots. Gently tap the pot on your work surface to help the mix settle around the roots. Use a stick or your fingers to push the mix into any gaps, but avoid compacting it too tightly, as orchids need good airflow.
7. Post-Repotting Care
After repotting, avoid watering your orchid for a few days to allow any minor root injuries to heal. Instead, you can mist the leaves. Place your repotted orchid in a bright spot with good air circulation, but avoid direct sunlight immediately after repotting. Resume your normal watering and fertilizing schedule after about a week or two.
Tips for Thriving Blooms
- Proper Watering: Water thoroughly when the potting mix is nearly dry, allowing excess water to drain completely.
- Humidity: Orchids love humidity. Consider placing a humidity tray nearby or using a humidifier.
- Fertilization: Use a balanced orchid fertilizer at half strength during the growing season.
- Light: Provide bright, indirect light. Too much sun can scorch leaves, while too little light can prevent blooming.
Repotting your orchid might seem daunting at first, but with a little practice and patience, you’ll find it’s a rewarding process that contributes significantly to your plant’s long-term health and spectacular blooms. Happy gardening!
Do you have any orchid repotting success stories or questions? Share them in the comments below!