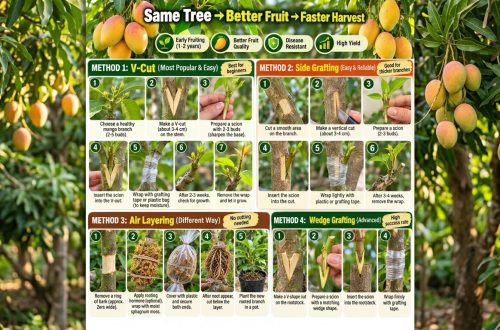
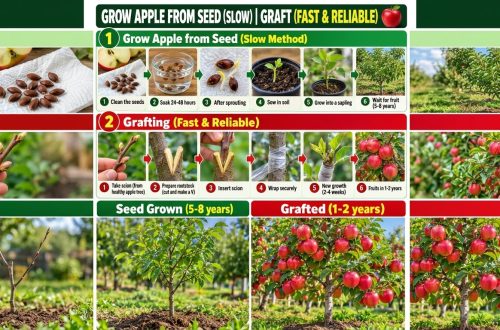
Have you ever dreamed of biting into an apple fresh from your own backyard tree? The journey from a tiny seed to a fruit-bearing apple tree is incredibly rewarding, and it’s more accessible than you might think! While growing from seed can be a fun experiment, grafting is the secret technique that many experienced gardeners use to ensure delicious, predictable results. Let’s dig into the fascinating world of apple tree cultivation!
The Charm of Growing Apple Trees from Seed
Starting an apple tree from seed is a delightful project, especially if you love a bit of mystery and discovery in your garden. The apples you get from a seed might not be identical to the parent fruit – in fact, they’ll likely be a unique variety! This genetic variation is what makes growing from seed an exciting adventure.
Step-by-Step: Planting Apple Seeds
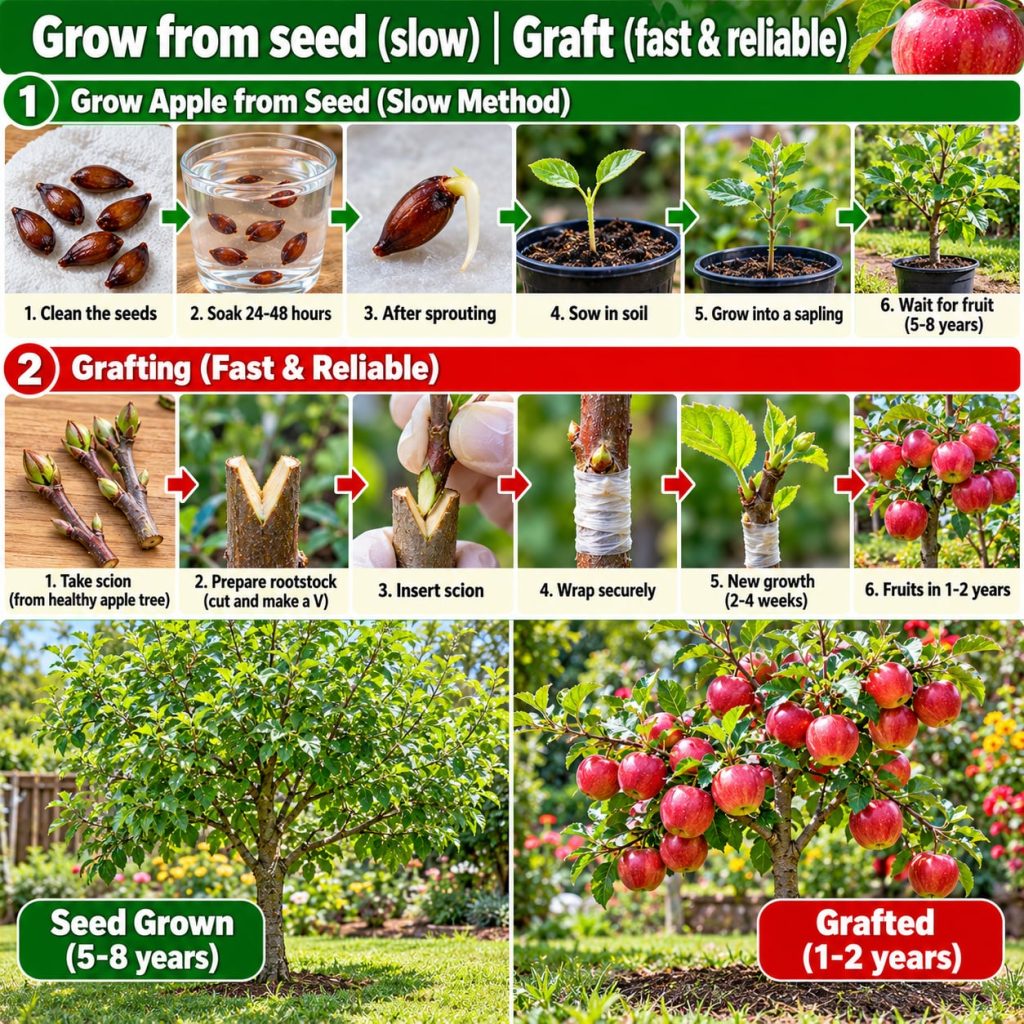
- Seed Collection and Cleaning: Choose seeds from healthy, ripe apples. Wash them thoroughly to remove any fruit flesh, which can inhibit germination.
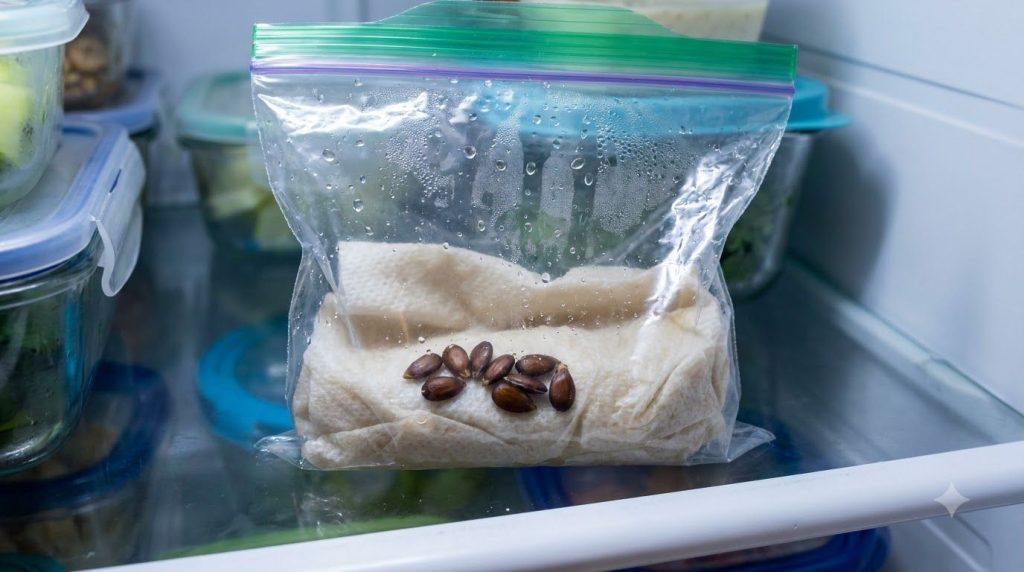
- Stratification (Crucial Step!): Apple seeds need a period of cold and moisture to break dormancy, mimicking winter conditions.
- Place seeds on a damp paper towel.
- Fold the paper towel over the seeds and place it inside a sealed plastic bag or airtight container.
- Store in your refrigerator (not freezer) for 6-8 weeks at around 35-45°F (1-7°C).
- Planting: After stratification, plant the seeds about 1/2 to 1 inch deep in small pots filled with a good quality potting mix.
- Watering and Light: Keep the soil consistently moist but not waterlogged. Place pots in a sunny location or under grow lights.
- Patience is Key: Germination can take a few weeks. Once sprouts appear, provide them with plenty of light and gradually acclimate them to outdoor conditions if you plan to move them outside.
Considerations for Seed-Grown Apples
While fun, growing apples from seed has a few drawbacks: they may not produce fruit true to the parent variety, they take much longer to mature and fruit (5-10 years or more), and the resulting fruit quality can be unpredictable.
The Magic of Grafting: Why It’s Essential for Apple Trees
Grafting is an ancient horticultural technique where tissues of plants are joined so as to continue their growth together. For apple trees, it’s incredibly important because it allows you to:
- Ensure True-to-Type Fruit: You can replicate a favorite apple variety exactly.
- Speed Up Fruiting: Grafted trees often produce fruit much sooner than seed-grown trees.
- Control Tree Size: By choosing a specific rootstock, you can grow dwarf, semi-dwarf, or standard-sized trees, perfect for any garden space.
- Improve Disease Resistance: Some rootstocks offer resistance to common apple tree diseases.
- Adapt to Soil Conditions: Certain rootstocks are better suited for specific soil types.
Understanding Basic Grafting Concepts
Grafting involves two main parts:
- Scion: The upper part of the graft, which will become the new apple variety, providing the fruit. It’s usually a dormant cutting from a desired apple tree.
- Rootstock: The lower part of the graft, which provides the root system. This determines the tree’s size, vigor, and disease resistance.
Common Grafting Methods for Apple Trees
There are several grafting techniques, but some are more common and successful for home gardeners:
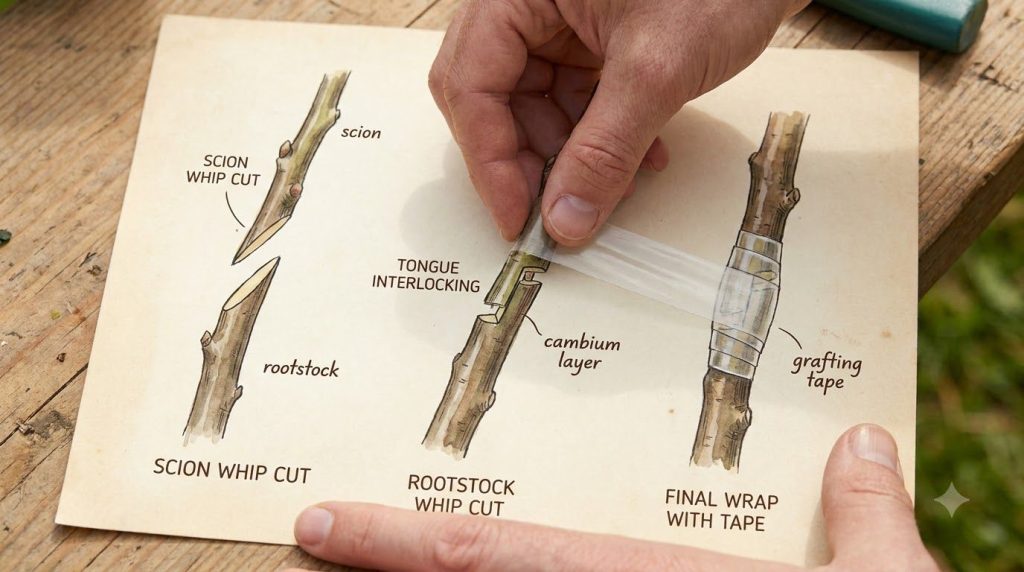
1. Whip-and-Tongue Graft
This method is highly effective for joining scions and rootstocks of similar diameter (typically 1/4 to 1/2 inch). It provides a strong union with good cambium contact.
2. Cleft Graft
Ideal for grafting a small scion onto a larger rootstock (or stump). The scion is wedged into a split in the rootstock.
Step-by-Step: Performing a Whip-and-Tongue Graft
For this guide, we’ll focus on the popular whip-and-tongue graft.
What You’ll Need:
- Sharp grafting knife or razor blade (sterilized)
- Scion wood (dormant, from a desired variety)
- Rootstock (established, often potted)
- Grafting tape or parafilm
- Grafting wax or sealant
The Grafting Process:
- Prepare Scion and Rootstock: Both should be roughly the same diameter. Make sure your scion has at least 2-3 healthy buds.
- Make the ‘Whip’ Cut: On both the rootstock and the bottom of the scion, make a long, smooth, upward-sloping cut about 1-1.5 inches long, exposing the cambium layer (the green layer just under the bark).
- Create the ‘Tongue’: About one-third of the way down from the tip of the whip cut, carefully make a downward cut into the wood, forming a ‘tongue’. Do this on both the scion and the rootstock.
- Join Them Together: Carefully interlock the scion and rootstock’s ‘tongues’ and ‘whips’. Ensure the cambium layers align as much as possible, as this is where the two parts will fuse.
- Secure the Graft: Tightly wrap the grafted union with grafting tape or parafilm. This holds the parts together and prevents moisture loss.
- Seal the Cut Ends: Apply grafting wax or sealant to any exposed cut surfaces, especially the top of the scion, to prevent dehydration.
Post-Grafting Care
Place your newly grafted tree in a sheltered location. Keep the soil moist. Over several weeks to months, if successful, the scion’s buds will swell and begin to grow. Remove grafting tape after the union has healed, usually after one growing season.
Ready to Grow Your Own Apple Tree?
Whether you choose the adventurous path of growing from seed or the more controlled method of grafting, cultivating your own apple trees is an incredibly rewarding experience. You’ll gain a deeper appreciation for where your food comes from and enjoy the satisfaction of nurturing life from the ground up. Don’t be afraid to try both methods and see which one you love more!
Happy gardening!