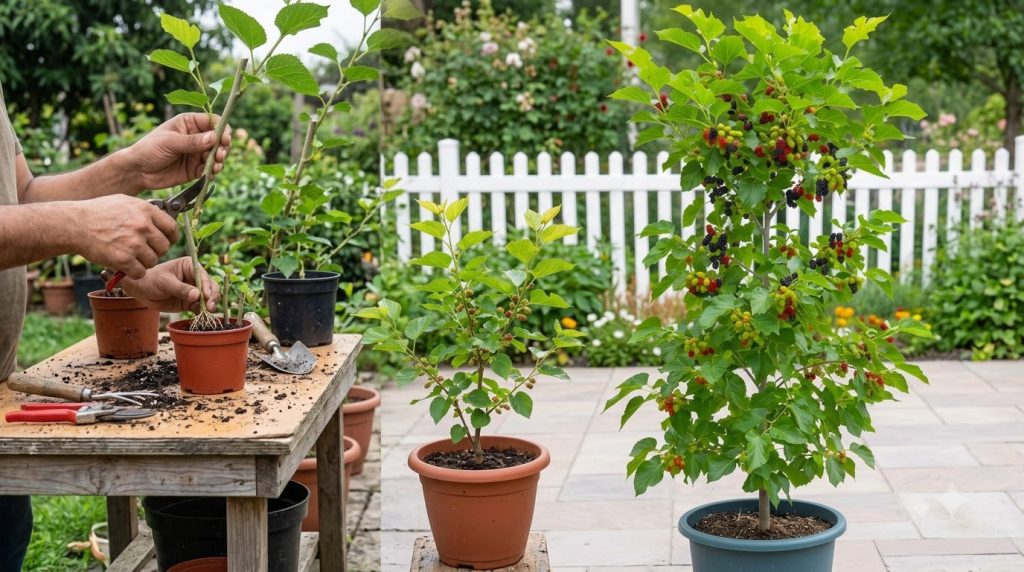
Imagine plucking sweet, juicy mulberries fresh from your own garden, a reward for your patience and care. There’s an unparalleled joy in cultivating your food, and growing a mulberry tree from a simple cutting is one of the most satisfying journeys a gardener can embark upon. Not only is it incredibly rewarding to witness a new tree spring from a small branch, but it’s also a fantastic way to expand your edible landscape without breaking the bank.
This comprehensive guide will walk you through every essential step, from selecting the perfect cutting to nurturing your young tree and ultimately enjoying a bountiful harvest of these delightful berries. Get ready to connect deeply with the natural cycle of growth and add a valuable, fruit-bearing tree to your garden.
Why Grow Mulberries from Cuttings?
Propagating mulberries from cuttings offers several advantages over growing from seed or buying established plants. Firstly, it’s incredibly cost-effective – often free if you have access to an existing mulberry tree. Secondly, cuttings produce a genetically identical clone of the parent plant, ensuring that your new tree will bear fruit with the same desirable characteristics as the source. This means if you love the flavor or growth habit of a particular mulberry, you can replicate it perfectly. Lastly, it often results in a faster path to fruiting compared to seed-grown trees, which can take many years to mature.
Step 1: Selecting and Preparing Your Mulberry Cuttings
The success of your mulberry propagation largely hinges on choosing the right cuttings at the right time. For mulberries, semi-hardwood cuttings are often the most successful, taken in late spring to early summer after the current season’s growth has slightly matured but is not yet fully woody.
When and How to Select Cuttings
- Timing: Aim for late spring through mid-summer when the branches are flexible but snap cleanly when bent, indicating the right stage of maturity.
- Branch Health: Look for healthy, disease-free branches from the current year’s growth. Avoid any wood that looks weak, damaged, or has signs of pests.
- Length: Each cutting should be about 6-10 inches long and have at least 3-4 nodes (the points where leaves or buds emerge).
- Preparation: Using sharp, clean pruning shears, make a clean cut just below a node at the bottom of the cutting. Remove all but the top 2-3 leaves to reduce moisture loss and make another clean cut just above a node at the top. If the remaining leaves are large, you can cut them in half to further reduce transpiration.
While not strictly necessary, dipping the bottom end of your cuttings in a rooting hormone can significantly improve your chances of success and speed up root development.
Step 2: Rooting Your Mulberry Cuttings
Mulberry cuttings can be rooted in water or directly in a potting mix. Both methods have their proponents, and success often depends on maintaining consistent conditions.
Water Propagation
Place the prepared cuttings in a clear jar or vase filled with non-chlorinated water, ensuring at least one node is submerged. Change the water every few days to keep it fresh and prevent bacterial growth. Place the jar in a bright location with indirect light and maintain a consistent room temperature (around 65-75°F or 18-24°C). Roots typically begin to form within 3-6 weeks, appearing as small white nubs along the submerged stem.
Soil Propagation
Prepare a well-draining rooting medium, such as a mix of peat moss and perlite or sand. Moisten the medium thoroughly before inserting the cuttings. Make a small hole with a pencil or stick to avoid rubbing off any rooting hormone you may have applied. Insert the cuttings about 2-3 inches deep, ensuring at least one node is buried. Gently firm the soil around each cutting.
To create a humid environment, which is crucial for rooting, cover the pot with a clear plastic bag or dome, ensuring the leaves don’t touch the plastic. Place the pot in a warm spot with bright, indirect light. Keep the soil consistently moist but not waterlogged. Rooting in soil can take anywhere from 4-10 weeks.
Once roots are about 1-2 inches long and well-developed, your cuttings are ready for the next stage.
Step 3: Planting and Establishing Young Mulberry Trees
Transplanting your rooted cuttings correctly is vital for their long-term success. This stage involves moving them from their rooting environment to individual pots where they can grow stronger before being planted in the garden.
Potting Up
- Container Choice: Select a 4-6 inch pot with good drainage holes.
- Soil Mix: Use a high-quality, well-draining potting mix. A standard mix formulated for trees and shrubs is ideal.
- Transplanting: Carefully remove the rooted cutting from its rooting medium, disturbing the new roots as little as possible. Plant it at the same depth it was rooting, gently backfilling with soil. Water thoroughly after potting.
Initial Care for Young Plants
Place your newly potted mulberry trees in a sheltered location with bright, indirect light for a week or two to help them adjust. Gradually introduce them to more direct sunlight over several weeks. Keep the soil consistently moist, checking it daily, especially in warm weather.
Step 4: Ongoing Care for Growing Mulberry Trees
Once established, mulberry trees are relatively low-maintenance, but consistent care in their early years ensures a strong, productive tree.
Sunlight Requirements
Mulberry trees thrive in full sun, needing at least 6-8 hours of direct sunlight per day to produce abundant fruit. While they can tolerate some partial shade, fruit production will be reduced.
Soil and Nutrition
These adaptable trees prefer well-drained, fertile soil but can tolerate a range of soil types, from sandy to clay, as long as drainage is adequate. Amend heavy clay soils with organic matter to improve aeration and drainage. A balanced slow-release fertilizer can be applied in early spring, especially for young trees or those in containers.
Watering Needs
Water young mulberry trees regularly, especially during dry spells, to encourage a strong root system. Once established, they are somewhat drought-tolerant but will produce more and better-quality fruit with consistent moisture, particularly during fruit development. For container-grown trees, check soil moisture daily and water when the top inch or two feels dry.
Pruning for Health and Production
Prune mulberry trees in late winter or early spring while they are dormant. Focus on removing dead, damaged, or crossing branches. You can also prune to shape the tree, control its size, and improve air circulation, which helps prevent diseases. Mulberries produce fruit on new wood, so light annual pruning encourages new growth and better harvests.
Pest and Disease Management
Mulberries are generally robust, but keep an eye out for common pests like scale insects, mealybugs, or mites. Treat minor infestations with horticultural oil or insecticidal soap. Fungal diseases like powdery mildew can occur in humid conditions; ensuring good air circulation through proper spacing and pruning can help prevent this.
Support and Spacing
If planting in the ground, allow ample space—15 to 25 feet—between trees for mature growth. Young trees may benefit from staking for the first year or two to ensure a straight trunk. For container growing, select dwarf varieties and plan to repot into larger containers as the tree grows, eventually settling in a pot 15-25 gallons or larger.
Step 5: The Sweet Reward – Harvesting Mulberries
The most anticipated stage of your mulberry journey is the harvest! Mulberries typically begin fruiting within 2-3 years from a cutting, depending on the species and growing conditions.
When to Harvest
Mulberries ripen from late spring through mid-summer, depending on your climate and the specific variety. They are ready to harvest when they are fully colored (often dark purple, red, or white, depending on the cultivar) and easily detach from the stem. Ripe mulberries will be soft and sweet; unripe ones can be tart.
Harvesting Techniques
For small quantities, simply hand-pick the ripe berries. For a larger harvest, spread a tarp or sheet under the tree and gently shake the branches. The ripe berries will fall onto the sheet. Avoid washing mulberries until just before eating, as they are delicate and can spoil quickly once wet.
Storage Tips
Fresh mulberries are best enjoyed immediately. They can be stored in the refrigerator for a few days but are highly perishable. For longer storage, mulberries freeze exceptionally well and can be used in pies, jams, smoothies, or desserts.
Regional Considerations and USDA Zones for Mulberries
Mulberries are quite adaptable, with different species thriving across various climates in the United States. Most common species, such as White Mulberry (*Morus alba*), Red Mulberry (*Morus rubra*), and Black Mulberry (*Morus nigra*), are hardy in USDA Zones 4-9, with some varieties extending to Zones 3 or 10.
- Zones 3-5: Choose cold-hardy varieties like some selections of White or Red Mulberry. Provide winter protection for young trees.
- Zones 6-8: Most mulberry varieties flourish here, with ample chilling hours and warm summers.
- Zones 9-11: Mulberries generally tolerate heat, but some varieties may struggle with very long, hot, and humid summers. Ensure good air circulation and adequate water.
Remember that USDA zones primarily indicate winter cold tolerance. Local microclimates, summer heat, rainfall, and humidity also play significant roles in a mulberry tree’s performance. For specific guidance, consulting your local extension service is always a great idea.
Common Mistakes to Avoid
Even experienced gardeners can make simple errors. Being aware of these common pitfalls can save you time and frustration:
- Poor Cutting Selection: Using old, woody, or unhealthy branches will significantly reduce rooting success. Always choose vigorous, healthy new growth.
- Inadequate Drainage: Whether rooting or growing, mulberries detest soggy feet. Ensure your rooting medium and potting soil drain freely to prevent root rot.
- Overwatering or Underwatering: Consistency is key. Overwatering suffocates roots, while underwatering stresses the plant. Feel the soil before watering.
- Insufficient Light: Mulberries are sun-lovers. Providing too little light will result in leggy growth and poor fruit production.
- Neglecting Pruning: While not always mandatory, proper pruning helps maintain tree health, shape, and promotes better fruiting over time.
- Ignoring Local Climate: Planting a variety not suited for your specific USDA zone or climate can lead to poor performance or plant loss.
Growing your own mulberry tree from a cutting is a journey filled with learning and immense satisfaction. It connects you directly to the rhythms of nature and provides a sustainable source of delicious, homegrown fruit. With these practical gardening tips, you’re well-equipped to embark on this rewarding adventure. Don’t hesitate to start your own mulberry forest and enjoy the sweet rewards for years to come!