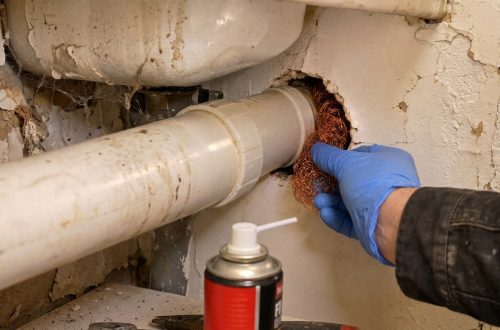
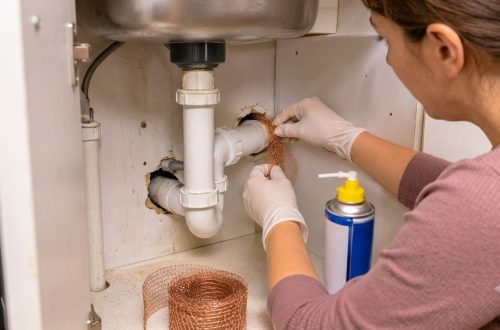
Pests rarely need a big opening to get into a home. Mice, roaches, and other small visitors often slip through the tiny gap where a pipe passes through a cabinet wall, and it’s easy to overlook because it’s hidden behind your sink. This simple DIY closes that gap with copper mesh and spray foam, creating a sturdy barrier that pests have a hard time chewing through.
The method is practical, inexpensive, and takes about an hour, including cure time. Here’s how to do it properly, what materials to use, and what to expect.
What You’ll Need
Materials
- Copper mesh (fine or medium gauge, roll format)
- Expanding spray foam sealant (a standard can labeled for gap and crack filling)
- Optional alternative for very small gaps: silicone or pest-resistant caulk
- Optional alternative to copper mesh: stainless steel mesh or steel wool, packed tightly and sealed with caulk
Tools
- Heavy-duty work gloves (nitrile or cotton-lined)
- Safety glasses
- Tin snips or heavy scissors for cutting mesh
- Flashlight or headlamp
- Putty knife or flat tool for pressing mesh into place
- Utility knife for trimming cured foam
- Old rag or paper towels for cleanup
Why This DIY Can Be Useful
Copper mesh is a common choice for pest-proofing because it’s tough to chew and holds up well over time without rusting. It works as a physical barrier that you can pack into openings too irregular for a neat patch.
Spray foam then fills the spaces around the mesh and locks it in place. It expands to seal small voids and adds a solid layer that holds the mesh securely. Together, the two materials make a more durable seal than either one would on its own.
How to Make It
There’s no mixing involved here. The main job is preparing the gap so the materials can do their work.
- Empty the cabinet under the sink and take out any cleaning supplies, trash bags, or boxes so you have room to work.
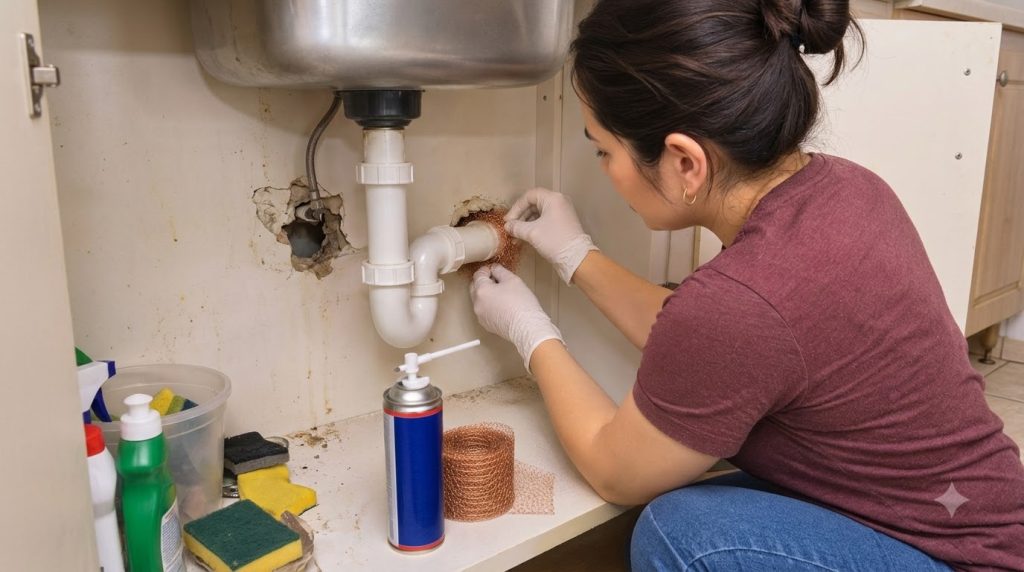
- Use a flashlight to find every gap around the pipes and wall openings. Look at the back of the cabinet and along the floor edge as well.
- Wipe away dust, grease, and loose debris from the edges of each opening. Dry surfaces help the foam stick.
- Cut a piece of copper mesh slightly larger than the opening, usually about 2 inches (5 cm) wider on all sides.
- Roll or fold the mesh so it fits snugly into the gap, then press it in with your gloved hands or a putty knife. Make sure it fills the space without big holes.
- Shake the spray foam can well for about 30 seconds if the label instructs it to.
How to Use It
- Stand the can upright or follow the label’s angle instructions. Apply a thin bead of foam around the pipe where it meets the mesh, working in short bursts.
- Don’t fill the gap completely in one shot. Foam expands as it cures, and overfilling can push it out or bulge the cabinet panel.
- Let the foam cure for the time listed on the can, usually several hours. Avoid touching it during this time.
- Once cured, trim any excess foam flush with the cabinet surface using a utility knife.
- Check the seal by pressing lightly along the edges. It should feel firm and stay in place.
What to Expect
A properly sealed gap should look neat, feel firm, and block the small openings pests use. The foam will be slightly rough or textured, which is normal. It’s not meant to look decorative, and it won’t stop every pest on its own. Sealing gaps is one part of a broader pest-prevention routine that includes keeping food stored, fixing leaks, and cleaning up crumbs.
Results depend on how well the gaps were found and filled. Check the area every few months, especially after moving furniture or running new plumbing.
Helpful Tips
- Cut the mesh with tin snips rather than tearing it, which leaves sharp edges.
- Use a flashlight to check for light coming through the back of the cabinet. Any light means there’s still a gap.
- For very small holes, a bead of silicone or pest-resistant caulk may be enough and gives you more control.
- Keep a spare piece of mesh and a small can of sealant on hand for future repairs.
- Seal gaps around other pipes and vents in the kitchen and bathroom while you’re at it.
Important Notes and Safety
- Wear gloves and safety glasses. Expanding foam can be difficult to remove from skin, and copper mesh edges can scratch.
- Work in a ventilated space. Open a window or run a fan, and follow the can’s instructions on fumes and handling.
- Keep foam away from hot pipes, water heater flues, and any exhaust or heat source. Leave clearance around them as recommended by local codes and the product label.
- Don’t block access to shutoff valves, drain traps, or pipe joints that might need inspection or repair later. Leave a removable section if you’re unsure.
- Never spray foam near electrical boxes or wiring. Keep it clear of outlets and cords.
- Check that the cabinet and surrounding materials are dry before sealing. Trapped moisture can cause mold or damage over time.
- Store the foam can upright in a cool, dry place away from children and pets, and keep the copper mesh roll in a dry spot so it doesn’t tangle or bend.