If you have ever scrolled through a companion planting chart and wondered whether any of it actually works, you are not alone. Many charts list dozens of pairings with confident arrows and little explanation. Some of the advice holds up well in real gardens, some is partly true, and some is simply folklore passed down from one gardener to the next. The good news is that you do not need to memorize a giant chart to get real benefits. A handful of well-chosen pairs can help you use space more efficiently, keep more beneficial insects around, and make your beds feel more balanced.
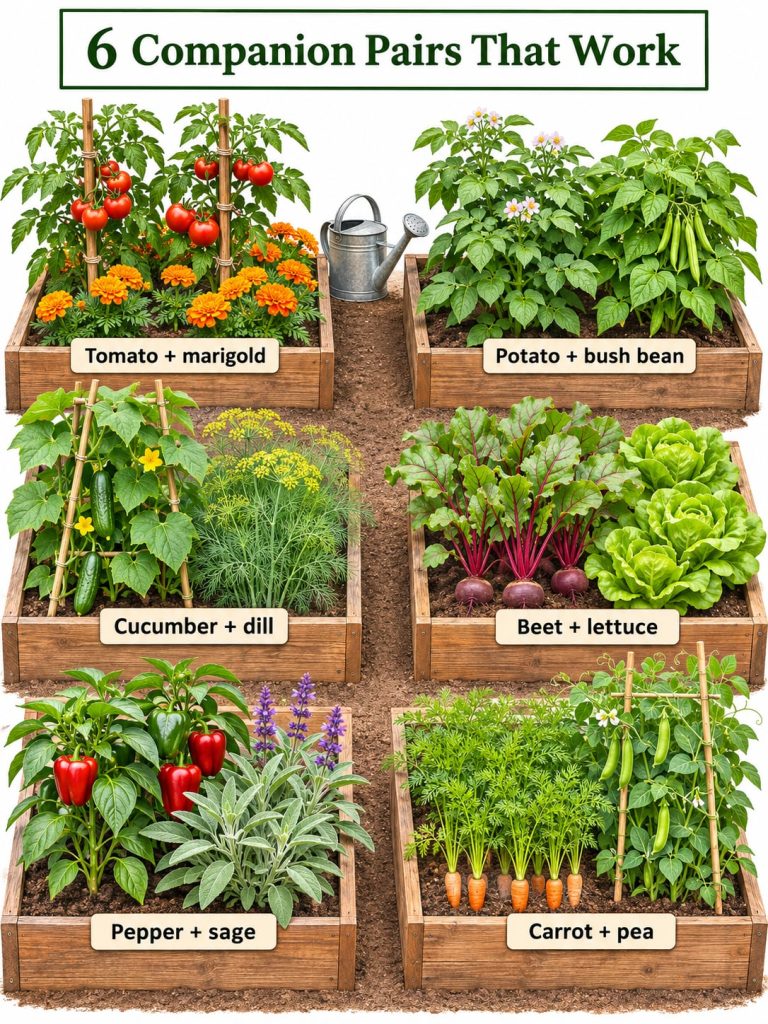
In this guide, we will look at six pairings that have solid horticultural reasoning behind them. You will learn what each combination actually does, how to plant it, and where it can fall short. We will also cover the spacing, timing, and small setup details that make the difference between a neat, productive bed and a crowded tangle. Whether you grow in raised beds, in-ground rows, or large containers, these ideas can help you get more from the same square footage.
Why Companion Planting Works, and Where It Falls Short
Companion planting is simply growing two or more plants together so that they support each other. The benefits usually come from a few specific mechanisms. Some plants attract pollinators and predatory insects that feed on pests. Others act as trap crops, drawing pests away from the vegetables you want to harvest. Taller plants can shade heat-sensitive crops, and legumes add nitrogen to the soil that neighboring plants can use. Spacing itself also matters, because a well-spaced bed has better airflow and fewer pest hiding places.
What companion planting does not do is guarantee pest prevention. A flowering plant may bring in hoverflies, but that does not mean your broccoli is immune to aphids. Research results vary by crop, climate, and garden design. The most reliable approach is to combine smart pairings with regular observation, healthy soil, and good watering habits.
Six Pairs Worth Trying
1. Tomatoes and Basil
This is one of the most popular pairings for good reason. Tomatoes and basil enjoy the same conditions: full sun, warm soil, regular deep watering, and well-drained beds. Basil flowers attract pollinators, which helps tomato fruit set, though tomatoes are largely self-pollinating and benefit most from wind or bee vibration. The aroma of basil is often recommended as a pest deterrent, but reliable evidence is limited, so think of the pairing as a practical and tasty one rather than a pest shield.
Plant basil about 12 to 18 inches from tomato stems once the soil has warmed. Pinch off basil flower heads regularly to keep the leaves productive, and harvest from the top of the plant to encourage bushy growth.
2. Corn, Pole Beans, and Winter Squash
Often called the Three Sisters, this combination has been grown together by many Indigenous farming communities for generations. Corn provides a sturdy vertical support for pole beans. Beans host nitrogen-fixing bacteria in their roots, which can benefit the corn and the soil over time. Winter squash spreads across the ground, shading the soil, reducing weeds, and helping retain moisture.
Plant corn in a block of at least four short rows rather than one long row so it pollinates well. Sow pole beans at the base of each corn stalk once the corn is about 6 inches tall. Plant squash in the open spaces between corn hills, and keep the vines from smothering the young corn by directing them outward.
3. Carrots and Onions
Carrots and onions are often paired to confuse carrot rust flies, which locate carrots partly by smell. Onion odor may reduce carrot rust fly damage in some trials, but results are inconsistent, and the benefit is modest at best. Still, the pairing is efficient because both crops have similar sun and soil needs and can share a bed without competing heavily.
Sow carrot seed directly into loose, stone-free soil at a depth of about one-quarter inch. Thin carrots to about 2 to 3 inches apart once seedlings are a few inches tall. Plant onion sets about 4 inches apart between carrot rows, and keep the soil evenly moist during bulb formation.
4. Nasturtiums with Cucumbers and Brassicas
Nasturtiums are a useful trap crop. Aphids often prefer nasturtium leaves to the leaves of cabbage, kale, or cucumbers, so they may gather on the nasturtiums first. This makes aphids easier to find and remove. Nasturtium flowers also attract some beneficial insects. Keep in mind that nasturtiums spread vigorously, so give them a dedicated spot or a container.
Place a few nasturtium plants at the edge of the bed or near the cucumber trellis. Check the undersides of nasturtium leaves weekly. If you see a cluster of aphids, remove the affected leaf or spray it off with water rather than reaching for a broad pesticide.
5. Sweet Alyssum with Brassicas
Sweet alyssum is a low-growing flower that produces small clusters of fragrant blooms. Its flowers provide nectar and pollen for tiny parasitic wasps and hoverflies, which are natural enemies of aphids and caterpillars. Planting alyssum around cabbage, broccoli, and kale can increase the number of these beneficial insects in your garden, though it does not eliminate pest problems on its own.
Sow alyssum seed directly after the last spring frost, or set transplants 8 to 12 inches apart along the edges of brassica beds. Alyssum tolerates light frost and often blooms until the first hard freeze in many regions. Regularly check your brassicas for caterpillars and aphids, and confirm the pest before you act.
6. Lettuce in the Shade of Taller Plants
Lettuce grows best when temperatures stay cool. Once daytime highs climb above about 80 degrees Fahrenheit, many lettuce varieties become bitter and begin to bolt, or send up a flower stalk. Planting lettuce on the east or north side of taller crops such as pole beans, tomatoes, or sunflowers provides afternoon shade and cooler soil. This can extend your harvest, especially in warm regions.
Sow lettuce seed in partial shade once taller plants are established, and keep the soil consistently moist. Choose heat-tolerant or slow-bolt varieties if your summers are hot. Harvest outer leaves first so the plant keeps producing from the center.
Step-by-Step Setup for Success
Start by sketching your bed on paper. Mark the sunny and shady areas, and note where tall plants will cast shadows. Place tall crops on the north side of the bed so they do not shade shorter plants. Leave walking paths of at least 18 inches in raised beds, so you can reach every plant without stepping on the soil.
Next, test your soil drainage. Dig a hole about 12 inches deep and fill it with water. If the water drains within a few hours, your bed is well-drained for most vegetables. If water stands for a day or longer, consider raised beds or added organic matter before planting.
Finally, water deeply and less often. Aim for about 1 inch of water per week, delivered at the base of plants. Check soil moisture by pushing a finger 2 inches into the soil. If it feels dry, water. If it feels wet and sticky, wait a day.
Common Mistakes and How to Avoid Them
- Overcrowding plants: Dense planting may look productive at first, but it reduces airflow and invites disease. Follow spacing guidelines on seed packets.
- Expecting companions to replace pest monitoring: Check plants at least twice a week, especially the undersides of leaves.
- Letting trap crops spread too far: Nasturtiums and alyssum can spread quickly. Contain them with edging or containers.
- Planting shade-loving crops in full heat: Lettuce planted in full afternoon sun in hot climates often bolts before harvest.
- Using pesticides too early: Identify the pest first. Many insects in your garden are helpful, and removing them can cause new problems.
Regional Notes for Different U.S. Climates
USDA hardiness zones describe winter cold, not summer heat or rainfall, so they are only part of the picture. In Zones 3 to 5, focus on frost dates and short growing seasons. Start corn and squash indoors or choose fast-maturing varieties, and plant alyssum and lettuce once soil has warmed. In Zones 6 to 8, most of these pairings work well in spring and fall. Lettuce often needs shade in summer. In Zones 9 to 11, many gardeners plant cool-season crops like carrots and lettuce in fall and winter, while using shade cloth or taller companions to protect them from heat. Local extension offices can help you confirm frost dates and planting windows for your exact location.
Start Small and Build from Here
You do not need to plant all six pairs at once. Choose one or two that fit your space and climate, and observe how they perform. Take notes on which plants attract visitors, where pests appear, and how much you harvest. Over a season or two, you will build a garden that works with your conditions rather than against them. Save this guide, and the next time you plan your beds, start with the pairing that looks most useful for your garden.