Unlock Your Inner Strength: Transform Your Body with Floor Exercises!
Are you ready to feel stronger, more stable, and more confident in your body? Whether you’re just starting your fitness journey, looking for effective ways to work out at home, or seeking low-impact options to build strength, you’ve landed in the right place! At Remedies Wellness, we believe that achieving your fitness goals doesn’t require a fancy gym or complicated equipment. Sometimes, all you need is your own body, a comfortable space on the floor, and the right guidance.
Today, we’re diving into five simple yet incredibly effective floor exercises that target your core, glutes, and legs. These foundational movements are perfect for beginners, highly adaptable for all fitness levels, and can be done anytime, anywhere. Get ready to activate those essential muscle groups, improve your stability, and build a powerful lower body and core without ever having to leave your living room!
Why Floor Exercises Are a Game-Changer for Beginner Fitness and Home Workouts
Floor exercises offer a unique set of benefits, making them an ideal choice for anyone looking to kickstart their fitness journey or enhance their current workout routine. Here’s why they’re so effective:
- Accessibility: No equipment? No problem! Most floor exercises rely solely on your body weight, making them accessible to everyone, regardless of budget or access to a gym.
- Reduced Impact: For those with joint concerns or seeking gentle yet effective options, floor exercises minimize impact, reducing stress on knees, ankles, and hips.
- Core Engagement: Nearly every floor exercise, especially those targeting the glutes and lower body, inherently engages your core. This helps build a strong foundation, crucial for everyday activities and preventing injuries.
- Improved Stability and Balance: By working your muscles in a controlled, often unilateral (one side at a time) manner, floor exercises significantly enhance your balance and overall body stability.
- Better Mind-Muscle Connection: Lying on the floor allows you to focus more intently on muscle activation and proper form, helping you feel the burn in the right places.
Before we jump into the exercises, a quick note on expectations: While these glute exercises and thigh workout routines are fantastic for strengthening and toning your muscles, it’s important to remember that you cannot specifically burn fat from one body area. Building muscle and increasing overall activity contribute to fat loss across your entire body, not just where you feel the burn. Focus on building strength, improving stability, and enjoying the process!
Safety First: Essential Tips for Beginners
Starting any new workout routine requires attention to safety to prevent injury and maximize your results. Keep these tips in mind:
- Listen to Your Body: If something hurts (beyond muscle fatigue), stop immediately. Pain is your body’s way of telling you something is wrong.
- Start Slow: Don’t try to do too much too soon. Begin with fewer repetitions and sets, and gradually increase as your strength improves.
- Focus on Form: Proper form is more important than the number of reps. Watch videos, use a mirror, or even record yourself to check your alignment.
- Warm-Up: Spend 5-10 minutes with light cardio (marching in place, arm circles) and dynamic stretches (leg swings, torso twists) to prepare your muscles.
- Cool-Down: After your workout, dedicate 5-10 minutes to static stretching, holding each stretch for 20-30 seconds.
- Stay Hydrated: Drink water before, during, and after your workout.
- Breath Properly: Generally, exhale on the exertion (the hardest part of the movement) and inhale on the release.
The 5 Simple Floor Exercises for a Stronger You
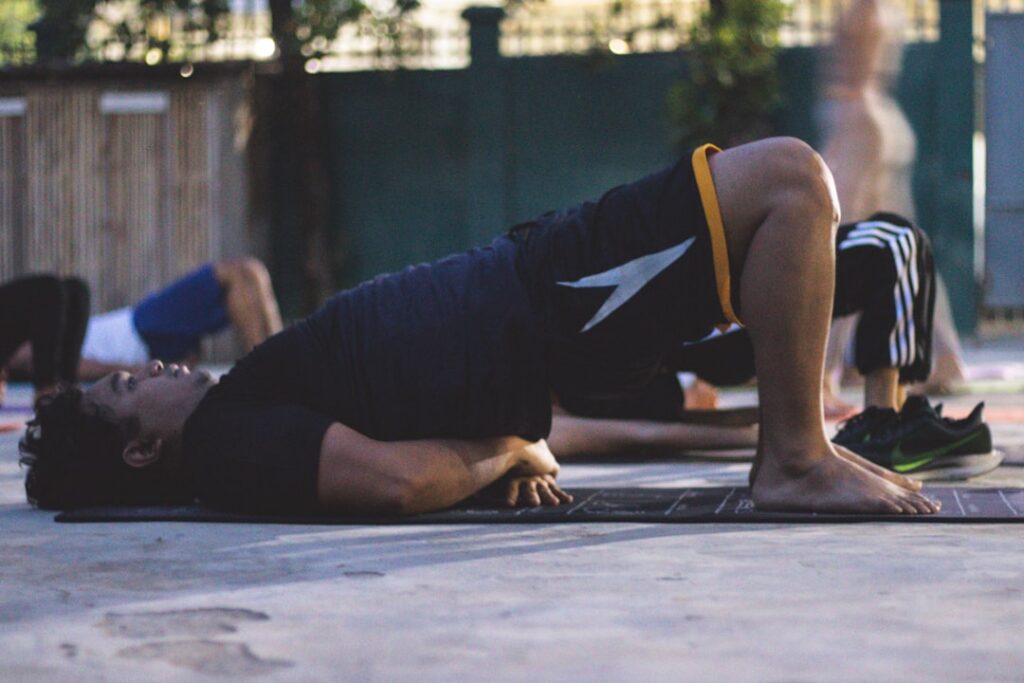
1. Glute Bridge: The Foundation of Glute Strengthening
The Glute Bridge exercise is a fantastic starting point for anyone looking to activate their glutes and build core strength. It’s simple, effective, and crucial for developing strong hips and a stable lower back.
Muscles Worked:
- Primary: Gluteus Maximus, Hamstrings
- Secondary: Core (Abdominals), Erector Spinae (lower back)
Step-by-Step Instructions:
- Lie on your back with your knees bent and feet flat on the floor, hip-width apart. Your heels should be a few inches from your glutes.
- Place your arms at your sides, palms facing down.
- Engage your core and press through your heels, lifting your hips off the floor until your body forms a straight line from your shoulders to your knees.
- Squeeze your glutes at the top of the movement. Avoid arching your lower back excessively.
- Hold for a second, then slowly lower your hips back down to the starting position.
Benefits:
- Strengthens glutes and hamstrings, crucial for walking, running, and jumping.
- Improves hip mobility and stability.
- Supports a healthy lower back by strengthening surrounding muscles.
- Activates the core, contributing to overall stability.
Reps, Sets, and Rest:
Perform 3 sets of 10-15 repetitions. Rest for 60 seconds between sets.
Beginner Tips & Common Mistakes:
- Tip: Focus on squeezing your glutes at the top. Imagine you’re holding a penny between your butt cheeks.
- Mistake: Arching your lower back instead of lifting through your hips. This can put strain on your back. Focus on keeping your core engaged.
- Mistake: Pushing off your toes instead of your heels. Ensure your weight is distributed through your heels for maximum glute activation.
2. Bent-Knee Leg Lift: Isolating Thigh and Glute Strength
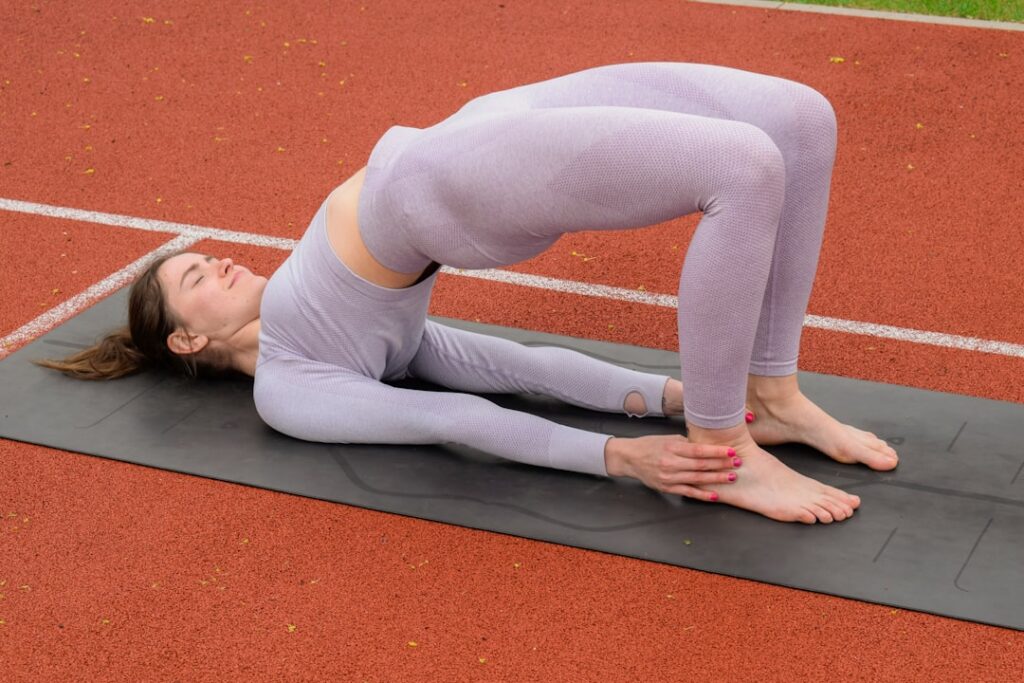
The Bent-Knee Leg Lift is a fantastic exercise for isolating the glutes and outer thighs, helping to strengthen and sculpt these often-underworked areas. It’s perfect for improving hip strength and stability.
Muscles Worked:
- Primary: Gluteus Medius, Gluteus Minimus (side glutes), Hip Abductors
- Secondary: Core stabilizers
Step-by-Step Instructions:
- Lie on your side with your legs stacked and bent at a 90-degree angle.
- Rest your head on your bottom arm or support it with your hand.
- Keep your heels together throughout the movement.
- Engage your core and, keeping your top knee bent, slowly lift your top knee towards the ceiling, opening your legs like a clam shell.
- Pause briefly at the top, feeling the contraction in your outer glute.
- Slowly lower your knee back to the starting position with control.
Benefits:
- Targets the often-neglected hip abductor muscles, important for hip health and stability.
- Helps alleviate knee and lower back pain by strengthening supporting muscles.
- Improves balance and prevents injury by stabilizing the pelvis.
Reps, Sets, and Rest:
Perform 3 sets of 12-15 repetitions on each side. Rest for 45-60 seconds between sets.
Beginner Tips & Common Mistakes:
- Tip: Ensure your hips remain stacked and don’t roll backward as you lift your knee. Imagine there’s a wall behind you.
- Mistake: Rushing the movement. Control is key to engaging the correct muscles. Move slowly both up and down.
- Mistake: Lifting your foot off the floor. Your heels should remain together.
3. Heel Slide: Gentle yet Effective for Leg and Glute Strength
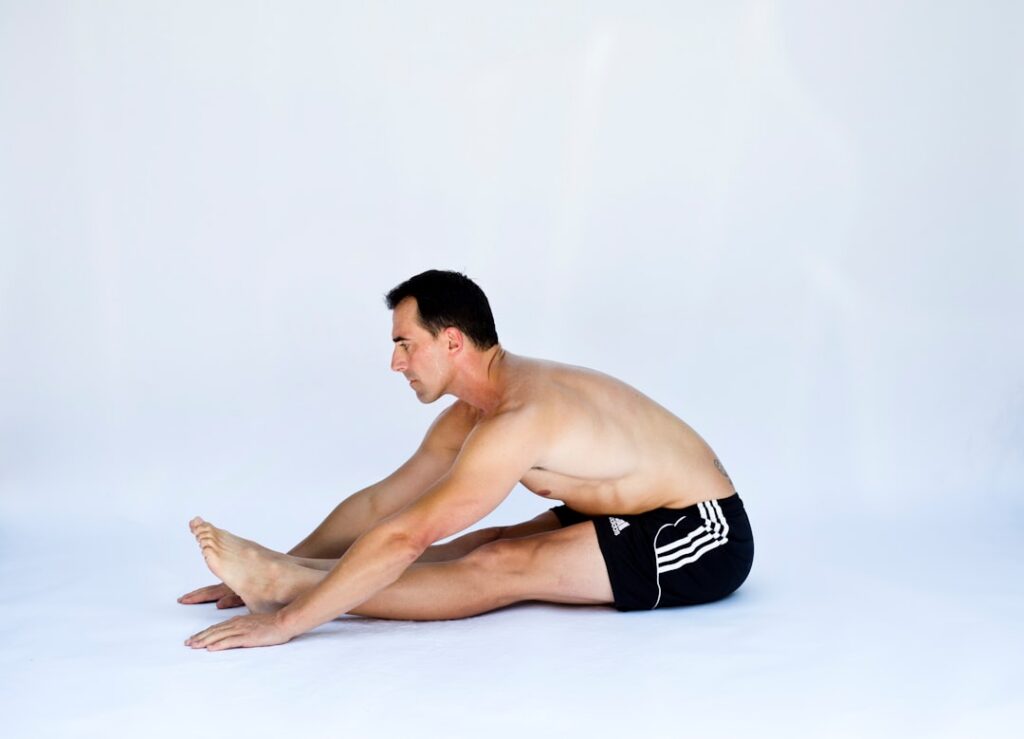
The Heel Slide is a subtle but powerful exercise that builds strength in your hamstrings and glutes while engaging your core. It’s excellent for those seeking a truly low-impact way to strengthen their lower body and improve knee stability.
Muscles Worked:
- Primary: Hamstrings, Gluteus Maximus, Quadriceps
- Secondary: Core (Abdominals)
Step-by-Step Instructions:
- Lie on your back with your legs extended straight.
- Engage your core, pressing your lower back gently into the floor.
- Slowly slide one heel towards your glutes, bending your knee and keeping your heel in contact with the floor.
- Continue until your knee is fully bent, or as far as comfortable without pain.
- Slowly extend your leg back to the starting position, maintaining control.
- Alternate legs.
Benefits:
- Strengthens hamstrings and quadriceps in a controlled manner, great for knee rehabilitation or injury prevention.
- Improves flexibility in the hip and knee joints.
- Enhances core stability by requiring constant abdominal engagement.
Reps, Sets, and Rest:
Perform 3 sets of 10-12 repetitions per leg. Rest for 45 seconds between sets.
Beginner Tips & Common Mistakes:
- Tip: If you have slippery socks or a smooth floor, this exercise will be easier. If not, a towel under your heel can help it slide.
- Mistake: Allowing your lower back to arch excessively as you extend your leg. Keep your core tight to maintain a neutral spine.
- Mistake: Rushing the movement. The slower you go, the more you’ll feel the muscles working.
4. Alternating Arm Reach Bridge: Elevating Your Core Workout at Home
This variation takes the classic Glute Bridge and adds an upper body challenge, transforming it into a dynamic exercise for full-body stability and a serious core workout at home. It’s excellent for improving coordination and challenging your balance.
Muscles Worked:
- Primary: Gluteus Maximus, Hamstrings, Core (Abdominals, Obliques), Shoulders
- Secondary: Erector Spinae (lower back), Triceps
Step-by-Step Instructions:
- Start in the Glute Bridge position: lying on your back with knees bent, feet flat, and hips lifted so your body forms a straight line from shoulders to knees.
- Keep your core tight and glutes squeezed.
- Slowly lift one arm straight up towards the ceiling, maintaining a stable bridge position without letting your hips drop or shift.
- Hold for a second, then slowly lower your arm back down.
- Repeat with the other arm.
- Continue alternating arms for the desired number of repetitions, all while keeping your hips elevated in the bridge.
- After completing all arm reaches, slowly lower your hips back to the floor.
Benefits:
- Significantly improves core stability and balance.
- Strengthens the entire posterior chain (glutes, hamstrings, lower back).
- Engages shoulder stabilizers, enhancing upper body control.
- Challenges proprioception (your body’s sense of position in space).
Reps, Sets, and Rest:
Perform 3 sets of 8-10 arm reaches per side (16-20 total reaches) while holding the bridge. Rest for 60-90 seconds between sets.
Beginner Tips & Common Mistakes:
- Tip: Imagine a glass of water on your stomach that you don’t want to spill. This helps keep your core stable and hips level.
- Mistake: Letting your hips sag or tilt when you lift an arm. Focus intensely on keeping your glutes engaged and core braced.
- Mistake: Rushing the arm movement. Slow and controlled movements are essential for stability.
5. Bridge with Knee Press: Deeper Hip and Glute Engagement
This advanced variation of the Glute Bridge adds an isometric hold and an additional layer of hip strengthening exercises by pressing the knees outwards. It truly ignites your glutes and helps improve hip stability and control.
Muscles Worked:
- Primary: Gluteus Maximus, Gluteus Medius, Gluteus Minimus, Hamstrings
- Secondary: Core (Abdominals), Hip Abductors
Step-by-Step Instructions:
- Start in the Glute Bridge position: lying on your back with knees bent, feet flat, and hips lifted so your body forms a straight line from shoulders to knees.
- Maintain a strong bridge, squeezing your glutes.
- While keeping your feet firmly planted, gently press your knees outwards, engaging your outer glutes and hip abductors.
- Hold this outward press for 2-3 seconds, feeling the deep contraction in your glutes.
- Slowly bring your knees back to the starting hip-width position.
- Repeat the knee press motion for the desired number of repetitions, all while keeping your hips elevated in the bridge.
- After completing all knee presses, slowly lower your hips back to the floor.
Benefits:
- Intensifies glute activation, especially the gluteus medius and minimus, which are crucial for hip stability.
- Strengthens hip abductors, vital for preventing knee valgus (knees caving in) during movements.
- Enhances body awareness and control, making it an excellent functional exercise.
Reps, Sets, and Rest:
Perform 3 sets of 8-12 knee presses while holding the bridge. Rest for 60-90 seconds between sets.
Beginner Tips & Common Mistakes:
- Tip: If you have a resistance band, place it just above your knees for added challenge and better feedback on pressing outwards.
- Mistake: Letting your hips drop as you press your knees out. Keep your glutes actively squeezing to maintain the bridge.
- Mistake: Moving too quickly. The outward press should be controlled and deliberate to truly engage the target muscles.
Sample Weekly Bodyweight Workout Routine
Ready to put these no equipment workout gems into action? Here’s a sample weekly workout routine you can follow to strengthen your core, glutes, and legs. Remember to warm up for 5-10 minutes before and cool down for 5-10 minutes after each session!
Workout Days (Perform 3 times a week, with at least one rest day in between, e.g., Monday, Wednesday, Friday):
- Warm-up: 5-10 minutes of light cardio (marching in place, jumping jacks), dynamic stretches (leg swings, torso twists).
- Glute Bridge: 3 sets of 10-15 reps (60 seconds rest)
- Bent-Knee Leg Lift (each side): 3 sets of 12-15 reps (45-60 seconds rest)
- Heel Slide (each leg): 3 sets of 10-12 reps (45 seconds rest)
- Alternating Arm Reach Bridge: 3 sets of 8-10 reaches per side (16-20 total) (60-90 seconds rest)
- Bridge with Knee Press: 3 sets of 8-12 knee presses (60-90 seconds rest)
- Cool-down: 5-10 minutes of static stretches (e.g., hamstring stretch, quad stretch, figure-four stretch).
Rest Days (Tuesday, Thursday, Saturday, Sunday):
- Focus on active recovery like walking, light stretching, or yoga.
- Prioritize sleep and good nutrition to support muscle recovery and growth.
As you get stronger, you can increase the number of repetitions, add more sets, or shorten your rest periods. You can also incorporate a resistance band for an added challenge to the Glute Bridge and Bridge with Knee Press!
Ready to Feel Stronger?
Building a powerful core, sculpted glutes, and strong legs doesn’t have to be complicated or intimidating. These five simple floor exercises provide a fantastic foundation for anyone looking to improve their beginner fitness, enhance their home workout routine, and feel incredible in their own skin. Consistency is your secret weapon, so commit to these movements, listen to your body, and celebrate every small victory along the way.
We’re here to support your journey to a healthier, more energetic you! For more expert tips, delicious healthy recipes, and motivating wellness content, be sure to explore more articles on the Healthy Insight Blog. Your path to a stronger you starts now!