DIY Clove & Aloe Botanical Facial Oil for Smooth, Healthy-Looking Skin
Hey there, beauty bestie! ✨ Have you ever dreamed of a skincare routine that feels like a warm hug for your skin? One that uses the power of nature to help your complexion look its absolute best? Well, you’re in the right place! Today, we’re diving into the wonderful world of DIY botanical face oil with a special recipe: our homemade Clove & Aloe Botanical Facial Oil.
In a world full of complex beauty products, sometimes the most effective solutions are found right in your kitchen or garden. This moisturizing facial oil is designed to help nourish your skin, support its natural barrier, and give you that radiant, healthy-looking glow we all adore. We’ll be using simple, wholesome ingredients like cloves, an oil extract of aloe vera, and the goodness of vitamin E to create a luxurious potion that your skin will thank you for.
Forget about complicated routines and sky-high prices. This homemade skincare recipe is all about gentle care and embracing your natural beauty. Ready to embark on this beautiful journey to smoother, healthier-looking skin? Let’s get started!
Why Botanical Oils Are Trending in Skincare
You might have noticed a buzz around facial oils lately, and for good reason! Botanical oils have become a staple in many skincare routines, moving from niche products to mainstream favorites. But why are they so popular?
First, there’s a growing desire for natural, back-to-basics beauty. People are becoming more conscious of what they put on their skin, seeking ingredients that are recognizable, sustainable, and less processed. DIY botanical face oil fits perfectly into this movement, offering a transparent approach to skincare where you control every ingredient.
Beyond the ‘natural’ appeal, botanical oils are incredibly effective moisturizers. Unlike lotions and creams that often contain a significant amount of water and emulsifiers, facial oils are concentrated emollients. They help lock in moisture, prevent transepidermal water loss, and support the skin’s lipid barrier, which is crucial for healthy, resilient skin. When your skin barrier is strong, it’s better equipped to protect itself from environmental stressors, keeping your complexion feeling soft and looking supple.
Furthermore, many botanical oils are rich in vitamins, antioxidants, and essential fatty acids. These components work together to nourish the skin, improve its overall appearance, and contribute to a more radiant, even-toned look. They can help soften the appearance of dry patches and create a smoother-looking canvas, making your skin feel wonderful and looking vibrant. This trend reflects a shift towards holistic self-care, where beauty is intertwined with wellness and mindful choices.
The Wonders of Cloves for Your Skin
When you think of cloves, your mind might jump to warm spices or holiday treats. But did you know this aromatic bud holds some incredible secrets for your skin too? For centuries, cloves have been cherished in traditional practices for their unique properties, and now they’re gaining recognition in natural skincare.
Cloves contain compounds that are known for their antioxidant benefits. Antioxidants are vital for helping to protect the skin from environmental stressors, which can contribute to the appearance of dullness and uneven skin tone. By incorporating clove face oil into your routine, you’re giving your skin a boost of these beneficial compounds, which can help maintain its vitality and promote a healthy-looking complexion.
Beyond antioxidants, cloves are also recognized for their potential to help soothe and comfort the skin. This can be particularly beneficial for those looking to calm the appearance of irritated skin or simply enjoy a more serene skincare experience. The gentle warmth and distinctive aroma of cloves add an extra layer of luxury to our botanical beauty recipe, making your daily skincare ritual feel like a mini-spa moment.
It’s important to use clove oil extract in a diluted form within a carrier oil, as its concentrated form can be potent. Our DIY recipe ensures you get all the wonderful benefits of cloves in a safe and gentle way, perfect for enhancing the appearance of smooth and healthy skin.
Aloe Vera: The Skin Soother (in Oil Form!)
Aloe vera is a legendary plant, famous worldwide for its incredible soothing and hydrating properties. You’ve probably used its gel for sunburns or minor irritations, but for our clove face oil, we’re focusing on an oil extract of aloe vera, which offers its own unique set of benefits when incorporated into a botanical oil blend.
While fresh aloe vera gel is water-based and doesn’t mix well directly into oil, aloe vera skincare formulations often include oil extracts where the beneficial compounds of aloe have been infused into a carrier oil. This allows us to harness some of aloe’s magic in an oil-soluble form. Aloe vera oil extract is known for its moisturizing capabilities, helping to replenish the skin’s hydration levels and contributing to a feeling of softness and suppleness.
It also brings a wonderful soothing quality. For skin that feels dry or looks tired, an oil containing aloe vera extract can provide a comforting sensation, helping the skin to feel more refreshed and appear revitalized. It supports the skin’s natural ability to recover, contributing to a healthy-looking and calm complexion.
Including aloe vera oil extract in our DIY botanical face oil ensures that your skin receives a harmonious blend of ingredients designed to promote a balanced, comfortable, and beautifully radiant appearance.
The Power of Vitamin E in Your Facial Oil
Vitamin E is a superstar ingredient in almost every skincare product, and for excellent reasons! This fat-soluble vitamin is not only fantastic for your skin but also acts as a natural preservative for our homemade skincare recipe, helping to extend its shelf life.
When it comes to your skin, vitamin E facial oil is widely celebrated for its antioxidant properties. Just like cloves, Vitamin E helps to protect your skin from environmental stressors, which can otherwise lead to dullness and premature signs of aging. By buffering against these factors, Vitamin E supports your skin’s natural resilience, helping it maintain a fresh and youthful appearance.
Beyond its protective qualities, Vitamin E is also a powerful emollient. It helps to strengthen the skin’s barrier function, meaning it assists in keeping moisture locked in and external irritants out. This leads to skin that feels softer, smoother, and better hydrated. For those with dry or flaky patches, Vitamin E can be particularly beneficial in improving the skin’s overall texture and appearance, contributing to a more even-looking tone and a silky-smooth feel.
Adding vitamin E to our DIY anti aging oil recipe not only maximizes its skin-loving benefits but also ensures your beautiful, handmade creation stays fresh and potent for longer, allowing you to enjoy its goodness for weeks to come.
Choosing the Right Carrier Oil for Your Skin
The carrier oil is the foundation of your DIY botanical face oil. It’s the base that carries all the wonderful properties of our star ingredients – cloves, aloe vera oil extract, and vitamin E – gently to your skin. Choosing the right carrier oil is crucial because different oils have different textures, absorption rates, and benefits, making some better suited for specific skin types than others.
- Jojoba Oil: Often called a “liquid wax,” jojoba oil is incredibly similar to the natural sebum our skin produces. This makes it an excellent choice for almost all skin types, including oily and acne-prone skin, as it’s non-comedogenic (won’t clog pores). It’s lightweight, absorbs easily, and helps balance the skin’s natural oil production, making it a universal favorite for a moisturizing facial oil.
- Sweet Almond Oil: A fantastic all-rounder, sweet almond oil is rich in vitamins E, A, and D, and essential fatty acids. It’s wonderfully nourishing, helps to soothe dry, irritated skin, and is known for its emollient properties, leaving skin soft and smooth. It’s slightly richer than jojoba but still well-tolerated by most skin types, especially normal to dry skin.
- Argan Oil: Hailing from Morocco, argan oil is often called “liquid gold.” It’s packed with antioxidants, vitamin E, and essential fatty acids, making it incredibly nourishing and restorative. It absorbs beautifully, is non-greasy, and is excellent for improving skin elasticity and promoting a radiant complexion. Ideal for normal, dry, and mature skin.
- Rosehip Seed Oil: While not typically used as a primary carrier in a high percentage due to its delicate nature and shorter shelf life, a small addition of rosehip oil can be powerful. It’s rich in essential fatty acids and vitamin A (retinoic acid derivative), known for its ability to improve the appearance of skin tone and texture. Best for dull, mature, or blemish-prone skin (use a small amount blended with other carrier oils).
For our Clove & Aloe Botanical Facial Oil, we recommend starting with Jojoba Oil due to its versatility and resemblance to skin’s natural oils. However, feel free to experiment with sweet almond or argan if they better suit your skin’s unique needs. The goal is a light, nourishing base that enhances the effects of our botanical powerhouses.
Ingredients for Your DIY Clove & Aloe Botanical Facial Oil
Ready to gather your treasures? Here’s what you’ll need for your very own botanical beauty recipe. Remember, quality ingredients make all the difference, so opt for organic and cold-pressed options whenever possible.
- 1/4 cup Carrier Oil: (e.g., Jojoba Oil, Sweet Almond Oil, or Argan Oil) – This is the base that will carry all the goodness. We recommend jojoba for its skin-mimicking properties.
- 1 tablespoon Dried Whole Cloves: Look for fresh, fragrant whole cloves from a reputable spice supplier. These will infuse our oil with their wonderful properties.
- 1 teaspoon Aloe Vera Oil Extract: Ensure you are using an oil extract (aloe vera macerated in a carrier oil) and not fresh aloe vera gel, which is water-based and will not mix with oil or preserve well.
- 1/2 teaspoon Vitamin E Oil: (Look for tocopherol or mixed tocopherols) – A powerful antioxidant for your skin and a natural preservative for your oil.
Equipment Needed
Making your own clove face oil is super simple and doesn’t require any fancy equipment. Here’s what you’ll need:
- Small, Clean Glass Jar with Lid: (e.g., a 4 oz mason jar or similar) – This will be for infusing your oil. Make sure it’s thoroughly cleaned and sterilized.
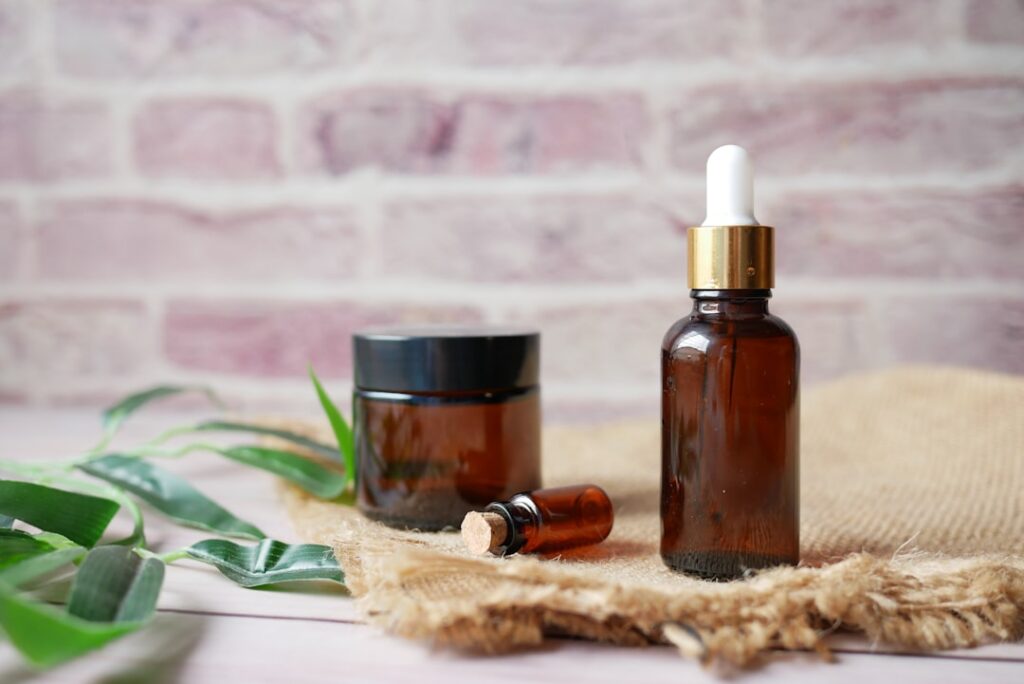
- Small Dark Glass Bottle with Dropper: (e.g., a 1 oz or 2 oz amber glass dropper bottle) – For storing your finished facial oil. Dark glass helps protect the oil from light degradation.
- Fine-Mesh Sieve or Cheesecloth: For straining out the botanical bits after infusion.
- Small Funnel: To help transfer the oil into the dropper bottle without spills.
- Measuring Spoons and Cups: For accurate ingredient measurements.
- Optional: Small Saucepan and Heat-Safe Bowl: If you choose the warm infusion method.
Step-by-Step Instructions: Crafting Your Botanical Elixir
Let’s get creative and make this beautiful DIY botanical face oil!
-
Prepare Your Cloves:
Gently crush the dried whole cloves slightly using a mortar and pestle or by placing them in a small bag and tapping them with the back of a spoon. You don’t want a powder, just enough to break them open and release their beneficial compounds. This step is optional but helps with the infusion process.
-
Combine Ingredients in the Infusion Jar:
Place the crushed cloves into your clean, dry glass jar. Pour your chosen carrier oil (jojoba, sweet almond, or argan) over the cloves. Ensure the cloves are fully submerged in the oil. Add the aloe vera oil extract to the jar.
-
Choose Your Infusion Method:
Cold Infusion (Recommended for Potency & Ease):
Seal the jar tightly with its lid. Place the jar in a cool, dark place, like a cupboard or pantry. Give the jar a gentle shake every day or two to help the infusion process along. This method allows the properties of the cloves and aloe to slowly and gently infuse into the carrier oil over time, without the risk of heat degradation.
Warm Infusion (Faster, but Requires Care):
If you’re a little impatient, you can opt for a gentle warm infusion. Place the jar (without the lid) into a small saucepan filled with a few inches of water, creating a double boiler. Heat the water gently over low heat, ensuring it never boils. Keep the oil warm (not hot!) for 2-4 hours. Stir occasionally. This method speeds up the infusion, but be careful not to overheat the oil, which can damage its beneficial compounds. Always monitor the temperature carefully.
-
Infusion Time:
For cold infusion, allow the mixture to infuse for a minimum of 2 weeks, ideally 4-6 weeks for maximum potency. For warm infusion, 2-4 hours should suffice.
-
Strain the Oil:
Once your infusion time is complete, it’s time to separate the oil from the botanicals. Line your fine-mesh sieve with a piece of cheesecloth and place it over a clean bowl or measuring cup. Pour the infused oil mixture through the sieve. Gather the edges of the cheesecloth and gently squeeze out any remaining oil from the cloves.
-
Add Vitamin E Oil:
To the strained, infused oil, add the 1/2 teaspoon of vitamin E oil. Stir gently to ensure it’s well combined. This is crucial for its antioxidant benefits for your skin and to help preserve the oil.
-
Transfer to Storage Bottle:
Using your small funnel, carefully pour your freshly made moisturizing facial oil into your clean, dark glass dropper bottle. Cap it tightly.
Voila! You’ve just created your very own Clove & Aloe Botanical Facial Oil. Give yourself a pat on the back, beauty queen!
Infusion Time: Patience is a Virtue
We touched upon infusion time in the steps, but let’s dive a little deeper into why it’s so important for your homemade skincare recipe.
When you infuse botanicals like cloves into a carrier oil, you’re essentially coaxing out their fat-soluble compounds – the beneficial antioxidants, soothing elements, and aromatic molecules – and transferring them into the oil. This process takes time, especially with the gentle cold infusion method we recommend.
- Cold Infusion (2-6 Weeks): This method is like a slow-cooker for your oil. It’s gentle, preserves the integrity of delicate compounds, and minimizes the risk of overheating. While it requires patience, the result is a beautifully infused oil with a robust profile. The longer it infuses, up to about 6 weeks, the more potent and fragrant your clove face oil will become. Just remember to shake it regularly!
- Warm Infusion (2-4 Hours): This method speeds things up by introducing low heat. It’s great if you’re in a hurry, but it requires careful monitoring to ensure the oil doesn’t get too hot. High temperatures can degrade sensitive beneficial compounds and even alter the oil’s properties. Always use a double boiler setup and keep the heat very low to avoid ‘cooking’ your botanicals.
Ultimately, the best infusion time is a balance between your desired potency and your patience. For a truly effective and enjoyable botanical beauty recipe, leaning towards the longer cold infusion will yield the best results.
How to Apply Your Facial Oil Correctly
Now that you have your gorgeous DIY anti aging oil, knowing how to apply it correctly is key to maximizing its benefits. Less is often more with facial oils!
- Cleanse Your Face: Always start with a freshly cleansed face. Gently wash away dirt, makeup, and impurities.
- Tone (Optional): If you use a toner, apply it now. This helps to balance your skin’s pH and prepare it for absorption.
- Moisturize While Damp: This is a pro-tip! Facial oils work best when applied to slightly damp skin. After cleansing and toning, leave your skin slightly moist (not dripping wet). This helps the oil to trap hydration on your skin’s surface, enhancing its moisturizing effect.
- Warm the Oil: Dispense 2-3 drops of your Clove & Aloe Botanical Facial Oil into the palm of your hand. Gently rub your hands together for a few seconds to warm the oil. This makes it more pliable and helps with absorption.
- Gentle Press and Massage: Instead of rubbing vigorously, gently press the oil onto your face and neck. Start with your cheeks, then forehead, nose, and chin. Use light, upward, circular motions to massage the oil into your skin. This not only aids absorption but also stimulates circulation and promotes a feeling of firmness and smoothness.
- Don’t Forget Your Neck and Décolletage: These areas are often neglected but can show signs of dryness. Extend your application to these areas for comprehensive care.
- Allow to Absorb: Give your skin a few minutes to fully absorb the oil before applying makeup or going to bed.
Consistency is key! Incorporating this step into your daily or nightly routine will help you achieve the best results for smooth, healthy-looking skin.
Morning vs. Evening Use: When to Apply Your Clove & Aloe Facial Oil
One of the beauties of a versatile moisturizing facial oil like our Clove & Aloe blend is that it can be adapted to fit your personal routine. The timing of your application can depend on your skin type, other products you use, and personal preference.
Morning Use:
Applying a light layer of your clove face oil in the morning can provide an excellent base for makeup, creating a dewy, glowing canvas. It helps to protect your skin throughout the day by reinforcing its barrier against environmental stressors and locking in moisture. If you have drier skin, a morning application can keep your skin feeling comfortable and looking radiant all day long.
Tips for Morning Application:
- Use just 1-2 drops to avoid an overly shiny look under makeup.
- Allow a few minutes for the oil to fully absorb before applying sunscreen or foundation.
- If your skin tends to be oily, you might prefer a lighter, more fast-absorbing carrier oil like jojoba for morning use.
Evening Use (Recommended):
The evening is often considered prime time for facial oil application. As your skin undergoes its natural repair and regeneration process overnight, nourishing it with a botanical oil can be particularly beneficial. The longer contact time allows the ingredients to work their magic, supporting skin hydration and contributing to a refreshed, smoother appearance by morning.
Tips for Evening Application:
- Feel free to use 2-3 drops, or slightly more if your skin is particularly dry or thirsty.
- This is a great time to incorporate a gentle facial massage, enhancing relaxation and promoting a feeling of firmness.
- It pairs wonderfully with a night cream, applied after the oil to seal in all the goodness.
Ultimately, listen to your skin! Experiment with both morning and evening applications to see what works best for your complexion and lifestyle. Many find a nightly application to be the most impactful for truly healthy-looking and smooth skin.
Storage Guide: Keeping Your DIY Oil Fresh
You’ve poured your heart into creating this beautiful homemade skincare recipe, so proper storage is essential to keep it fresh, potent, and safe to use. Just like with food, natural products without harsh chemical preservatives require a little extra care.
- Dark Glass Bottles: This is non-negotiable! Always store your finished facial oil in dark amber or cobalt blue glass bottles with a tight-fitting lid or dropper. Light exposure (especially UV light) can quickly degrade the beneficial compounds and delicate fatty acids in your oils, leading to rancidity.
- Cool, Dry Place: Heat and humidity are enemies of oil. Store your bottle in a cool, dry cupboard, away from direct sunlight, windows, and sources of heat like radiators or stove tops. Bathroom cabinets can work, but avoid placing it directly on a humid counter after a shower.
- Avoid Oxygen Exposure: The less air that gets into your bottle, the better. That’s why dropper bottles are excellent – they minimize air exposure compared to wide-mouthed jars. Always ensure the lid is tightly sealed after each use.
- Consider the Refrigerator: If you live in a very warm climate or simply want to extend the shelf life a bit further, storing your facial oil in the refrigerator can be a good option. Be aware that some oils might thicken slightly when cold, but they will return to their normal consistency at room temperature.
- No Water Contamination: Always ensure your hands are clean and dry when handling the dropper or bottle. Introducing water into the oil can encourage bacterial growth and spoilage.
By following these simple storage tips, you’ll ensure your DIY botanical face oil remains a vibrant and effective part of your skincare routine for as long as possible.
Shelf Life of Your Homemade Clove & Aloe Facial Oil
Understanding the shelf life of your homemade skincare recipe is crucial for safety and efficacy. Unlike commercially produced products with advanced preservation systems, your DIY oil has a more limited lifespan, but with proper care, it will serve you well.
Generally, a homemade botanical oil, especially one with vitamin E added, can last anywhere from 3 to 6 months if stored correctly in a cool, dark place. The exact duration depends on several factors:
- Quality of Ingredients: Fresh, high-quality, cold-pressed carrier oils and botanicals will naturally last longer than older or lower-quality ones.
- Hygiene During Preparation: Ensuring all your equipment (jars, bottles, funnels) are meticulously clean and sterilized before use is paramount. Any introduction of bacteria or mold during preparation can significantly shorten shelf life.
- Storage Conditions: As mentioned, light, heat, and oxygen are the biggest culprits for rancidity. Adhering to the storage guide will maximize your oil’s lifespan.
- Vitamin E: The addition of vitamin E oil (tocopherol) acts as an antioxidant, helping to prevent the other oils from oxidizing and going rancid quickly. It’s a key ingredient for extending shelf life.
Signs Your Oil Has Gone Bad:
Always trust your senses! Before each use, quickly check your oil for these signs:
- Smell: A rancid oil will develop a distinct “off” smell – often fishy, crayon-like, or bitter. It will lose its pleasant, natural aroma.
- Color Change: While subtle, you might notice the oil becoming darker or cloudier than when it was fresh.
- Texture Change: It might become thicker, stickier, or develop a gritty texture.
If you notice any of these changes, it’s best to discard the oil and make a fresh batch. Using rancid oil can be irritating to the skin and counterproductive to your skincare goals. When in doubt, throw it out!
Patch Test Instructions: Safety First, Always!
Even with the most natural and gentle ingredients, individual skin reactions can vary. That’s why a patch test is a non-negotiable step before fully incorporating any new homemade skincare recipe into your routine. This simple test helps ensure you don’t have an adverse reaction to any of the components in your Clove & Aloe Botanical Facial Oil.
Here’s how to perform a patch test correctly:
- Choose a Small, Discreet Area: Select a small, less sensitive area of skin, such as behind your ear, on your inner forearm, or on the side of your neck. These areas are usually good indicators of how your facial skin might react.
- Clean the Area: Gently cleanse the chosen spot with mild soap and water, then pat it dry.
- Apply a Small Amount: Apply a tiny amount (just a drop) of your newly made Clove & Aloe Botanical Facial Oil to the test area.
- Observe for 24-48 Hours: Leave the oil on your skin and monitor the area for any signs of reaction. Look out for:
- Redness
- Itching
- Burning sensation
- Swelling
- Rash or hives
- Rinse if Reaction Occurs: If you experience any discomfort, redness, or irritation at any point during the 24-48 hour period, immediately wash off the oil with cool water and a gentle cleanser. Do not proceed with using the oil on your face.
- If No Reaction: If your skin shows no signs of irritation after 24-48 hours, congratulations! Your Clove & Aloe Botanical Facial Oil is likely safe for you to use on your face.
Remember, your skin is unique. What works wonderfully for one person might not be ideal for another. Taking these few extra minutes for a patch test can save you from potential discomfort and help you enjoy your DIY botanical face oil with peace of mind.
Frequently Asked Questions About Your Botanical Facial Oil
Q1: Can this oil replace my regular moisturizer?
A: For many, yes! Especially if you have normal to dry skin. Facial oils are excellent emollients that help seal in moisture. However, if your skin is extremely dry, you might find benefit in layering a water-based moisturizer underneath the oil, or using a heavier cream after the oil to lock in even more hydration.
Q2: Is this Clove & Aloe Facial Oil suitable for all skin types?
A: This moisturizing facial oil is generally suitable for most skin types, particularly normal, dry, and combination skin. For oily or acne-prone skin, choosing jojoba oil as your carrier is highly recommended as it’s non-comedogenic and mimics skin’s natural sebum. Always do a patch test first!
Q3: Will this oil make my skin oily or clog my pores?
A: When formulated with non-comedogenic carrier oils like jojoba and applied in small amounts (2-3 drops), facial oils should absorb beautifully without feeling greasy or clogging pores. The key is using the right amount and selecting suitable carrier oils for your skin type.
Q4: How often should I use this clove face oil?
A: We recommend using it once daily, ideally in the evening, to allow the oil to work with your skin’s natural repair process. If your skin is very dry, you might also use a single drop in the morning.
Q5: Can I use this oil around my eyes?
A: The skin around the eyes is delicate. While the ingredients are generally gentle, always perform a separate patch test near the eye area first, and if used, apply very sparingly and carefully, avoiding direct contact with the eyes.
Q6: Does this oil help with wrinkles?
A: While this DIY anti aging oil provides deep moisturization and antioxidant benefits, which can improve the overall appearance and suppleness of the skin, helping it look smoother and more radiant, it does not “remove wrinkles instantly” or “work like Botox.” Consistent moisturizing helps to soften the look of fine lines often associated with dryness.
Q7: Can I use fresh aloe vera gel instead of aloe vera oil extract?
A: No, we strongly advise against using fresh aloe vera gel in this oil recipe. Aloe vera gel is water-based and will not properly mix with oil, leading to separation and potential bacterial growth, which can cause spoilage and skin irritation. Always use an oil extract of aloe vera for oil-based recipes.
Q8: What if I don’t have vitamin E oil?
A: While the oil will still be beneficial for your skin, vitamin E acts as an important antioxidant for both your skin and the oil itself, helping to extend its shelf life. If you omit it, be extra vigilant about storage and use the oil more quickly.
Q9: Can I add other essential oils to this botanical beauty recipe?
A: While you can, exercise caution. Many essential oils are potent and can cause skin sensitivity. If you choose to add them, research their skin benefits and dilution ratios carefully. Start with a very low concentration (e.g., 1-2 drops per ounce of oil) and always perform a patch test. For this recipe, the clove already provides a natural aroma.
Q10: Why dark glass bottles for storage?
A: Dark glass (amber or cobalt blue) helps protect the delicate oils from light exposure, especially UV rays, which can cause oils to oxidize and go rancid faster. This preserves the potency and freshness of your homemade skincare recipe.
Q11: Can men use this facial oil too?
A: Absolutely! Skincare is for everyone. This moisturizing facial oil offers benefits for all skin types and can be a great addition to any grooming routine for smooth, healthy-looking skin.
Q12: Is this suitable for sensitive skin?
A: While the ingredients are natural, individual sensitivities vary. Clove can be potent, so ensure proper dilution through infusion. Always, always, always perform a thorough patch test before applying to your entire face if you have sensitive skin.
Common DIY Mistakes to Avoid When Making Facial Oils
Making your own DIY botanical face oil is rewarding, but a few common pitfalls can hinder your success or even make your oil less effective. Here’s what to watch out for:
- Poor Hygiene: This is perhaps the most critical mistake. Any bacteria introduced during the making process can contaminate your oil and cause it to spoil quickly or, worse, lead to skin issues. Always sterilize your jars, bottles, and equipment thoroughly before you begin.
- Using Fresh, Water-Based Botanicals: For oil infusions, always use dried botanicals. Fresh plants contain water, which can introduce bacteria and mold, leading to spoilage and a drastically reduced shelf life for your oil. This is why we specify aloe vera oil extract, not fresh aloe gel.
- Overheating During Warm Infusion: If you opt for the warm infusion method, applying too much heat can degrade the delicate compounds in your oils and botanicals, stripping them of their beneficial properties. Always use a gentle double boiler method and keep the heat low.
- Skipping the Patch Test: We can’t stress this enough! Even natural ingredients can cause reactions. A patch test is a simple, non-negotiable step to ensure your skin agrees with your homemade skincare recipe.
- Incorrect Storage: Exposing your finished oil to light, heat, or air can cause it to go rancid prematurely, making it ineffective and potentially irritating. Stick to dark glass bottles and cool, dark storage.
- Unrealistic Expectations: While botanical oils are wonderful for moisturizing and promoting healthy-looking skin, they are not magic potions. They won’t work like medical treatments, remove deep wrinkles overnight, or drastically change your skin’s underlying structure. Focus on the benefits of hydration, nourishment, and a healthy glow.
- Using Rancid Oil: If your oil smells “off” or changes color/texture, it’s gone bad. Continuing to use rancid oil can lead to skin irritation and is counterproductive to your skincare goals. When in doubt, toss it out.
By being mindful of these common mistakes, you’ll ensure your clove face oil creation is safe, effective, and a true joy to use!
Final Thoughts: Embrace Your Natural Radiance
And there you have it, beauty bestie! You’ve just unlocked the secrets to crafting your very own Clove & Aloe Botanical Facial Oil – a truly special DIY botanical face oil designed to bring out your skin’s natural radiance and leave it feeling beautifully smooth and healthy-looking. This isn’t just about making a product; it’s about connecting with nature, understanding what truly nourishes your skin, and embracing a mindful approach to self-care.
Remember, the journey to healthy, glowing skin is about consistency, gentle care, and listening to what your skin needs. This moisturizing facial oil, rich in the goodness of cloves, aloe vera oil extract, and vitamin E, is a testament to how simple, natural ingredients can make a significant difference in how your skin looks and feels. It supports your skin’s barrier, locks in moisture, and contributes to a smoother, more vibrant complexion.
So go ahead, indulge in this little act of self-love. With just a few drops each day, you’ll be giving your skin a nurturing boost, helping it to feel firmer and look more radiant, the natural way. We can’t wait to hear how this homemade skincare recipe transforms your routine and helps you shine even brighter!
Happy blending, and here’s to your beautiful, healthy-looking skin!
Medical Disclaimer
The information provided in this article about the DIY Clove & Aloe Botanical Facial Oil is for general informational purposes only and is not intended as medical advice. While natural ingredients can be beneficial for the skin, individual results may vary, and reactions can occur. Always perform a patch test before applying any new product to your face. If you have a pre-existing skin condition, allergies, or concerns about using specific ingredients, please consult with a qualified dermatologist or healthcare professional before trying this or any other DIY skincare recipe. Beauty Tips Daily is not responsible for any adverse reactions or consequences resulting from the use of the recipes or information presented herein. Discontinue use if irritation occurs.