Hey there, beauty besties! Are you ready to dive into the wonderful world of natural skincare right from your very own kitchen? We’re all looking for those secret ingredients that can help our skin feel amazing without breaking the bank or overwhelming us with complicated routines. Today, we’re spilling the beans (pun intended!) on a truly special DIY treat: an antioxidant-rich homemade coffee face cream!
Imagine harnessing the power of your morning brew for more than just waking up. Coffee, with its naturally occurring compounds, isn’t just for your mug – it’s a fantastic ingredient for an at-home moisturizing cream. This isn’t about magical quick fixes or erasing years overnight, but about embracing simple, natural ingredients that can help your skin feel softer, look healthier, and maintain that lovely glow we all adore. We’ll show you how to create your very own DIY coffee skincare masterpiece that combines coffee’s natural antioxidants and caffeine with deeply moisturizing ingredients like Vitamin E and Aloe Vera. Get ready to pamper your skin and discover a simple way to improve the appearance of dryness and support healthy-looking skin.
So, grab a comfy spot, because we’re about to walk you through everything you need to know to whip up this incredible coffee beauty recipe. From understanding why coffee is so special for your skin to step-by-step instructions, storage tips, and even how to avoid common DIY mistakes – we’ve got you covered!
Why Coffee Is Popular in DIY Skincare
It’s no secret that coffee has taken the world by storm, not just as a beloved beverage but also as a fascinating ingredient in the beauty industry. Walk into any high-end spa or browse a natural beauty aisle, and you’ll likely spot products boasting coffee as a key component. But why is this humble bean gaining so much traction in skincare, especially in the DIY world?
The allure of coffee in DIY skincare stems from its accessibility and the array of naturally occurring compounds it contains. People are increasingly seeking natural, affordable alternatives to conventional products, and coffee fits this bill perfectly. It’s an everyday staple that many already have in their pantry, making it an easy and cost-effective choice for homemade skincare. Beyond its common availability, coffee brings a unique set of properties to the table that can benefit the skin.
One of the primary reasons for its popularity is its energizing effect, not just when ingested, but also when applied topically. The caffeine in coffee is often celebrated for its ability to temporarily reduce the appearance of puffiness, making it a favorite for under-eye treatments and facial masks. Additionally, the fine texture of ground coffee has made it a popular choice for gentle exfoliation (though in our cream, we’ll be using its infused goodness rather than relying on its abrasive nature).
Furthermore, coffee is packed with antioxidants, which are vital for protecting the skin from environmental stressors that we encounter daily. These antioxidants help maintain the skin’s healthy appearance and contribute to an overall vibrant complexion. When combined with other nourishing ingredients in a moisturizing cream, coffee helps to create a natural face cream that supports skin vitality and a smoother feel.
The idea of turning a kitchen ingredient into a potent beauty potion is incredibly empowering. It allows us to take control of what we put on our skin, understanding each ingredient and its role. This homemade moisturizing cream celebrates the simplicity and efficacy of natural ingredients, offering a gentle yet effective way to nurture your skin without the harsh chemicals or hefty price tags often associated with commercial products. It’s a true beauty hack that champions healthy, glowing skin from within your home.

Antioxidants Found in Coffee
When we talk about the benefits of coffee for your skin, the star players are undoubtedly its antioxidants. What exactly are antioxidants, and why are they so crucial for our skin? In simple terms, antioxidants are compounds that help protect our body’s cells, including skin cells, from damage caused by unstable molecules called free radicals. These free radicals can be generated by environmental factors like pollution, UV radiation, and even daily stress, and they can contribute to the appearance of dullness or signs of aging.
Coffee is a rich source of various types of antioxidants, making it a valuable addition to your skincare routine. Two of the most significant groups of antioxidants found in coffee are:
- Polyphenols: This is a broad category of plant compounds known for their antioxidant properties. Coffee contains a high concentration of polyphenols, which play a vital role in helping to protect the skin from environmental stressors. These compounds contribute to maintaining the skin’s healthy appearance and can support its natural defenses against daily exposure to elements that might otherwise contribute to visible skin concerns.
- Hydrocinnamic Acids: Specifically, coffee is rich in caffeic acid and chlorogenic acid. These are potent antioxidants that work to neutralize free radicals, helping to prevent the visible impacts of environmental damage on the skin. By aiding in this protective process, hydrocinnamic acids contribute to the overall resilience and healthy look of your skin.
By incorporating coffee into your DIY coffee skincare, you’re essentially providing your skin with a natural shield. While it won’t magically erase pigmentation or remove wrinkles permanently, the consistent use of antioxidant-rich ingredients can certainly contribute to a more vibrant and healthier-looking complexion. These antioxidants help the skin to look more radiant and resilient, making it a wonderful component in your natural face cream. They support the skin’s ability to bounce back from daily environmental challenges, keeping it feeling soft and looking fresh.
It’s important to set realistic expectations. This DIY coffee face cream leverages coffee’s natural properties to support skin health, not to replicate the results of clinical treatments. Instead, it offers a gentle, natural way to nurture your skin, helping it to feel nourished and appear revitalized.
Benefits of Vitamin E
Vitamin E is a powerhouse ingredient in skincare, often found in a myriad of products, and for very good reason! When we talk about creating an antioxidant skincare hero like our DIY coffee face cream, including Vitamin E oil is a non-negotiable step. It brings a host of benefits that perfectly complement coffee’s goodness.
At its core, Vitamin E is a potent antioxidant. Just like the antioxidants in coffee, Vitamin E helps to protect your skin cells from damage caused by free radicals. This protective action is crucial for maintaining the skin’s overall health and appearance. By guarding against environmental stressors, Vitamin E assists in keeping your skin looking vibrant and feeling resilient.
Beyond its antioxidant prowess, Vitamin E is renowned for its exceptional moisturizing and skin barrier-supporting properties. Here’s why it’s a must-have in our homemade moisturizing cream:
- Deeply Moisturizing: Vitamin E is an oil-soluble nutrient, meaning it can penetrate the skin’s lipid layers, providing deep hydration. It helps to seal moisture into the skin, preventing water loss and effectively improving the appearance of dryness. This results in skin that feels remarkably softer and smoother to the touch.
- Supports Skin Barrier Function: A healthy skin barrier is your first line of defense against irritants and moisture loss. Vitamin E helps to strengthen and support this barrier, making your skin more resilient and less prone to sensitivity or dryness. When your skin barrier is happy, your skin looks and feels healthier.
- Soothing Properties: Vitamin E also has soothing qualities that can help calm the skin. This makes it a great addition for anyone looking to reduce the appearance of redness or irritation, contributing to a more even-toned complexion.
When combined with the naturally occurring antioxidants from coffee and the hydrating power of our chosen base, Vitamin E elevates our DIY facial moisturizer to a whole new level. It ensures that your homemade coffee face cream not only feels luxurious but also actively works to keep your skin plump, hydrated, and protected. Just remember to use a high-quality, pure Vitamin E oil for the best results in your coffee beauty recipe.
Benefits of Aloe Vera
No natural skincare recipe would be complete without a nod to the amazing benefits of Aloe Vera! This succulent plant has been revered for centuries for its incredible healing and soothing properties, making it a star ingredient in our DIY coffee face cream. Its gel-like consistency and rich nutrient profile offer a burst of hydration and comfort to your skin.
Here’s why pure Aloe Vera gel is an absolute game-changer for our homemade moisturizing cream:
- Intense Hydration: Aloe Vera is primarily water, making it an exceptional hydrating agent. It delivers a refreshing surge of moisture to the skin without feeling heavy or greasy, which is perfect for all skin types, even those prone to oiliness. This deep hydration helps to plump up the skin, making it feel supple and reducing the appearance of fine lines caused by dehydration.
- Soothing and Calming: One of Aloe Vera’s most famous attributes is its ability to soothe irritated or sun-kissed skin. It contains compounds like polysaccharides that help to calm the skin, reducing the appearance of redness and discomfort. For skin that feels a little stressed or sensitive, Aloe Vera provides a gentle, cooling embrace.
- Lightweight Feel: Unlike some heavier oils or butters, Aloe Vera gel is incredibly light and absorbs quickly into the skin. This ensures that our coffee face cream feels comfortable and non-comedogenic for most skin types, leaving your skin feeling fresh and not weighed down.
By incorporating Aloe Vera into our coffee beauty recipe, we’re adding a layer of refreshing hydration and gentle care. It works synergistically with the coffee’s antioxidants and Vitamin E’s nourishing qualities to create a balanced, effective, and truly luxurious DIY facial moisturizer. When choosing your Aloe Vera, opt for a pure, organic gel with minimal additives to ensure you’re getting the most potent benefits for your homemade skincare creation.
Choosing a Moisturizing Base
The foundation of any good cream is its base, and for our DIY coffee face cream, selecting the right moisturizing base is key to achieving that perfect texture and delivering maximum skin-loving benefits. The base acts as the carrier for all our wonderful ingredients, ensuring they penetrate the skin effectively while providing deep hydration itself. When crafting your homemade moisturizing cream, you have a few excellent options, each with its unique characteristics.
Here are some popular choices and considerations:
- Shea Butter: This is a fantastic choice for a rich, deeply nourishing cream. Shea butter is extracted from the nuts of the African shea tree and is packed with vitamins A, E, and F, as well as fatty acids. It’s incredibly emollient, meaning it helps to soften and smooth the skin, and is known for its ability to melt at body temperature, making it easy to spread. It’s particularly great for dry, dehydrated, or mature skin, providing an intense moisture boost and helping to improve the appearance of skin elasticity.
- Cocoa Butter: Similar to shea butter, cocoa butter is a rich, natural fat extracted from cocoa beans. It has a beautiful chocolatey aroma and is a wonderful emollient. Cocoa butter forms a protective barrier on the skin, helping to lock in moisture and protect against environmental stressors. It’s also very firm at room temperature, contributing to a thicker, more stable cream. Ideal for very dry skin.
- Coconut Oil: While highly moisturizing, coconut oil can be a bit controversial for facial use, especially for those prone to breakouts, as it can be moderately comedogenic (meaning it might clog pores for some). However, for individuals with very dry skin or those who don’t experience breakouts from it, its rich fatty acid profile makes it a powerful hydrator. If you choose coconut oil, opt for virgin, unrefined varieties.
- Almond Oil: A lighter yet highly nourishing option, sweet almond oil is rich in Vitamin E, monounsaturated fatty acids, and other vitamins. It’s excellent for all skin types, including sensitive skin, as it’s less likely to clog pores than heavier oils. Almond oil is easily absorbed, leaving skin feeling soft and smooth without a greasy residue. It’s perfect for a DIY facial moisturizer that aims for a balanced, comfortable feel.
- Jojoba Oil: Technically a liquid wax, jojoba oil closely mimics the skin’s natural sebum, making it an exceptional choice for all skin types, including oily and acne-prone skin. It’s non-comedogenic and helps to balance oil production while providing substantial moisture. Jojoba oil is stable and doesn’t easily oxidize, extending the shelf life of your homemade skincare.
- Beeswax (optional, for thicker consistency): If you desire a thicker, more stable cream, adding a small amount of beeswax can help. Beeswax acts as an emulsifier and thickener, creating a protective barrier on the skin without clogging pores. It also helps to bind water and oil components together, giving your cream a more professional consistency.
For our coffee beauty recipe, a blend of a nourishing butter (like shea) and a lighter oil (like almond or jojoba) often yields the best results, providing deep moisture without feeling too heavy. Consider your skin type: if you have oily skin, lean towards jojoba or almond oil; for dry skin, shea or cocoa butter will be your best friend. This careful selection ensures your homemade coffee face cream is perfectly tailored to your skin’s needs.
Ingredients
Alright, beauty besties, let’s gather our magical ingredients for this incredible DIY coffee face cream! Remember, quality matters when it comes to homemade skincare, so choose fresh, high-quality ingredients for the best results.
Here’s what you’ll need for your antioxidant skincare hero:
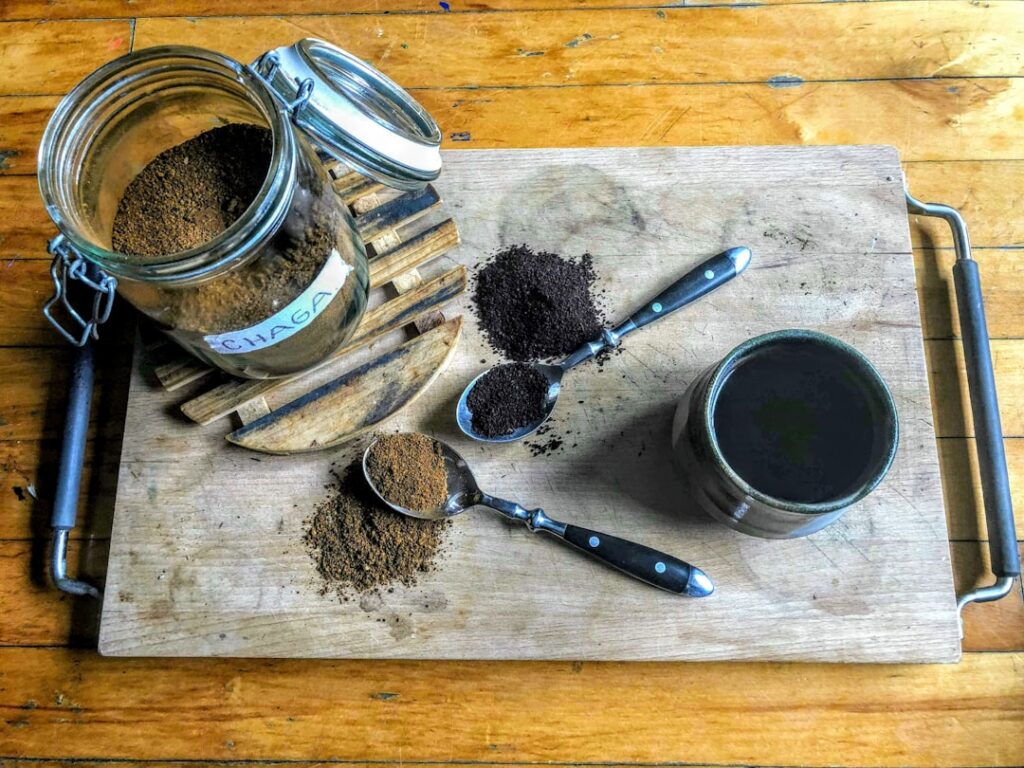
- 2 tablespoons Finely Ground Coffee: Opt for organic, freshly ground coffee (not instant!). The finer the grind, the better the infusion of its beneficial compounds.
- 1/2 cup Carrier Oil: Choose one that suits your skin type. Recommendations:
- Dry Skin: Sweet Almond Oil, Avocado Oil, or Grapeseed Oil.
- Normal/Combination Skin: Jojoba Oil or Apricot Kernel Oil.
- Oily/Acne-prone Skin: Jojoba Oil or Hemp Seed Oil.
- 2 tablespoons Shea Butter (or Cocoa Butter): For its deeply moisturizing properties and creamy texture. If you want a lighter cream, you can reduce this slightly or use less firm butter.
- 1 tablespoon Pure Aloe Vera Gel: Make sure it’s 99% pure or higher, with minimal additives. This adds soothing hydration.
- 1 teaspoon Vitamin E Oil: A powerful antioxidant and skin conditioner. You can use capsules; just pierce them and squeeze out the oil.
- 5-10 drops Essential Oil (Optional, for fragrance and added benefits): *Use with caution and always patch test.* For facial use, always choose skin-safe, non-phototoxic oils. Consider Lavender (calming), Frankincense (rejuvenating appearance), or Geranium (balancing). If you have very sensitive skin, you might prefer to omit essential oils entirely.
Equipment Needed
Before we start concocting our amazing homemade moisturizing cream, let’s make sure we have all the right tools. Cleanliness is paramount in DIY skincare to prevent contamination and ensure your product lasts as long as possible. So, wash and sterilize all your equipment thoroughly before you begin.
Here’s your checklist:
- Heat-Safe Glass Jar or Bowl: For infusing the coffee into the carrier oil. A Mason jar works perfectly.
- Small Saucepan: For creating a double boiler setup.
- Fine Mesh Sieve or Cheesecloth: To strain the coffee grounds from the oil.
- Small Mixing Bowl: To combine all your ingredients.
- Spatula or Whisk: For blending the cream until smooth.
- Measuring Spoons: For accurate measurements of all ingredients.
- Airtight Container: A clean, sterilized dark glass jar or small plastic container with a lid for storing your finished coffee face cream.
- Double Boiler (Optional, if melting beeswax): If you opt to add beeswax for extra thickness, a dedicated double boiler or a heat-safe bowl over a simmering pot of water is essential.
Having all your equipment ready and clean before you start will make the process smooth, enjoyable, and hygienic, setting the stage for a perfect batch of your DIY coffee skincare.
Step-by-Step Recipe
Alright, it’s time for the fun part! Follow these simple steps to create your very own luxurious DIY coffee face cream. Take your time, enjoy the process, and soon you’ll have a wonderfully nourishing homemade moisturizing cream ready for your skin!
Part 1: Infusing the Coffee Oil
- Prepare Your Infusion Setup: In your heat-safe glass jar, combine the 2 tablespoons of finely ground coffee with 1/2 cup of your chosen carrier oil (e.g., almond, jojoba). Stir well to ensure the coffee grounds are fully submerged in the oil.
- Create a Double Boiler: Place the glass jar containing the coffee and oil into a small saucepan. Add about 1-2 inches of water to the saucepan, ensuring the water level is below the rim of your glass jar.
- Gently Heat and Infuse: Heat the saucepan over low heat. The goal is to warm the oil gently, not to boil it. Let the oil infuse for 1-2 hours. Stir occasionally. This slow, gentle heating allows the beneficial compounds from the coffee (like antioxidants and caffeine) to infuse into the oil without burning or degrading them.
- Cool and Strain: Once infused, remove the jar from the heat and let it cool completely. Once cool, use your fine mesh sieve or cheesecloth to strain the coffee grounds from the oil. Squeeze out as much oil as possible. You should be left with a beautiful, coffee-infused oil. Discard the spent grounds.
Part 2: Making the Cream
- Melt the Shea Butter: In a clean, heat-safe bowl, gently melt the 2 tablespoons of shea butter (and any optional beeswax, if using) using the same double boiler method. Heat just until melted, don’t overheat.
- Combine Oils: Once the shea butter is melted, remove it from the heat and add your cooled coffee-infused oil to the bowl. Stir well to combine.
- Cool Slightly: Allow the oil and butter mixture to cool slightly – it should still be liquid but not hot. This is important before adding the water-based ingredients.
- Add Aloe Vera and Vitamin E: Once the mixture has cooled a bit, add the 1 tablespoon of pure Aloe Vera gel and 1 teaspoon of Vitamin E oil. If using essential oils, add 5-10 drops now.
- Whisk to Perfection: Using your whisk or spatula, begin to vigorously whisk the mixture. Initially, it might look separated, but keep whisking! As it cools and incorporates air, it will start to thicken and become creamy. You can even place the bowl over an ice bath (making sure no water gets in) to speed up the thickening process, whisking continuously.
- Achieve Creamy Texture: Continue whisking until you achieve a light, fluffy, and uniform cream consistency. This might take 5-10 minutes of continuous whisking.
And voilà! You’ve just created your very own antioxidant skincare superstar! Transfer your freshly made DIY facial moisturizer into your clean, airtight container. Give yourself a pat on the back, beauty bestie!
Proper Mixing Technique
Achieving that perfectly smooth, creamy consistency for your homemade coffee face cream is an art, but it’s an art that anyone can master with the right technique! The goal is to emulsify the oil and water-based ingredients as much as possible, preventing separation and creating a luxurious texture that glides onto your skin. This is a crucial step in ensuring your homemade moisturizing cream feels professional and effective.
Here’s how to nail the proper mixing technique:
- Temperature Control is Key: After melting your shea butter and adding the infused coffee oil, let the mixture cool down significantly but remain liquid. If it’s too hot when you add the Aloe Vera gel, the mixture won’t emulsify properly. If it’s too cold, the butter will solidify too quickly, leading to a lumpy cream. Aim for a slightly warm or room temperature liquid state.
- Gradual Addition of Water-Based Ingredients: While not a traditional emulsion that requires a constant stream, adding the Aloe Vera gel (and Vitamin E oil, which often comes with a small carrier) to a slightly cooled oil/butter mixture helps.
- Vigorous Whisking: This is where the magic happens! Once all your ingredients are in the bowl, start whisking vigorously. Don’t be shy! You’ll need to incorporate air into the mixture to lighten it and help the ingredients bind together.
- Continuous Motion: Keep whisking continuously. You’ll notice a transformation – from a liquid or oily consistency to a thicker, opaque cream. The longer you whisk, the fluffier and smoother your DIY facial moisturizer will become.
- The Ice Bath Trick: If your mixture isn’t thickening up or if your kitchen is warm, place your mixing bowl over a larger bowl filled with ice water (ensure no water splashes into your cream). Continue whisking over the ice bath. The cold will help the butters solidify and emulsify more quickly, resulting in a beautifully whipped texture.
- Scrape Down the Sides: Regularly use a spatula to scrape down the sides of your bowl. This ensures that all ingredients are thoroughly combined and no unmixed bits are left behind.
- Look for Uniformity: You’re aiming for a uniform, light, and airy consistency, similar to whipped cream or frosting. There should be no visible separation of oil and water, and no lumps of butter.
By mastering this mixing technique, you’ll ensure that every application of your coffee beauty recipe is a delightful experience, delivering consistent nourishment and hydration. This attention to detail elevates your homemade skincare from good to truly exceptional!
How to Apply
Now that you’ve lovingly crafted your DIY coffee face cream, it’s time to learn how to apply it for maximum benefits. Using your homemade moisturizing cream correctly ensures that your skin absorbs all the goodness and you get that beautiful, healthy-looking glow. Think of this as a mini self-care ritual!
- Cleanse Your Skin: Always start with a freshly cleansed face. Use your favorite gentle facial cleanser to remove any makeup, dirt, or impurities. Pat your skin dry with a clean towel.
- Tone (Optional): If you use a toner, apply it after cleansing and before your cream. Allow it to fully absorb.
- Take a Small Amount: Your DIY facial moisturizer is rich, so a little goes a long way! Scoop out a pea-sized amount (or slightly more if your skin is very dry) onto your fingertips.
- Warm it Up: Gently rub the cream between your fingertips for a few seconds. This helps to slightly warm the cream, making it easier to spread and absorb into your skin.
- Dot and Distribute: Dot the cream onto different areas of your face – forehead, cheeks, nose, and chin. Don’t forget your neck and décolletage, as these areas often show signs of dryness too!
- Gentle Massage: Using upward and outward strokes, gently massage the cream into your skin. Focus on areas that tend to be drier or where you want to promote circulation. Avoid pulling or tugging at your skin.
- Pat it In: Once the cream is mostly absorbed, gently pat your face with your fingertips. This helps to press the product into your skin and stimulate blood flow, enhancing that natural glow.
- Allow to Absorb: Give your skin a few minutes to fully absorb the coffee face cream before applying makeup or going to bed.
Remember, consistency is key! Incorporating this coffee beauty recipe into your daily routine will help your skin feel softer, look more hydrated, and maintain its radiant appearance. Enjoy this beautiful moment of self-care with your amazing antioxidant skincare creation!
Morning vs Evening Use
One of the beauties of your homemade coffee face cream is its versatility! You can easily incorporate this nourishing DIY facial moisturizer into both your morning and evening skincare routines, depending on your skin’s needs and your personal preference. Let’s explore the best times to use your antioxidant skincare hero.
Morning Use: Wake Up and Glow!
Using your coffee face cream in the morning can be a fantastic way to start your day, especially if your skin tends to be on the drier side or needs an extra boost of hydration to face the day’s environmental elements.
- Hydration and Protection: Applying the cream after cleansing will provide a lovely layer of moisture, helping your skin feel soft and supple. The antioxidants from the coffee and Vitamin E can also offer a bit of support against daily environmental stressors.
- Refreshing Look: The subtle coffee aroma (if you enjoy it!) can be a refreshing wake-up call for your senses, and the cream itself will leave your skin looking hydrated and fresh, creating a smooth canvas for any makeup you might apply.
- Consider SPF: If you use this cream in the morning, remember that it does not contain SPF. Always follow up with a broad-spectrum sunscreen as the last step in your morning routine to protect your skin from harmful UV rays, especially after applying any antioxidant skincare product.
Evening Use: Overnight Nourishment
Many find that evening is the ideal time to apply a richer, more nourishing cream like our coffee face cream, allowing it to work its magic overnight while your skin is in repair mode.
- Deep Repair and Hydration: As you sleep, your skin goes into regeneration mode. Applying this homemade moisturizing cream in the evening allows the rich emollients from the shea butter, carrier oils, and the hydrating properties of Aloe Vera to deeply nourish and soften your skin without interruption.
- Antioxidant Boost: The antioxidants from coffee and Vitamin E can quietly work to support your skin’s resilience against environmental factors throughout the night.
- Wake Up Rejuvenated: You’ll wake up to skin that feels incredibly soft, plump, and deeply moisturized, ready to face a new day with a natural, healthy glow.
Ultimately, whether you use your DIY coffee skincare in the morning or evening (or both!) depends on how your skin feels and what works best for your routine. For drier skin, twice a day might be perfect. For normal or combination skin, an evening application might be sufficient. Experiment and listen to your skin!
Storage Instructions
Proper storage is absolutely essential for homemade skincare products, especially your DIY coffee face cream. Unlike commercial products that often contain strong preservatives, your homemade moisturizing cream relies on natural ingredients, which means it needs a little extra care to maintain its freshness and efficacy. Following these storage instructions will help extend the shelf life of your coffee beauty recipe and keep it safe for use.
- Use an Airtight Container: Always store your cream in a clean, sterilized, airtight container. This prevents air and moisture from entering, which can introduce bacteria and speed up spoilage. Dark glass jars are ideal as they also protect the ingredients from light degradation.
- Keep it Cool: Heat and humidity are enemies of natural skincare. Store your coffee face cream in a cool, dry place, away from direct sunlight, radiators, or steamy bathrooms. A cool cupboard or drawer is usually fine.
- Refrigeration is Best: For optimal freshness and to significantly extend its shelf life, we highly recommend storing your DIY facial moisturizer in the refrigerator. The cool temperature helps to keep the oils and butters stable and inhibits bacterial growth, preserving the antioxidants and other beneficial compounds.
- Avoid Contamination: Always use clean, dry hands or a clean spatula to scoop out the cream. Dipping dirty fingers into the jar can introduce bacteria and shorten the product’s lifespan.
- Label Your Container: Write the date you made the cream on the container. This will help you keep track of its freshness and know when it’s time to make a new batch.
By following these simple storage tips, you’ll ensure that your antioxidant skincare creation remains a safe, effective, and delightful part of your beauty routine for as long as possible. Treat your homemade skincare with the care it deserves!
Shelf Life
Understanding the shelf life of your DIY coffee face cream is crucial for safe and effective homemade skincare. Because this homemade moisturizing cream is made with natural ingredients and without strong synthetic preservatives, its lifespan will be significantly shorter than that of commercial products. This is a trade-off for using pure, gentle ingredients.
- Refrigerated Shelf Life: When stored properly in an airtight container in the refrigerator, your DIY coffee face cream typically has a shelf life of about 2-3 weeks. The cool temperature helps to slow down oxidation and inhibit microbial growth.
- Room Temperature Shelf Life: If kept at room temperature (in a cool, dark place), its shelf life will be shorter, generally around 1 week. This can vary depending on the temperature and humidity of your environment.
- Signs of Spoilage: It’s important to pay attention to any changes in your cream, which can indicate spoilage. Look out for:
- Changes in Color: A significant alteration from its original color.
- Unusual Odor: A rancid, sour, or ‘off’ smell that wasn’t there initially.
- Changes in Texture: Separation of ingredients, mold growth, or a change from smooth to lumpy/gritty.
- Visible Mold: Any fuzzy spots or discoloration.
- When in Doubt, Throw it Out: If you notice any of these signs, or if you’re simply unsure about its freshness, it’s always best to err on the side of caution and discard the cream. Using spoiled products on your skin can lead to irritation or skin infections.
To avoid waste, consider making smaller batches of your coffee beauty recipe more frequently. This ensures you always have a fresh supply of your antioxidant skincare on hand, ready to deliver its full benefits to your skin. Embrace the fresh nature of your DIY facial moisturizer!
Patch Test Guide
Even though your DIY coffee face cream is made with natural ingredients, it’s incredibly important to always perform a patch test before applying any new homemade skincare product to your entire face. Everyone’s skin is unique, and what works wonderfully for one person might cause a reaction in another. This simple step can save you from potential irritation or allergic reactions, making sure your antioxidant skincare journey is a happy one!
Here’s how to do a proper patch test for your homemade moisturizing cream:
- Choose a Discreet Area: Select a small, inconspicuous area of your skin to test. Common spots include: a small patch behind your ear, on your inner forearm, or on the side of your neck.
- Apply a Small Amount: Dab a very small amount of your DIY facial moisturizer onto the chosen area.
- Leave it On: Leave the product on your skin for at least 24 hours, ideally 48 hours, without washing it off.
- Observe for Reactions: During the testing period, regularly check the area for any signs of irritation. Look for:
- Redness or unusual discoloration
- Itching
- Burning or stinging sensation
- Swelling
- Rash or hives
- If a Reaction Occurs: If you experience any discomfort or visible reaction, immediately wash off the product with gentle soap and water. Discontinue use of the cream. You might be sensitive to one of the ingredients.
- If No Reaction: If, after 24-48 hours, you haven’t experienced any adverse reactions, you can generally consider the product safe to use on your face.
A patch test is a small investment of your time that provides great peace of mind. It ensures that your coffee beauty recipe is a truly beneficial addition to your routine, allowing you to enjoy all the wonderful softening and hydrating benefits without worry. Always prioritize your skin’s health and safety!
Common DIY Skincare Mistakes
Embarking on the journey of homemade skincare is exciting, but like any new adventure, there are a few common pitfalls to avoid. Being aware of these mistakes can help you create the best possible DIY coffee face cream and ensure your antioxidant skincare efforts are both safe and effective. Let’s learn from common missteps to make your experience smooth and successful!
- Skipping the Patch Test: This is arguably the biggest mistake! As we just discussed, not patch testing can lead to uncomfortable skin reactions. Always test new ingredients and formulations on a small area first.
- Poor Hygiene: Using unsterilized tools, containers, or dirty hands can introduce bacteria into your homemade moisturizing cream, leading to spoilage, contamination, and potentially skin infections. Always clean and sterilize everything before you start.
- Exaggerated Expectations: Natural, homemade products are fantastic for nourishing and supporting skin health, helping it feel soft and look vibrant. However, it’s crucial not to expect them to perform like medical treatments or expensive cosmetic procedures (e.g., permanently removing wrinkles, erasing pigmentation, or making you look decades younger). Manage your expectations – focus on healthy, hydrated skin!
- Incorrect Ingredient Ratios: Skincare, even DIY, involves a delicate balance. Too much of one ingredient (like essential oils) or incorrect ratios of oil to butter can alter the texture, efficacy, and safety of your product. Stick to the recipe or research thoroughly before making modifications.
- Ignoring Shelf Life and Spoilage: Homemade products have a shorter shelf life. Using expired or spoiled coffee face cream can do more harm than good. Pay attention to storage instructions, label your products, and discard anything that shows signs of spoilage.
- Using Unsafe Essential Oils: While some essential oils can be beneficial, many are not suitable for direct application to the face, especially in high concentrations. Some are phototoxic (react negatively to sunlight), and others can be highly irritating. If you’re unsure, omit them or consult a certified aromatherapist for facial-safe options. Less is always more with essential oils.
- Not Straining Infused Oils Properly: If you leave too many coffee grounds in your infused oil, your cream might feel gritty or become abrasive. Ensure thorough straining with a fine mesh sieve or cheesecloth for a smooth DIY facial moisturizer.
- Overheating Ingredients: Overheating delicate ingredients like oils and butters can degrade their beneficial properties. Always use low heat and a double boiler method for gentle warming.
By keeping these common DIY skincare mistakes in mind, you’ll be well on your way to creating safe, effective, and truly wonderful batches of your coffee beauty recipe. Happy crafting, beauty bestie!
Frequently Asked Questions
We know you might have a few questions bubbling up about your new DIY coffee face cream! Here are some common queries we often hear about homemade moisturizing cream and antioxidant skincare:
Q1: Can I use instant coffee for this recipe?
A: It’s best to use freshly ground coffee beans (fine grind) rather than instant coffee. Freshly ground coffee contains more of the natural antioxidants and caffeine that we want to infuse into our oil, providing the most benefits for your homemade skincare.
Q2: Is this coffee face cream suitable for all skin types?
A: Generally, yes! This recipe is adaptable. For oily skin, choose lighter carrier oils like jojoba or hemp seed oil. For very dry skin, avocado oil or a richer blend with shea butter is excellent. Always perform a patch test first to ensure compatibility with your unique skin.
Q3: Will the coffee stain my skin?
A: No, if you follow the recipe and properly strain the coffee grounds from the infused oil, your DIY facial moisturizer will not stain your skin. The beneficial compounds are infused into the oil, and the grounds are removed.
Q4: Can I add other ingredients to this coffee beauty recipe?
A: While you can experiment, it’s always best to introduce new ingredients cautiously and research their safety and compatibility for facial use. Stick to the proven recipe first, then try minor, well-researched additions. Always patch test any modified formula.
Q5: How often should I use this homemade moisturizing cream?
A: You can use your coffee face cream daily, once or twice a day, depending on your skin’s needs. Many prefer it as an evening cream for overnight nourishment, or in the morning for extra hydration.
Q6: Does it have a strong coffee smell?
A: The scent will be a subtle, pleasant coffee aroma from the infused oil. It’s generally not overpowering. If you prefer, you can add a few drops of skin-safe essential oils like lavender for a different fragrance.
Q7: Can I use this around my eyes?
A: Yes, with care! The skin around the eyes is delicate. Apply a tiny amount gently with your ring finger, patting it in. Avoid direct contact with your eyes. The caffeine may temporarily help with the appearance of puffiness.
Q8: What if I have very sensitive skin?
A: If you have sensitive skin, a patch test is even more crucial. Opt for very gentle, hypoallergenic carrier oils like jojoba or sweet almond oil, and definitely omit any essential oils. Listen to your skin’s reactions.
Q9: How long does it take to see results?
A: You’ll likely notice immediate improvements in skin softness and hydration. Visible improvements in overall skin health and appearance (like reduced dryness or a more radiant look) typically take a few weeks of consistent use, as your skin cycles through regeneration.
Q10: Where can I find good quality ingredients for my DIY skincare?
A: Look for organic, unrefined ingredients at health food stores, reputable online suppliers specializing in DIY beauty ingredients, or even some larger grocery stores in their natural foods section. Always check reviews and ingredient purity.
Q11: Is this a replacement for my regular moisturizer?
A: Yes, for many people, this DIY coffee face cream can absolutely serve as your daily moisturizer, especially if you’re seeking a natural, antioxidant-rich option. If you have specific skin conditions, always consult with a dermatologist.
Q12: Does this cream exfoliate my skin?
A: No, this DIY facial moisturizer is designed to hydrate and nourish, not exfoliate. While coffee grounds are sometimes used in scrubs, in this cream, the grounds are strained out. The benefits come from the infused oil, not physical exfoliation.
Final Thoughts
There you have it, beauty besties! You’ve just unlocked the secret to creating your very own DIY coffee face cream – an antioxidant-rich moisturizer that’s designed to bring out your skin’s natural glow and softness. Isn’t it empowering to know that you can whip up such a beneficial and luxurious product right in your own kitchen?
This homemade moisturizing cream isn’t about chasing unrealistic beauty standards, but about embracing simple, natural ingredients that support your skin’s health. By harnessing the power of coffee’s natural antioxidants, paired with the hydrating magic of Vitamin E and Aloe Vera, you’re giving your skin a tender, loving boost. It’s a journey towards softer, healthier-looking skin, helping to improve the appearance of dryness and protect against everyday environmental stressors.
Remember, consistency is your best friend when it comes to skincare. Incorporate this coffee beauty recipe into your daily routine, listen to your skin, and enjoy the process of self-care. It’s more than just a cream; it’s a mindful moment, a connection to nature, and a celebration of simple, effective beauty.
We encourage you to try this amazing DIY facial moisturizer and experience the difference for yourself. Share your experiences, your tips, and your glowing results with us – we can’t wait to hear how this antioxidant skincare hero transforms your routine!
Stay radiant, stay natural, and keep nurturing that beautiful skin of yours!
Medical Disclaimer
The information provided in this article is for general informational purposes only and is not intended as medical advice. Always consult with a qualified healthcare professional or dermatologist before starting any new skincare regimen, especially if you have sensitive skin, allergies, or existing skin conditions. Individual results with DIY skincare products may vary. We do not claim that coffee will remove wrinkles permanently, boost collagen production, erase pigmentation, make users look decades younger, or replace professional skincare treatments. The properties described are based on general knowledge of ingredients and are not a substitute for professional medical guidance.