Welcome, fellow garden enthusiasts! Have you ever looked at your plants and wondered if they needed a little trim? Pruning might seem intimidating at first, but it’s one of the most vital practices for cultivating a beautiful, healthy, and thriving garden. Think of it as giving your plants a fresh start, encouraging new growth, and helping them reach their full potential!
At Garden – L. Quyên, we believe that gardening should be enjoyable and rewarding, not daunting. That’s why we’ve put together this comprehensive guide to help you master the art of pruning. Get ready to transform your green space and see your plants flourish like never before!
Why Pruning is Essential for Your Plants’ Health
Pruning isn’t just about making your plants look neat; it’s a fundamental aspect of plant care that offers numerous benefits:
- Promotes Vigorous Growth: Removing old or weak branches encourages the plant to put energy into producing new, stronger growth.
- Enhances Flowering and Fruiting: Strategic pruning can stimulate more blooms and a better harvest by directing energy to flower and fruit production.
- Improves Plant Structure: Shaping your plants through pruning helps them develop a strong framework, making them more resilient to wind and heavy loads.
- Increases Air Circulation: Removing dense inner branches improves airflow, which is crucial for preventing fungal diseases and pest infestations.
- Maintains Desired Size and Shape: Keep your plants from overgrowing their space and maintain an attractive appearance in your garden or home.
- Removes Dead, Damaged, or Diseased Parts: This is perhaps the most critical reason. Cutting away unhealthy parts prevents the spread of disease and pests, ensuring the plant’s overall well-being.
When is the Best Time to Prune?
Timing is everything when it comes to pruning. While specific needs vary by plant, here are some general guidelines:
- Late Winter/Early Spring (Dormant Pruning): This is the ideal time for many deciduous trees and shrubs before new growth begins. The plant is dormant, making cuts less stressful, and you can clearly see the plant’s structure.
- After Flowering: For plants that bloom on old wood (e.g., lilacs, forsythia), prune them immediately after they finish flowering. Pruning too early will remove flower buds.
- Anytime (Deadheading and Removing Unhealthy Parts): You can remove dead, diseased, or damaged branches as soon as you spot them, regardless of the season. This is crucial for preventing disease spread.
- Summer Pruning: Light pruning can be done in summer to control size, shape, or to remove water sprouts and suckers. Avoid heavy pruning, which can stress the plant during active growth.
Essential Pruning Tools and How to Use Them Safely
Having the right tools makes all the difference! Always ensure your tools are clean and sharp to make clean cuts and prevent the spread of disease.
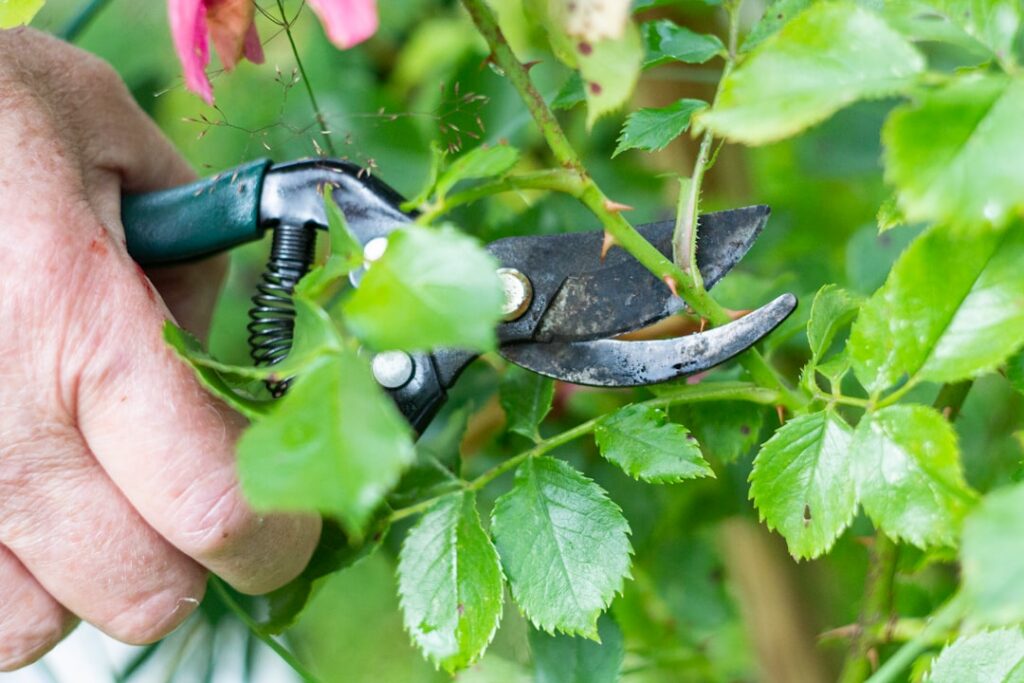
- Hand Pruners (Bypass Pruners): Perfect for small branches (up to 3/4 inch thick). They make clean, scissor-like cuts, ideal for green wood.
- Loppers: Designed for thicker branches (up to 1.5-2 inches). Their long handles provide leverage for harder-to-reach or thicker stems.
- Pruning Saws: For branches larger than 1.5-2 inches. These saws cut on both the push and pull strokes, making quick work of larger limbs.
- Hedge Shears: Best for shaping hedges, not for individual branch removal.
Safety Tip: Always wear gardening gloves and safety glasses to protect your hands and eyes from thorns, sap, and flying debris.
Understanding the Types of Pruning Cuts
Knowing where to cut is just as important as when to cut.
1. The “Three D’s” – Dead, Damaged, Diseased
This is your starting point for almost any pruning job. Always remove:
- Dead wood: Branches that are brittle, discolored, and show no signs of life.
- Damaged branches: Those that are broken, cracked, or scraped.
- Diseased branches: Look for discolored leaves, cankers, or unusual growths. Make sure to disinfect your tools between cuts when dealing with diseased plants.
2. Thinning Cuts vs. Heading Cuts
- Thinning Cuts: Involve removing an entire branch back to its point of origin or a main stem. These cuts reduce overall density, improve air circulation, and direct growth.
- Heading Cuts: Involve cutting back a branch to a bud, another branch, or a stem. This encourages bushier growth and can stimulate new buds to form near the cut.
3. Proper Cut Placement
- Make cuts just outside the “branch collar” – the slightly swollen area where a branch joins a larger stem or trunk. This collar contains cells that help the wound heal quickly.
- For cuts to a bud, cut at a 45-degree angle about 1/4 inch above an outward-facing bud. This encourages new growth away from the center of the plant.
Common Pruning Mistakes to Avoid
Even experienced gardeners can make mistakes. Here are a few to watch out for:
- Over-pruning: Removing too much of a plant at once can stress it and inhibit growth. A good rule of thumb is to never remove more than 25-30% of a plant’s total mass in a single season.
- Pruning at the Wrong Time: As discussed, pruning at the incorrect time can reduce flowering, fruiting, or even damage the plant.
- Using Dull or Dirty Tools: Dull tools tear and crush plant tissue, making it harder for the plant to heal and leaving it vulnerable to disease. Dirty tools can spread pathogens.
- “Topping” Trees: This involves cutting off the entire top of a tree, often leaving stubs. It’s incredibly detrimental to tree health and structure.
Your Journey to Healthier Plants Begins Now!
Pruning is a skill that develops with practice and observation. Don’t be afraid to start small! Begin by removing the obvious dead or damaged parts, and then gradually move on to shaping and thinning. Each cut you make is an investment in your garden’s future, leading to more beautiful blooms, abundant harvests, and vibrant, healthy plants.
We hope this guide empowers you to confidently pick up your pruners and create the garden of your dreams. Happy pruning, and happy gardening!