Effortless Garden Transformation: Master the No-Dig Method for Stunning Flower Beds
Are you dreaming of replacing a section of your lawn with a vibrant, low-maintenance flower bed, but dread the thought of back-breaking digging? Many gardeners face the challenge of removing stubborn sod, a task that can feel overwhelming and physically demanding. What if there was a simpler way to transform your outdoor space, build healthy soil, and create a beautiful garden without ever lifting a shovel?
Welcome to the world of no-dig gardening, a revolutionary approach that saves your back, enhances soil fertility, and creates ideal conditions for plants to thrive. This method uses layers of organic materials to smother weeds, improve soil structure, and suppress future weed growth naturally. It’s an empowering technique that allows you to establish stunning new garden beds with minimal effort, making gardening more accessible and enjoyable for everyone. Let’s explore how you can turn a patch of grass into a blooming paradise, step by step.
The No-Dig Method: Effortless Lawn to Garden Transformation
At its heart, the no-dig method, often called sheet mulching, is about building up, not digging down. Instead of tilling or removing existing turf, you create new planting areas by layering organic matter directly on top of your lawn. This process mimics natural forest floor decomposition, gradually breaking down the grass and enriching the soil beneath. The result is a weed-suppressing, nutrient-rich foundation that plants adore.
Step-by-Step Guide to a No-Dig Flower Bed
Creating your no-dig garden bed is a straightforward process that anyone can master. Here’s how to do it:
Step 1: Gather Your Materials
- Cardboard: Untreated, unlaminated cardboard boxes are perfect. Remove all tape, labels, and staples. This acts as the weed barrier.
- Organic Mulch/Compost: A thick layer of good quality compost, shredded leaves, wood chips, or a mix of these. This will feed your soil and plants.
- Water: Essential for activating the layers.
- Plants: Your chosen flowers or edibles.
Step 2: Define Your Bed and Lay Cardboard
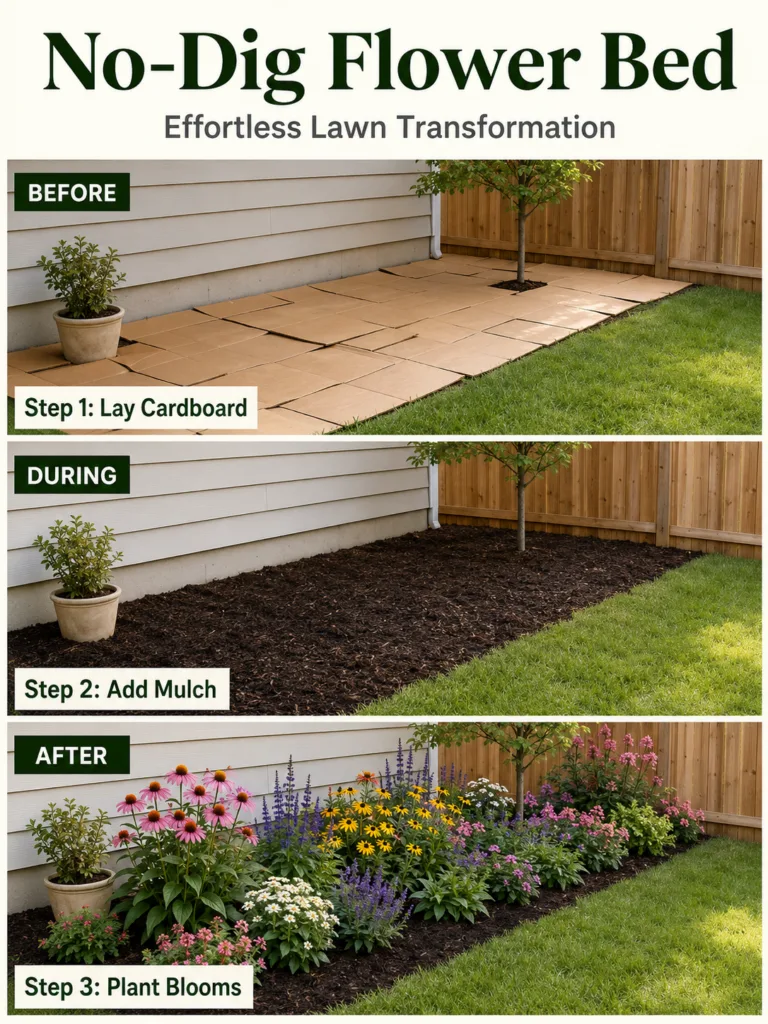
Start by outlining the shape of your new garden bed directly on your lawn. Once you have your desired shape, begin laying down a solid layer of cardboard. Overlap each piece by at least 6-8 inches to prevent grass and weeds from peeking through the gaps. Ensure the cardboard extends slightly beyond your intended bed edges to provide ample weed suppression. Once all the cardboard is laid, thoroughly wet it down. This helps it start decomposing and prevents it from blowing away.
Step 3: Add Your Mulch Layers
Immediately after wetting the cardboard, start adding your organic mulch. Aim for a generous layer, at least 6-12 inches deep. If you’re using a mix, start with a finer layer like compost directly on the cardboard, followed by coarser materials like wood chips. This thick blanket will smother the existing grass, provide nutrients as it breaks down, and retain moisture for your new plants. Water this layer well too, helping it settle and create a more hospitable environment.
Step 4: Plant Your Blooms
You can plant directly into your freshly laid no-dig bed! Simply create a hole by pushing aside the mulch and cutting through the cardboard beneath. Add a scoop of good quality potting mix or compost into the hole, place your plant, and then gently push the mulch back around its base. For seeds, create a small furrow, fill with a thin layer of compost, sow your seeds, and cover lightly with more compost before applying a very thin layer of fine mulch. Water everything thoroughly after planting to help settle the roots.
Choosing the Right Plants for Your No-Dig Bed
While almost any plant can thrive in a no-dig bed once established, selecting resilient, sun-loving perennials will ensure long-lasting beauty and reduce future maintenance. Here are a few examples of gorgeous, easy-care blooms that flourish in sunny conditions, like those often found in new garden beds:
Coneflower (Echinacea purpurea)
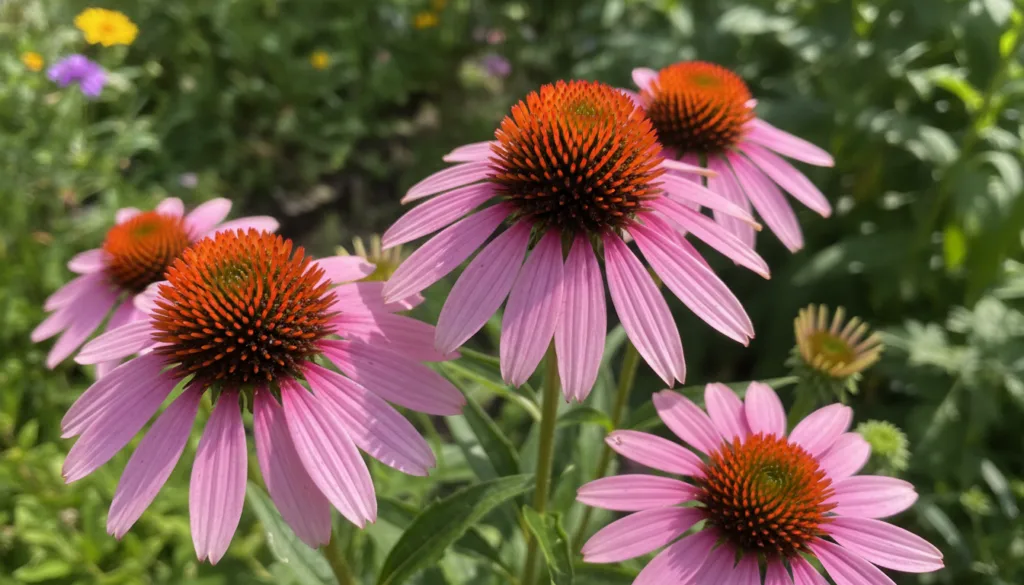
Known for their daisy-like flowers with distinctive domed centers, coneflowers are a garden favorite. They are tough, drought-tolerant, and attract a host of beneficial insects and pollinators, including bees and butterflies.
- Hardiness: USDA Zones 3–9
- Plant Type: Herbaceous Perennial
- Exposure: Full sun (at least 6 hours direct sunlight) to partial shade
- Height: 2–5 feet
- Spread: 1–2 feet
- Key Value: Long blooming period from summer into fall, wide range of colors (pink, purple, white, yellow, orange), excellent cut flowers.
- Care Tip: Deadheading (removing spent blooms) can encourage more flowers, though leaving some can provide seeds for birds in winter and allow for natural reseeding.
Salvia (Salvia spp.)
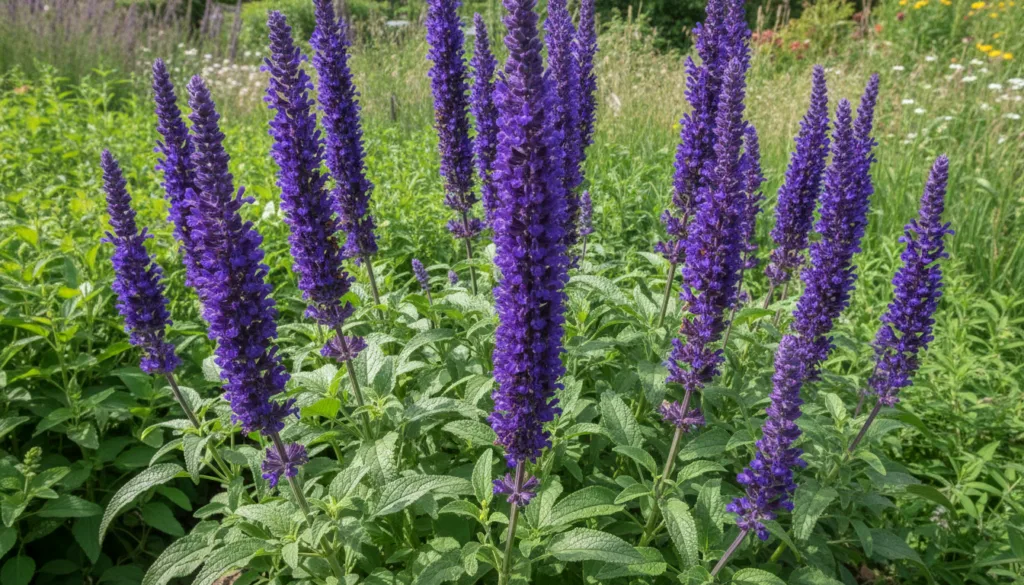
Salvias offer a spectacular show of color with their striking upright flower spikes. Many perennial varieties are exceptionally heat and drought-tolerant once established, making them ideal for sunny garden beds. They are also irresistible to hummingbirds and butterflies.
- Hardiness: Varies greatly by species (e.g., Salvia nemorosa: Zones 4–9; many annual varieties are grown in all zones).
- Plant Type: Perennial, Annual, or Tender Perennial (often grown as annuals)
- Exposure: Full sun
- Height: 1–3 feet, depending on species
- Spread: 1–2 feet
- Key Value: Continuous blooms from late spring to fall, diverse flower colors (purple, blue, pink, red, white), fragrant foliage in some varieties.
- Care Tip: Shearing back spent flower stalks after the first flush of blooms can encourage a second, robust wave of flowering.
Black-Eyed Susan (Rudbeckia hirta)
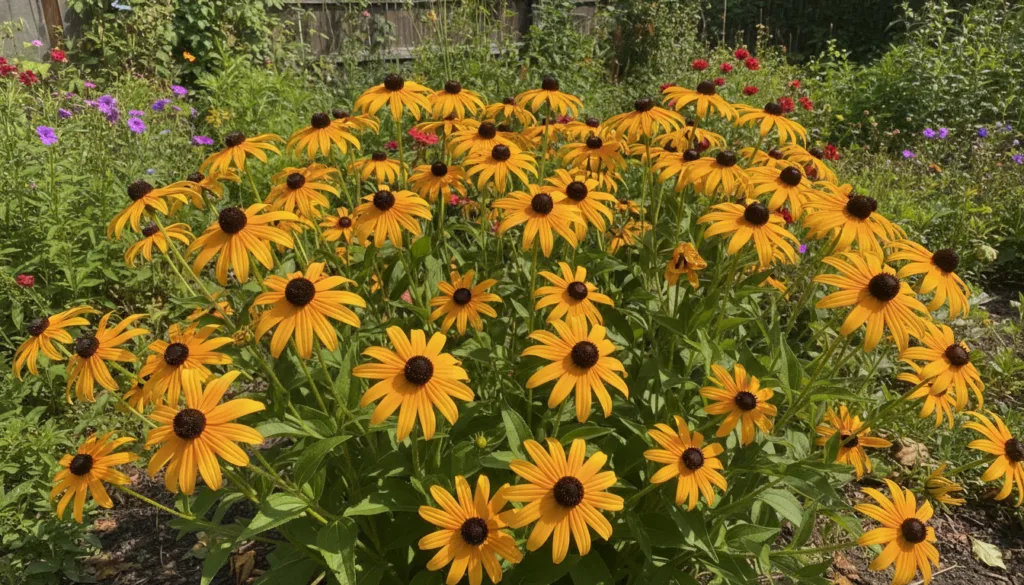
The cheerful yellow petals and dark brown centers of Black-Eyed Susans are a classic sign of summer. These robust plants are easy to grow, adaptable to various soil conditions, and provide a long season of color. While often short-lived perennials or biennials, they readily reseed, creating a continuous display year after year.
- Hardiness: USDA Zones 3–9 (often grown as an annual or short-lived perennial that reseeds)
- Plant Type: Short-lived Perennial, Biennial, or Annual
- Exposure: Full sun
- Height: 1–3 feet
- Spread: 1–2 feet
- Key Value: Abundant yellow blooms from mid-summer through fall, highly attractive to butterflies and native bees, excellent for naturalized areas.
- Care Tip: Allow some flowers to go to seed at the end of the season to ensure new plants for the following year. They are fairly drought tolerant once established.
Regional & Seasonal Considerations for Your No-Dig Garden
The best time to start a no-dig bed largely depends on your local climate and planting goals. Generally, fall or early spring are ideal. Starting in fall allows the cardboard and mulch layers to begin decomposing over winter, giving you a head start for spring planting. If you choose spring, aim for early in the season after the last hard frost but before the intense summer heat sets in.
- USDA Zones 3-5: Start your no-dig beds in early spring as soon as the ground thaws, or in late summer/early fall to benefit from winter decomposition. Choose perennials that are hardy for your specific zone.
- USDA Zones 6-8: Fall is an excellent time to prepare beds, as the milder winters allow for significant breakdown of organic matter. Spring planting is also very successful.
- USDA Zones 9-11: No-dig beds can be started almost year-round, avoiding only the peak heat of summer. Consider adding plants that can tolerate some summer drought or benefit from light shade during the hottest parts of the day.
Always consult your local extension service for specific frost dates and planting recommendations. Understanding your local microclimate, including sun exposure, wind patterns, and moisture, will greatly enhance the success of your no-dig bed.
Common Mistakes to Avoid in No-Dig Gardening
While the no-dig method is forgiving, a few pitfalls can hinder your success:
- Insufficient Cardboard Overlap: Gaps between cardboard pieces are an open invitation for tenacious weeds and grass to push through. Ensure generous overlap.
- Too Thin a Mulch Layer: A skimpy mulch layer won’t effectively smother existing vegetation or retain enough moisture. Aim for at least 6 inches, preferably 8-12 inches, of organic material.
- Skipping the Watering: Wetting the cardboard and mulch layers helps them settle, initiates decomposition, and provides initial moisture for plants. Don’t skip this crucial step.
- Planting Too Soon: While you can plant immediately, allowing the layers to settle for a few weeks, especially if you have very aggressive weeds, can provide an even better start.
- Neglecting Edges: Even with cardboard, persistent lawn grasses can creep in from the sides. Be diligent about weeding around the perimeter of your new bed in the first few months.
Cultivating a Sustainable and Joyful Garden
The no-dig method is more than just a technique; it’s a philosophy that champions healthier soil, less labor, and a thriving ecosystem right in your backyard. By embracing this approach, you’re not just transforming a patch of lawn; you’re creating a sustainable habitat for pollinators, enriching the earth, and making your gardening journey more enjoyable and less strenuous.
Imagine stepping outside to a vibrant display of flowers, knowing you created it with care and minimal disruption to the soil. This method empowers you to build beautiful, productive gardens that work with nature, not against it. So, roll up your sleeves (but leave the shovel in the shed!), gather your materials, and embark on your effortless garden transformation today. Your back and your garden will thank you.