There’s nothing quite as satisfying as harvesting fresh, homegrown vegetables from your garden. The crisp lettuce, the juicy tomatoes, the vibrant greens – it’s the reward for your hard work and dedication. However, many gardeners share a common frustration: watching their precious crops disappear overnight, pilfered by uninvited garden guests. Rabbits, squirrels, deer, and birds can turn a promising harvest into a heartbreaking loss. But what if you could secure your vegetables and enjoy a truly bountiful yield? The secret lies in smart garden protection, especially for your productive raised beds.
Creating a physical barrier around your edibles is one of the most effective strategies to keep curious critters at bay. It transforms your raised bed into a protected haven where your plants can thrive undisturbed. This guide will walk you through the practical steps to design, build, and maintain a robust defense, ensuring your kitchen harvests are safe, secure, and abundant.
The Unbeatable Advantage of Raised Garden Beds
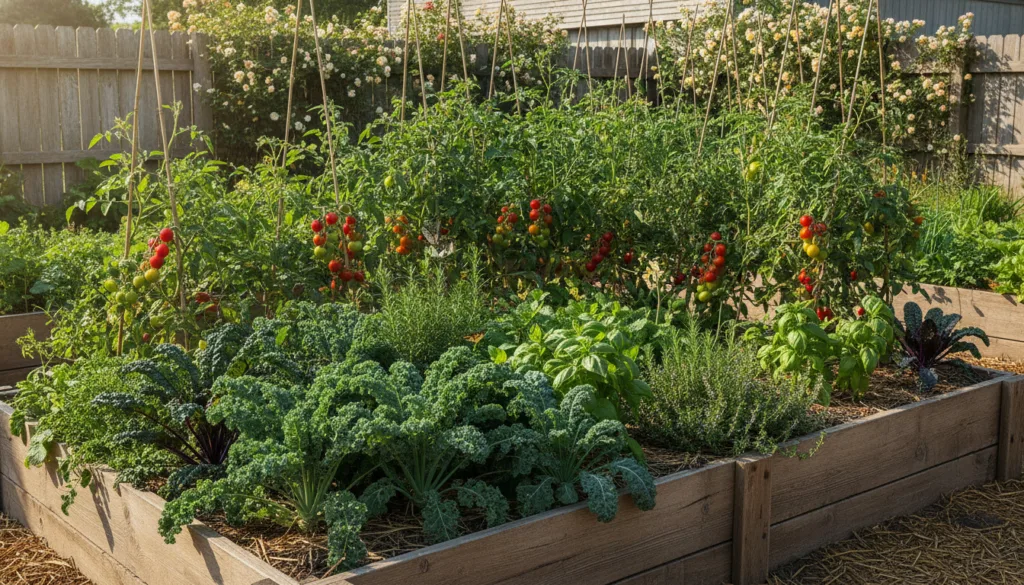
Before we delve into protection, let’s briefly celebrate why raised beds are a gardener’s best friend. They offer unparalleled control over your growing environment. You can fill them with custom soil mixes, ensuring optimal nutrients and drainage, which is crucial for plants like tomatoes and leafy greens often seen thriving in them. Raised beds also warm up faster in spring, extend the growing season, reduce soil compaction, and make gardening more accessible by minimizing bending and kneeling. This ideal environment, however, also makes them highly attractive to local wildlife.
Why Garden Protection is Essential for Your Harvest
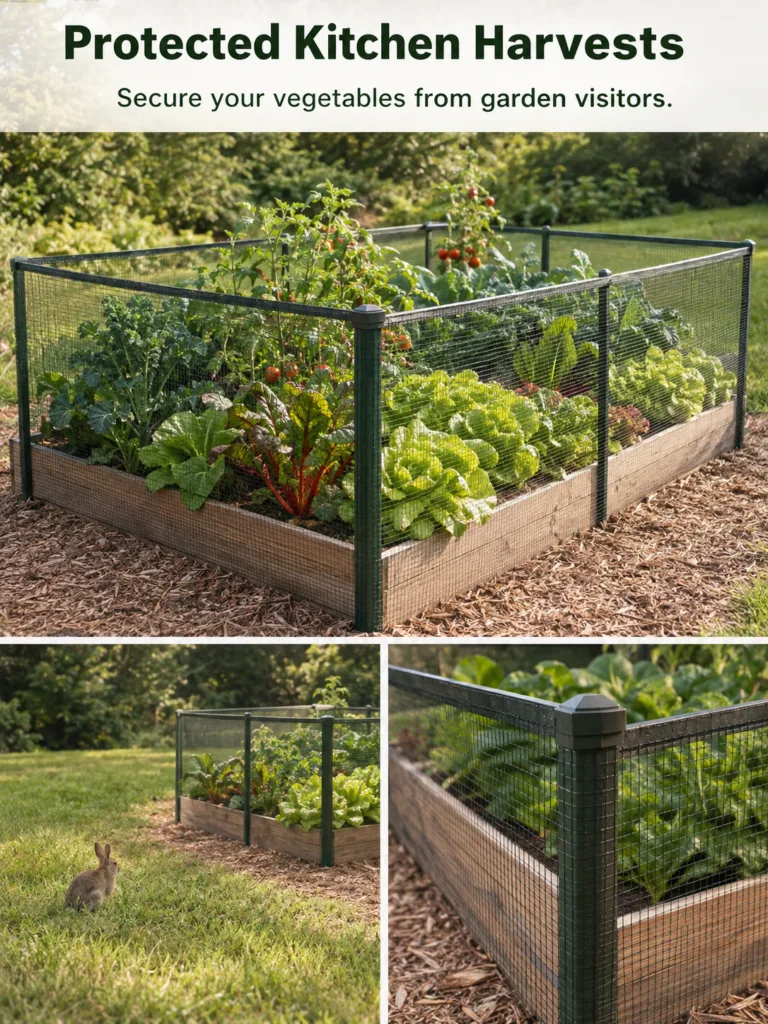
The image beautifully illustrates the goal: ‘Protected Kitchen Harvests’ from ‘garden visitors.’ These visitors, whether a cute rabbit, a busy squirrel, or a flock of birds, see your garden as a buffet. Without protection, your efforts can quickly become their next meal. Damage can range from nibbled leaves and stunted growth to entire plants being uprooted or consumed. Installing a physical barrier is a proactive, non-toxic approach to pest management that allows your plants to reach their full potential.
Designing Your Defensive Perimeter: Fencing Strategies
Effective garden fencing starts with understanding the pests you’re trying to deter. Different animals require different defensive tactics.
Understanding Your Adversaries
- Rabbits: These common garden pests are agile and can squeeze through surprisingly small openings. They are also known to dig under fences.
- Squirrels & Chipmunks: Opportunistic and persistent, squirrels can climb, jump, and dig. They often target fruits, nuts, and even young seedlings.
- Birds: While many birds are beneficial for insect control, some, like robins or starlings, can decimate berry patches or peck at ripening tomatoes.
- Deer: A significant challenge in many areas, deer can browse plants high off the ground and require substantial barriers.
- Other Pests: Depending on your region, you might contend with groundhogs (woodchucks), raccoons, or even voles and moles (which operate underground).
Key Elements of an Effective Fence
A well-designed fence takes these pest behaviors into account:
- Height: For rabbits and groundhogs, 2-3 feet (60-90 cm) is often sufficient, but for deer, you’ll need at least 7-8 feet (2.1-2.4 m). Consider a fence that covers the raised bed and extends upwards.
- Mesh Size: Use a mesh small enough to prevent pests from squeezing through. For rabbits and groundhogs, a 1-inch (2.5 cm) or smaller mesh (like poultry netting or hardware cloth) is ideal. For deer, larger mesh (2-4 inch or 5-10 cm) deer netting is often used due to its height.
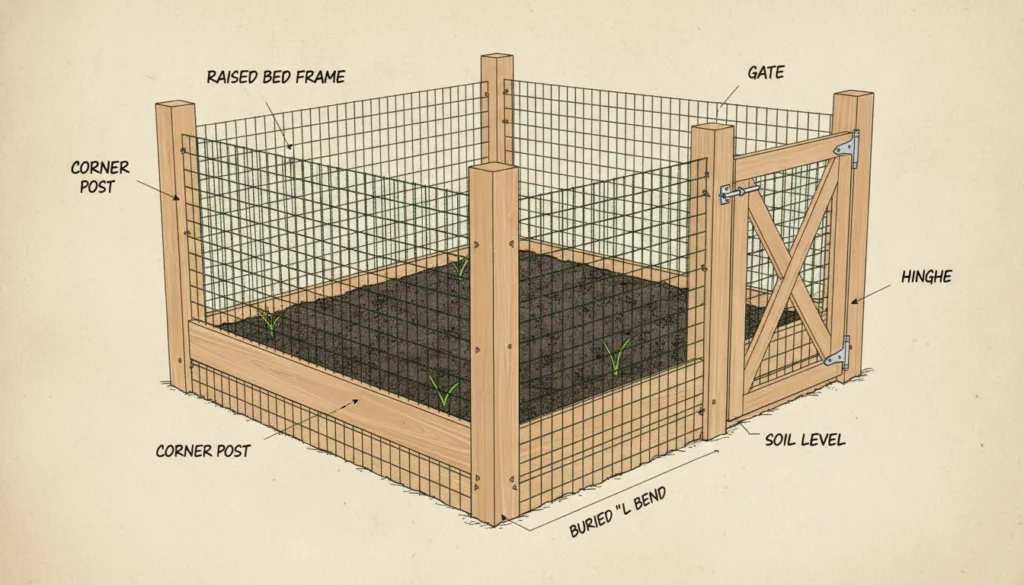
- Depth: To deter digging animals like rabbits, groundhogs, and voles, bury the bottom edge of your fence at least 6-12 inches (15-30 cm) deep. Bend the buried portion outwards in an ‘L’ shape for added deterrence.
- Structure: Sturdy posts are essential to keep the fence taut and prevent it from being pushed over. A well-built access gate is also crucial for easy garden entry.
- Overhead Protection: For birds, a simple netting draped over hoops or a cage-like structure can provide effective overhead defense.
Step-by-Step: Building a Secure Raised Bed Fence
Let’s get practical. Building a protective enclosure for your raised bed is a weekend project that yields long-term benefits.
Materials You’ll Need:
- Posts: Wooden posts (2x2s or 4x4s), metal T-posts, or U-posts. Choose a height suitable for your primary pest.
- Fencing Material: Galvanized hardware cloth (for digging pests), chicken wire, poultry netting, or specialized deer netting.
- Fasteners: Zip ties, fence staples, U-nails, or hog rings.
- Tools: Post-hole digger or auger, hammer or post driver, wire cutters, measuring tape, level.
- Gate Hardware: Hinges and a latch.
Construction Steps:
- Plan and Measure: Determine the perimeter of your raised bed and decide on the fence’s height. Sketch out where your posts will go, ensuring one section can be a gate.
- Install Posts: Dig post holes at each corner of your raised bed and every 4-6 feet (1.2-1.8 m) along the sides, depending on the fence’s height and material. For stability, bury posts at least 18-24 inches (45-60 cm) deep, concreting if desired for taller fences. Ensure they are plumb with a level.
- Prepare Fencing: Cut your chosen mesh material to size, allowing extra length to bury the bottom edge. If deterring digging animals, bend the bottom 6-12 inches (15-30 cm) of hardware cloth outwards at a 90-degree angle to create an ‘L’ shaped skirt.
- Attach Fencing: Starting from a corner, attach the mesh to the inside of your posts using fence staples, U-nails, or zip ties. Pull the mesh taut as you go, working your way around the bed.
- Bury the Base: Once the mesh is attached, dig a shallow trench around the outside perimeter of the raised bed. Place the ‘L’ shaped skirt of the fence into this trench and backfill with soil or rocks, compacting it firmly. This prevents animals from digging underneath.
- Construct the Gate: Frame an opening for your gate using two additional posts. Attach a section of mesh to a simple wooden frame or directly to the posts, using hinges and a secure latch. Ensure the gate also has a buried base or a tight fit to the ground.
- Add Overhead Protection (Optional): If birds are a problem, install hoops over your raised bed and drape bird netting over them, securing it to the fence structure. This creates a full cage.
Optimizing Your Raised Bed for Success
Even with a perfect fence, your vegetables still need ideal growing conditions. Remember to:
- Provide Quality Soil: Fill your raised bed with a blend of good compost, topsoil, and amendments. This ensures excellent drainage and fertility, essential for vigorous growth.
- Ensure Adequate Sunlight: Most vegetables, including tomatoes and leafy greens, need at least 6-8 hours of direct sunlight per day. Position your raised bed in a sunny location.
- Water Consistently: Raised beds can dry out faster than in-ground gardens. Check soil moisture regularly and water deeply when the top inch or two (2.5-5 cm) feels dry. Consistent moisture is key to preventing blossom end rot in tomatoes.
- Space Appropriately: Give your plants enough room to grow and for air to circulate. Overcrowding can lead to disease and reduced yields. Refer to seed packets or plant tags for specific spacing recommendations.
- Support Vining Plants: For tomatoes, cucumbers, or pole beans, incorporate stakes or trellises within your fenced bed. This lifts fruit off the ground, improving air circulation and making harvesting easier.
Common Mistakes in Garden Protection and How to Avoid Them
Even with good intentions, small oversights can render your protective efforts ineffective. Watch out for these common pitfalls:
- Insufficient Height: A fence that’s too short for deer, or a rabbit can easily jump over, is pointless. Always err on the side of taller.
- Gaps and Weak Points: Regularly inspect your fence for holes, loose sections, or points where the mesh meets the ground. Pests will find the smallest vulnerability.
- Not Burying the Fence: Digging animals are incredibly persistent. Failing to bury the fence deeply, or without the ‘L’ shaped bend, provides an open invitation.
- Ignoring Overhead Threats: If birds are raiding your tomatoes, a perimeter fence won’t help. Invest in overhead netting if this is an issue.
- Lack of a Convenient Access Point: Make sure your gate is easy to open and close, and that it latches securely. A difficult gate often leads to gardeners leaving it open, defeating its purpose.
Regional Considerations for Pest Management
Pest pressure varies significantly across the United States. In colder USDA Zones (3-5), you might primarily contend with rabbits and voles, while in warmer zones (9-11), deer, raccoons, and a wider array of bird species might be more prevalent. Always research common garden pests in your specific area. Your local extension service is an invaluable resource for identifying regional threats and offering tailored advice on effective deterrence strategies. While a good fence is a universal solution, the specific height and mesh type might need local adjustment.
Reap the Rewards of a Protected Garden
There’s immense satisfaction in walking into your garden knowing your vegetables are safe and sound, growing heartily towards a delicious harvest. Investing the time and effort into building a protective barrier for your raised beds pays dividends in fresh produce, reduced frustration, and the joy of a truly productive garden. Take the initiative, secure your edibles, and prepare to enjoy the bounty you’ve worked so hard to cultivate. Your kitchen will thank you, and your garden will thrive.