Dreaming of fresh ginger at your fingertips, even without a sprawling garden? Growing ginger indoors is not only possible but incredibly rewarding! Imagine adding freshly grated, zesty ginger to your stir-fries, teas, or smoothies, all from a plant you nurtured yourself. This guide will walk you through the simple steps of preparing ginger for indoor planting, ensuring a thriving, aromatic addition to your home.
Why Grow Ginger Indoors?
Indoor ginger cultivation offers a multitude of benefits:
- Freshness on Demand: Enjoy the vibrant, pungent flavor of ginger whenever you need it.
- Decorative Appeal: Ginger plants boast lush, tropical foliage that can enhance any indoor space.
- Therapeutic Benefits: Known for its medicinal properties, having fresh ginger readily available is a true advantage.
- Year-Round Harvest: Unlike outdoor gardens, indoor growing allows for continuous harvesting regardless of the season.
- Pest Control: Fewer outdoor pests mean easier maintenance and healthier plants.
Choosing the Perfect Ginger Root
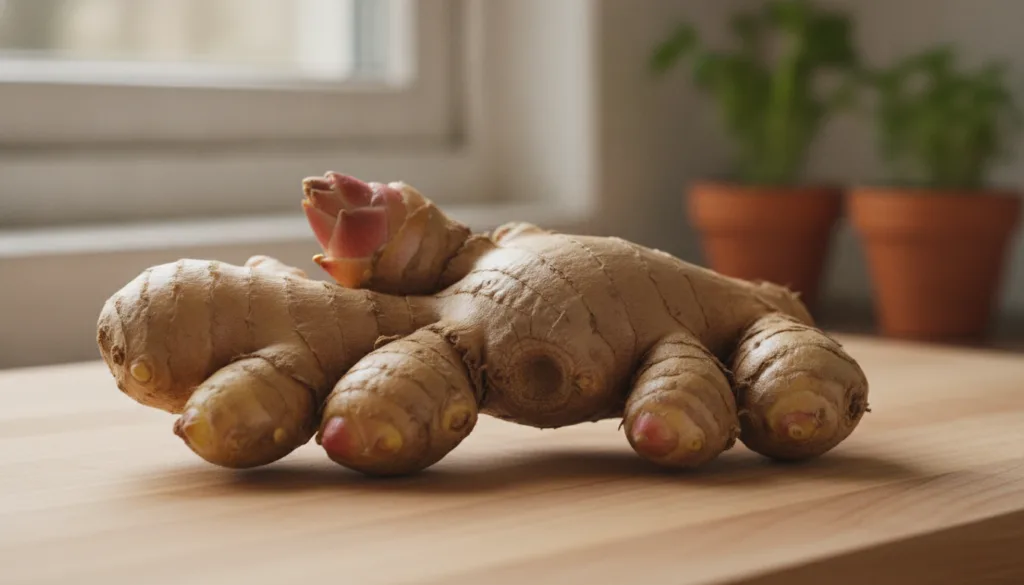
Your journey begins with selecting the right ginger root (rhizome). Head to your local grocery store or a specialty food market. Look for organic ginger, as non-organic ginger is sometimes treated with growth inhibitors. Crucially, seek out pieces that are firm, plump, and have visible ‘eyes’ or growth buds, which look like small, bumpy protrusions. These are where new shoots will emerge.
Step-by-Step: Preparing Your Ginger for Planting
Preparing your ginger root is a simple yet crucial step for successful indoor growth.
- Select Healthy Rhizomes: Choose pieces that are about 2-4 inches long, ensuring each piece has at least one or two prominent ‘eyes’.
- Soak for Success: If your ginger looks a bit dry, or you want to give it a head start, soak the pieces in a bowl of warm water overnight. This rehydrates the rhizome and can help awaken the ‘eyes’.
- Cut if Necessary: If you have a large piece of ginger, you can cut it into smaller sections. Ensure each section is at least an inch or two long and has at least one ‘eye’. Use a clean, sharp knife to prevent damage and infection.
- Let it Cure (Optional but Recommended): After cutting, allow the cut surfaces to dry and form a callus for a day or two. This helps prevent rot once planted. Simply leave the pieces in a dry, well-ventilated spot out of direct sunlight.
Planting Your Prepared Ginger
With your ginger prepared, it’s time to give it a home!
- Choose the Right Pot: Ginger needs space to spread. Select a wide, shallow pot (at least 12-18 inches in diameter and 8-10 inches deep) with good drainage holes.
- Prepare the Soil: Use a rich, well-draining potting mix. A good blend would be equal parts potting soil, compost, and perlite or sand for aeration. Ginger thrives in slightly acidic to neutral soil (pH 6.0-7.0).
- Planting Time!: Fill your pot with soil, leaving about an inch or two from the rim. Place the prepared ginger pieces with the ‘eyes’ facing upwards, about 1-2 inches deep. Lightly cover them with soil. If planting multiple pieces, space them 6-8 inches apart.
Caring for Your Indoor Ginger Plant
Once planted, consistent care will ensure your ginger flourishes.
- Light Requirements: Ginger prefers bright, indirect light. A spot near an east or west-facing window is ideal. Avoid direct, harsh sunlight, which can scorch the leaves.
- Watering Wisdom: Keep the soil consistently moist but never waterlogged. Overwatering can lead to rot. Water thoroughly when the top inch of soil feels dry to the touch, and ensure excess water drains away.
- Humidity & Temperature: Ginger is a tropical plant, so it loves humidity. You can mist the leaves regularly or place the pot on a pebble tray filled with water. Maintain a consistent room temperature between 68-85°F (20-30°C).
- Feeding Your Plant: During the growing season (spring and summer), feed your ginger plant with a balanced liquid fertilizer every 2-4 weeks. Reduce feeding in fall and winter.
- Pest Patrol: Indoor ginger is generally resistant to pests, but occasionally look out for common houseplant pests like spider mites or mealybugs. Address any issues promptly with organic pest control methods.
Harvesting Your Homegrown Ginger
Patience is a virtue when growing ginger! It typically takes 8-10 months for the rhizomes to mature enough for a good harvest. You’ll know it’s ready when the leaves start to yellow and die back. You can gently dig up a portion of the rhizome from the side of the pot, leaving the rest to continue growing, or harvest the entire plant.
Enjoy the Rewards of Your Indoor Ginger Garden!
There’s immense satisfaction in cultivating your own food, and ginger is no exception. With a little preparation and consistent care, you’ll soon be enjoying the pungent, aromatic goodness of homegrown ginger. Share your indoor gardening journey with us – we’d love to see your thriving ginger plants!