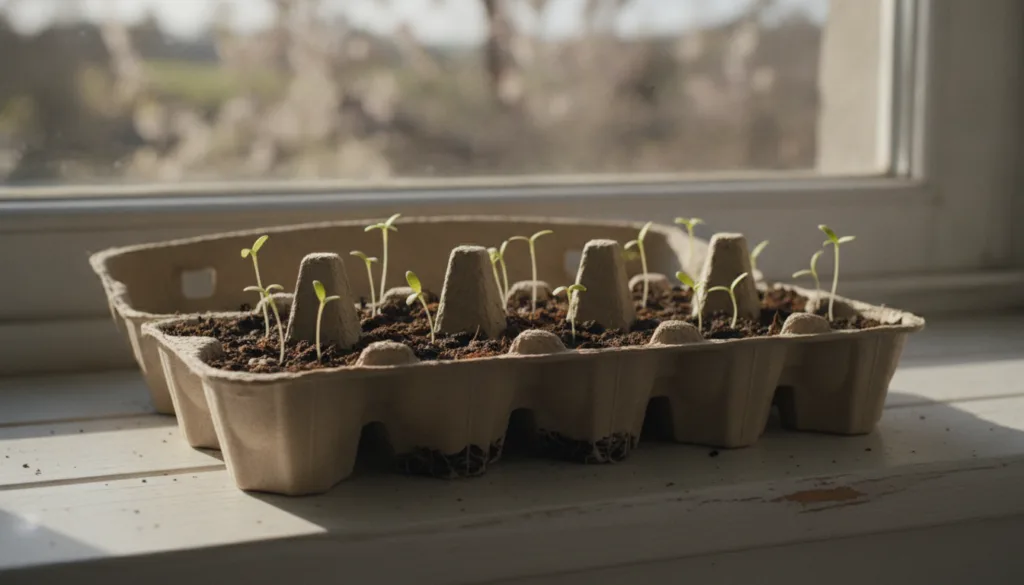
There’s a special kind of magic in watching a tiny seed sprout into a vibrant plant. For many gardeners, the journey truly begins indoors, long before the last frost. Starting your own seeds gives you a head start on the growing season, allows you to grow unique varieties, and connects you deeply with the rhythm of nature. And what if we told you could do all of this using something you probably already have in your recycling bin?
Welcome to the wonderful world of DIY egg carton seed starters! This eco-friendly, budget-conscious, and incredibly simple method is perfect for both seasoned gardeners and those just dipping their toes into the soil. Let’s transform those humble cartons into thriving nurseries for your future garden beauties!
Why Choose Egg Cartons for Seed Starting?
- Eco-Friendly: Reduce waste by repurposing cardboard or paper-pulp egg cartons. It’s a fantastic way to give items a second life before composting them.
- Cost-Effective: Save money on plastic seed starting trays. Your breakfast leftovers are free!
- Biodegradable: Paper-pulp egg cartons can often be planted directly into the garden, minimizing transplant shock and naturally breaking down in the soil.
- Perfect Size: The individual cells are ideal for small seeds, providing just enough space for initial growth without overcrowding.
- Breathable: Cardboard allows for good airflow, which is crucial for healthy root development and preventing damping-off disease.
What You’ll Need:
- Cardboard or paper-pulp egg cartons (avoid styrofoam, as it’s not biodegradable)
- Potting mix or seed starting mix (specifically designed for germination)
- Your chosen seeds
- Small trowel or spoon
- Spray bottle with water
- A waterproof tray (like a plastic lid or another old tray) to place your egg carton in
- A bright, warm spot (like a sunny windowsill or under grow lights)
Step-by-Step Guide to Your DIY Egg Carton Seed Starters:
1. Prepare Your Egg Cartons
If you’re using a carton with a lid, you can either cut the lid off or fold it back. For drainage, which is essential for healthy seedlings, use a small pair of scissors or a knife to carefully poke a few holes in the bottom of each individual egg cell. This prevents waterlogging, which can be fatal for young plants.
2. Fill with Seed Starting Mix
Gently fill each cell of the egg carton with your seed starting mix. Don’t compact the soil too much; you want it to be light and airy for delicate roots. Leave about a quarter-inch of space from the top of each cell.
3. Plant Your Seeds
Refer to your seed packets for specific planting depths and spacing. Generally, small seeds should be planted about twice their diameter deep. Place one or two seeds in each cell, then lightly cover them with more seed starting mix. If you plant two, you can thin out the weaker seedling later.
4. Water Gently
Using a spray bottle, thoroughly mist the soil until it’s evenly moist but not soggy. A gentle mist prevents dislodging the tiny seeds. You can also bottom-water by placing the egg carton in your waterproof tray filled with about an inch of water, allowing the soil to soak it up from the bottom. Remove the carton once the topsoil feels damp.
5. Provide the Right Environment
- Light: Place your seed starters in a location that receives plenty of bright, indirect light. A south-facing windowsill is often ideal. If natural light is limited, consider using a grow light for 12-16 hours a day to prevent leggy seedlings.
- Warmth: Most seeds germinate best in warm conditions (check your seed packets for ideal temperatures). You can use a seedling heat mat if your environment is too cool.
- Humidity: To maintain humidity, you can loosely cover the egg carton with plastic wrap or a clear dome until the seeds sprout. Be sure to remove it once you see germination to allow for airflow.
Caring for Your Young Seedlings:
- Watering: Keep the soil consistently moist but never waterlogged. Check daily by feeling the topsoil. Continue to use a spray bottle or bottom-watering method.
- Air Circulation: Once seedlings emerge, good air circulation is vital to prevent fungal diseases like damping-off. A small fan set on a low setting can help.
- Thinning: If you planted multiple seeds per cell and more than one germinated, snip off the weaker seedling at the soil line with small scissors, leaving only the strongest one to grow.
- Hardening Off: Before transplanting outdoors, gradually acclimate your seedlings to outdoor conditions over 7-10 days. Start with an hour or two in a sheltered spot, increasing exposure to sun and wind each day.
When to Transplant:
Your seedlings are ready for transplanting when they have developed their first set of true leaves (the leaves that appear after the initial cotyledons) and have outgrown their egg carton cells. For paper-pulp cartons, you can often tear off individual cells and plant the entire cell directly into a larger pot or your garden bed. Just make sure to completely bury the carton and tear away any parts peeking above the soil line to prevent wicking moisture away from the roots.
Embrace the Green Journey!
Starting seeds in egg cartons is more than just a gardening hack; it’s a small act of sustainability and a wonderful way to connect with the growth cycle of your plants. It’s incredibly rewarding to watch your garden come to life from these tiny, humble beginnings. So, save those egg cartons, grab your seeds, and get ready to nurture new life!
Happy gardening, friends!