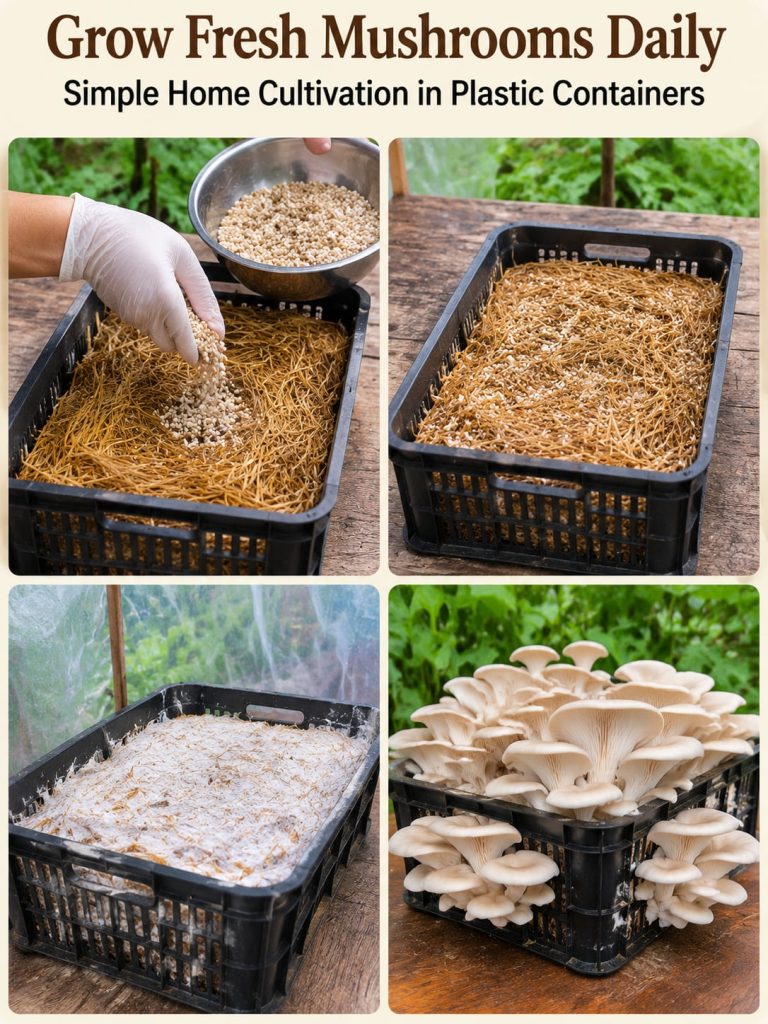
There is something special about cutting a handful of mushrooms you grew yourself, especially when they are still cool and firm from the growing space. Many home cooks buy mushrooms that have traveled for days, lost moisture, and lost flavor. Growing your own is one of the most satisfying projects a beginner can try, and it needs far less space than a vegetable bed. A basic plastic bucket, a bag of pasteurized straw, and some mushroom spawn are enough to get started.
Before you get too excited about a daily harvest, it helps to know how mushroom growing really works. Mushrooms are the fruiting bodies of a fungus, not plants, so they do not photosynthesize or grow from seeds. They grow from a living network of mycelium that colonizes a substrate, which is the material you feed them. Once the mycelium is established and the conditions are right, mushrooms form in flushes, usually every one to two weeks. This guide will walk you through a bucket method that works well for oyster mushrooms, explain what they need, and help you avoid the most common mistakes.
Understanding the Core Principle: Substrate, Spawn, and Fresh Air
Three things determine whether your bucket produces a steady crop. The first is substrate, the material the fungus digests, such as straw, sawdust, or coffee grounds. The second is spawn, the mycelium-infused starter you mix into the substrate. The third is the environment, which needs high humidity, moderate temperatures, indirect light, and steady fresh air.
Oyster mushrooms (Pleurotus ostreatus and Pleurotus pulmonarius) are the best choice for beginners. They colonize straw quickly, tolerate a wider range of conditions than many other species, and produce fruit with very little fuss. Button mushrooms (Agaricus bisporus) need a more complicated compost and casing system, and shiitake usually grows best on hardwood logs or sawdust blocks. Start with oysters, and you will learn the rhythm of the process before trying anything more demanding.
Choosing and Preparing Your Bucket
Use a clean, food-grade plastic bucket, typically five to five-and-a-half gallons, with a tight-fitting lid. Avoid buckets that once held chemicals or motor oil. Drill rows of holes about one inch across along the sides, spaced roughly four to six inches apart, staggered so the fruiting pins have room to form. Wash the bucket with a mild bleach solution or unscented soap, then rinse thoroughly.
Pasteurize your straw before use. Soak chopped straw, about two to four inches long, in water heated to roughly 160 to 180 degrees Fahrenheit for one to two hours, or soak it in cold water overnight with a small amount of lime. The goal is to reduce competing molds and bacteria, not to sterilize everything. Let the straw drain and cool until it feels damp, like a wrung-out sponge, with no dripping water. Too wet and the substrate can turn sour; too dry and the mycelium will struggle.
Step-by-Step Setup in the Bucket
Layer the substrate and spawn inside the bucket. Start with a two-inch layer of damp straw, then sprinkle a handful of grain spawn across the surface, pressing gently. Repeat with two or three more layers until the bucket is about three-quarters full, finishing with a spawn layer on top. Use roughly one part spawn to five to ten parts straw by weight, following your spawn supplier’s guidance. Tamp each layer lightly so it stays compact but not packed tight.
Close the lid loosely or cover the bucket with a breathable cloth. Keep it in a dark or dim spot at about 65 to 75 degrees Fahrenheit. Over the next two to four weeks, you should see white, cottony mycelium spreading through the straw. The block is ready to fruit when most of the substrate is covered and it smells fresh and earthy rather than sharp or sour.
Triggering Fruiting
When the bucket is fully colonized, move it to a location with indirect light, such as a shaded porch, a basement near a window, or a bright room away from direct sun. Cut or poke open the holes if they are sealed. Mist the sides and the surface two or three times a day to keep humidity around 85 to 95 percent. Oyster mushrooms fruit best between about 55 and 75 degrees Fahrenheit, so cooler spaces often work better than warm ones.
Fresh Air Matters
Fungi release carbon dioxide while they grow. In a closed bucket, high CO2 causes long, thin stems and small, underdeveloped caps. Open the lid for a few minutes each day, or crack it enough to let air circulate without drying the block. Good airflow produces sturdier mushrooms with better flavor and texture.
Harvesting and Caring for Repeat Flushes
Harvest oyster mushrooms when the caps are still slightly curved downward, before the edges flatten out or start to tear. Grasp the cluster at the base and twist gently, then pull. Avoid cutting the stems at the surface, because leftover stumps can rot and invite contamination. Expect the first flush to be the largest, with later flushes often smaller. Many growers see two to three flushes from a single bucket, although yields vary widely with substrate quality, temperature, and humidity.
After each harvest, scrape off any old stumps, lightly mist the block, and keep conditions steady. Rest periods of about one to two weeks between flushes are normal. If the block stops producing after several flushes, it has likely used most of its nutrients, and you can compost the spent straw in your garden beds.
Common Mistakes and How to Avoid Them
- Expecting a daily harvest. Mushrooms come in flushes, not daily. Plan for a few pounds of fruit spread over several weeks rather than a steady dinner-sized crop every morning.
- Letting the substrate dry out. If the straw looks pale and crumbly, mist it more often and check the moisture by squeezing a handful of substrate.
- Keeping the bucket too warm. Temperatures above about 80 degrees Fahrenheit can encourage bacterial problems and stress the fruit. Move the bucket to a cooler spot.
- Ignoring off smells or colors. Green, black, or orange mold, or a sour or ammonia smell, means contamination. Remove and discard the affected block away from your food prep area.
- Eating unfamiliar wild mushrooms. Identify any mushroom with certainty before eating it. Grow only from reputable spawn sources, and never assume a mushroom is safe because it appeared in your container.
Adapting the Method to Your Climate
Mushrooms do not follow USDA hardiness zones the way perennial plants do, because the bucket is controlled by your indoor or shaded conditions. USDA zones measure winter cold tolerance, so they matter far less for a bucket grown in a garage, basement, or shaded patio. Temperature, humidity, and airflow are what count.
In cold northern regions, indoor setups in basements or heated rooms work well during winter, while summer may be better handled in a shaded outdoor spot. In hot southern regions, look for the coolest, most shaded location available, and consider a cooler indoor room, a basement, or a closet with a small fan and a humidifier. Your local cooperative extension office can offer advice on local conditions and seasonal timing, and it is a helpful resource for questions about your specific area.
Bringing It All Together
Growing mushrooms in a plastic bucket is one of the most approachable projects you can start at home. You do not need a large yard or special equipment, and the process teaches you to watch humidity, airflow, and temperature closely. Start with one bucket, keep it clean, and track each flush so you learn what works in your space. Within a few weeks, you will have a harvest that tastes better than store-bought mushrooms, and you will understand the rhythm of the fungus well enough to plan your next batch.
If you try this method, take notes on your first flush and share what you learned with other growers. Your next step is simple: gather a bucket, a bag of straw, and a packet of oyster spawn this week, and begin your first mushroom block.